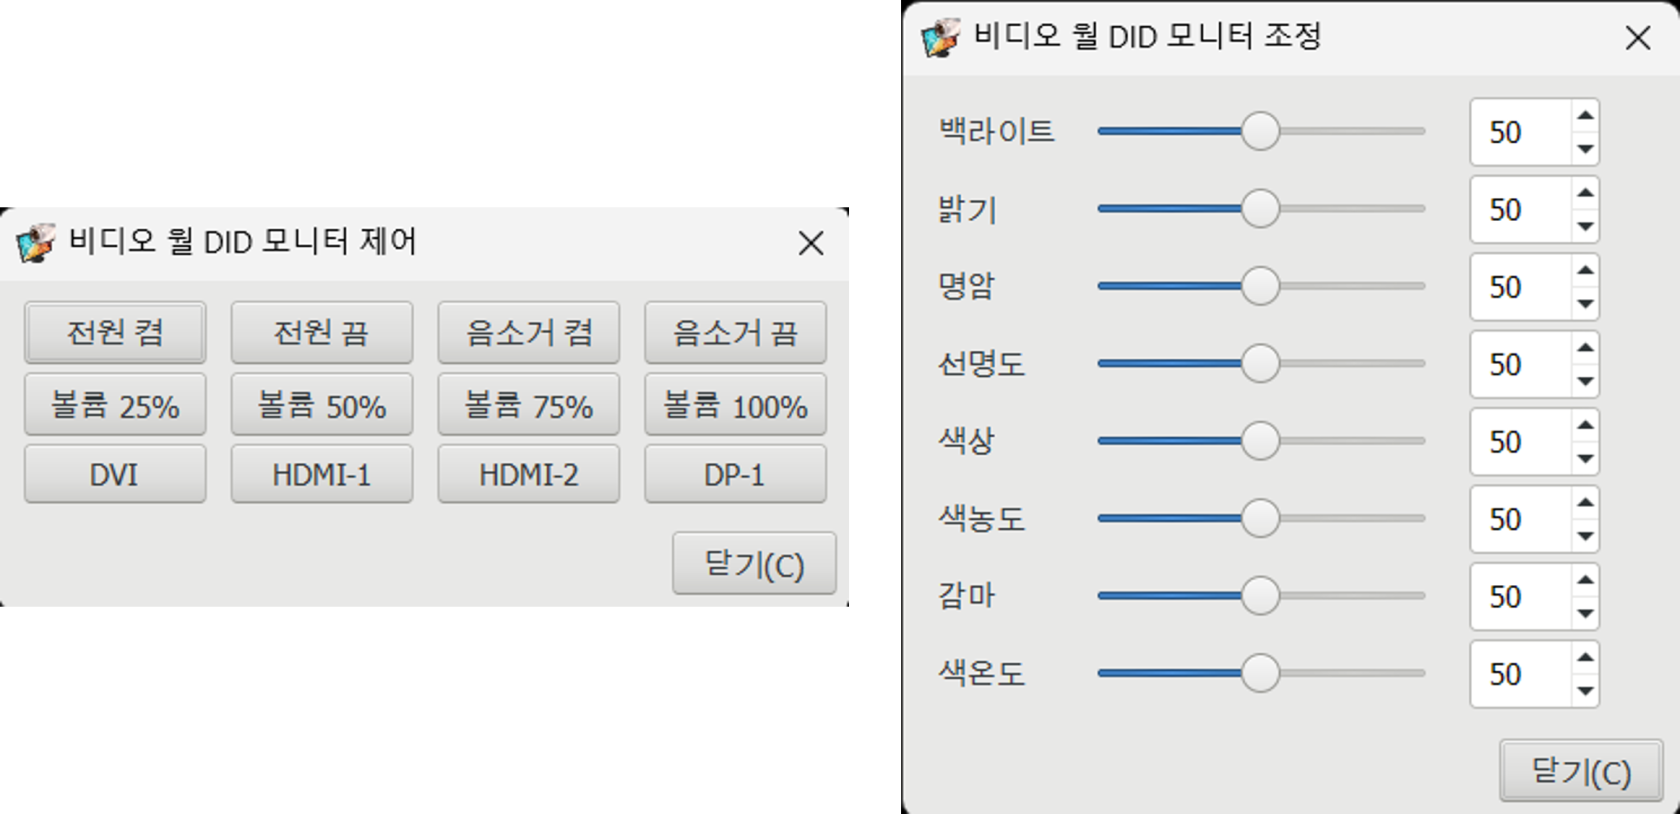
NDS DID Control
You can control the DID from the NDS using the DID's RS232 interface.
First, connect the DID units to each other using their RS232 In/Out ports, then prepare a USB-to-RS232 converter.
USB to RS232 Converter
The products verified through testing are the KW-925 and KW-725F.
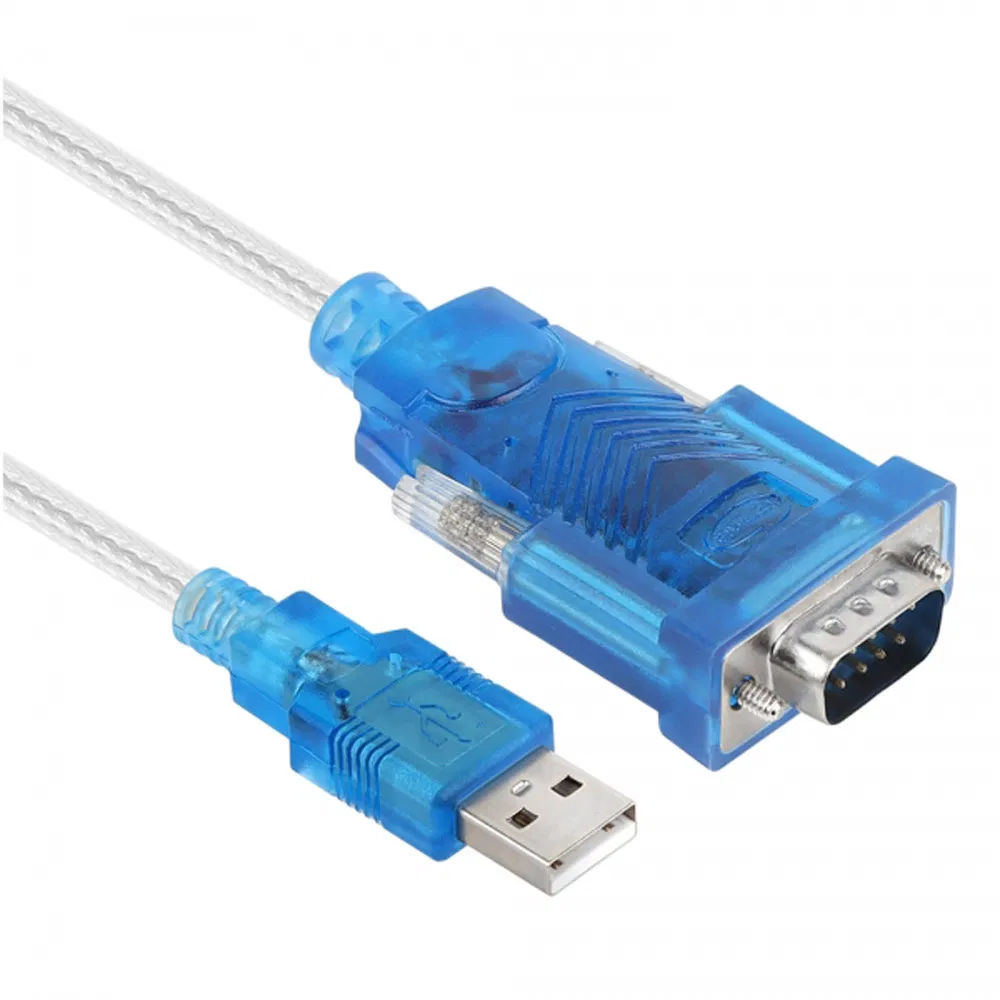
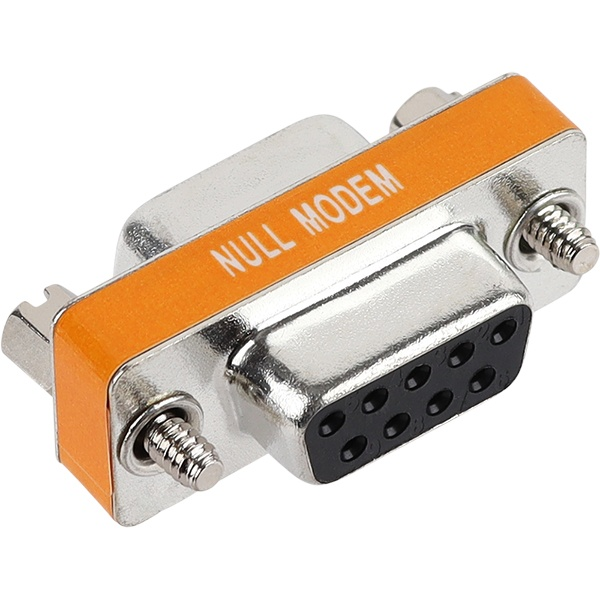
Since the RS-232 cable typically provided with the DID unit is of the male type, a DB9 F/F gender changer is required when using the KW-925.
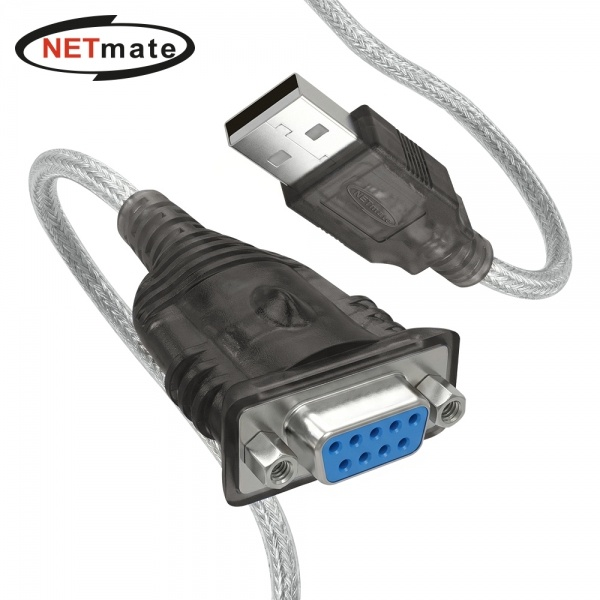
This product features a female connector.
Some USB-to-RS232 converters may not be compatible.
Depending on the DID manufacturer and the specific converter used, you may need to cross-connect the TX and RX lines.
Connect the cable so that the signal enters the RS232 input port of the DID.
Connect the USB end to one of the NDS ports.
DID Monitor Settings
In the CMS, go to Settings > Video Wall > Monitor Layout, select the monitor, check the "Use DID Monitor" box, and enter the required information.
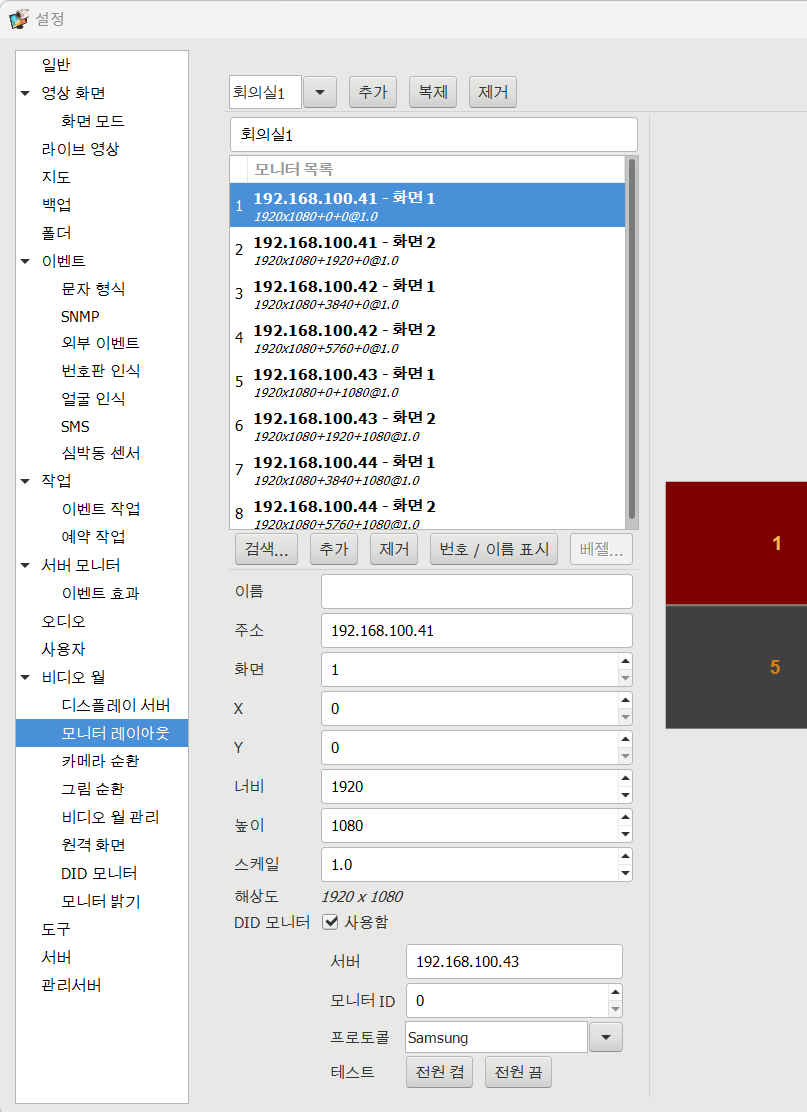
Server: IP address of the NDS connected via USB Monitor ID: Monitor ID assigned to the DID Protocol: Select the DID manufacturer
Press the Test button to verify that DID control is working.
Configure the remaining monitors in the same way.
Using DID Control on a Video Wall
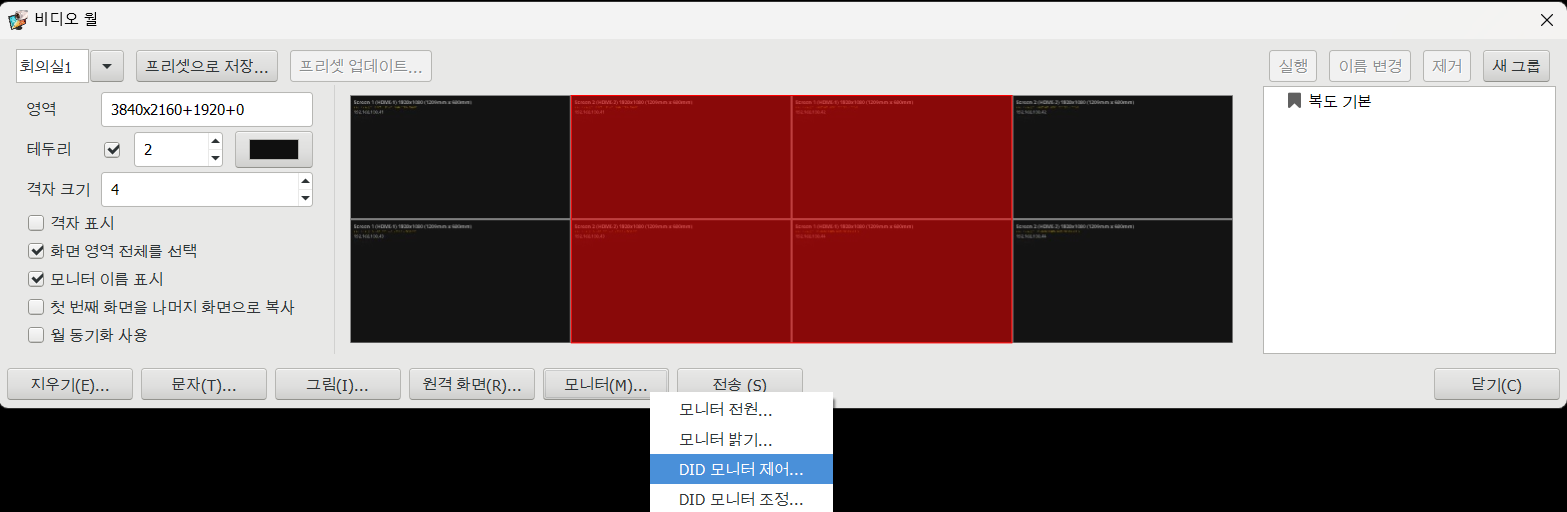
In the video wall window, select the monitor you wish to control, then click the "DID Monitor Control" or "DID Monitor Adjustment" button to manage the settings.