AI-Bridge simple setup manual
AIBOX simple setup manual
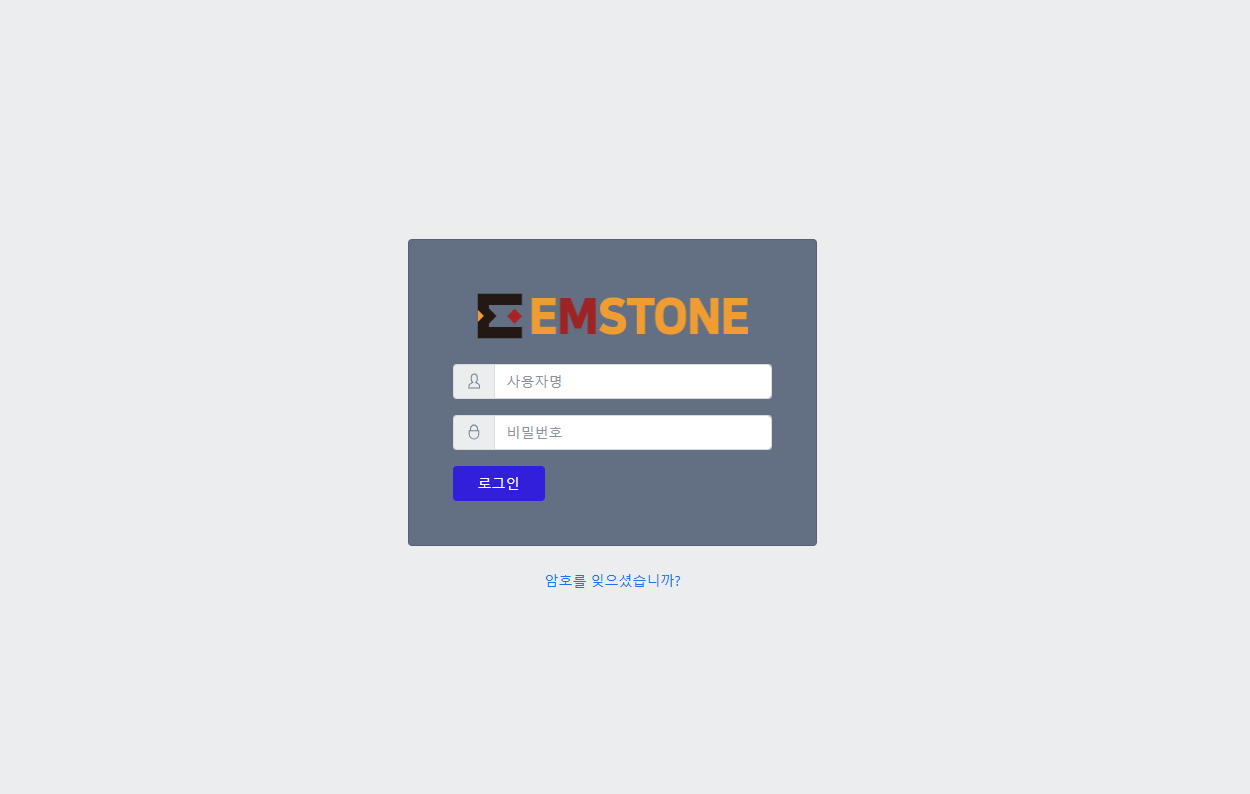
AIBOX login
When running AIBOX for the first time, connect to the device using the scan tool.
After downloading and installing the file below, double-click the discovered device to connect to its web page.
*Initial account info ID: admin PW: 1234
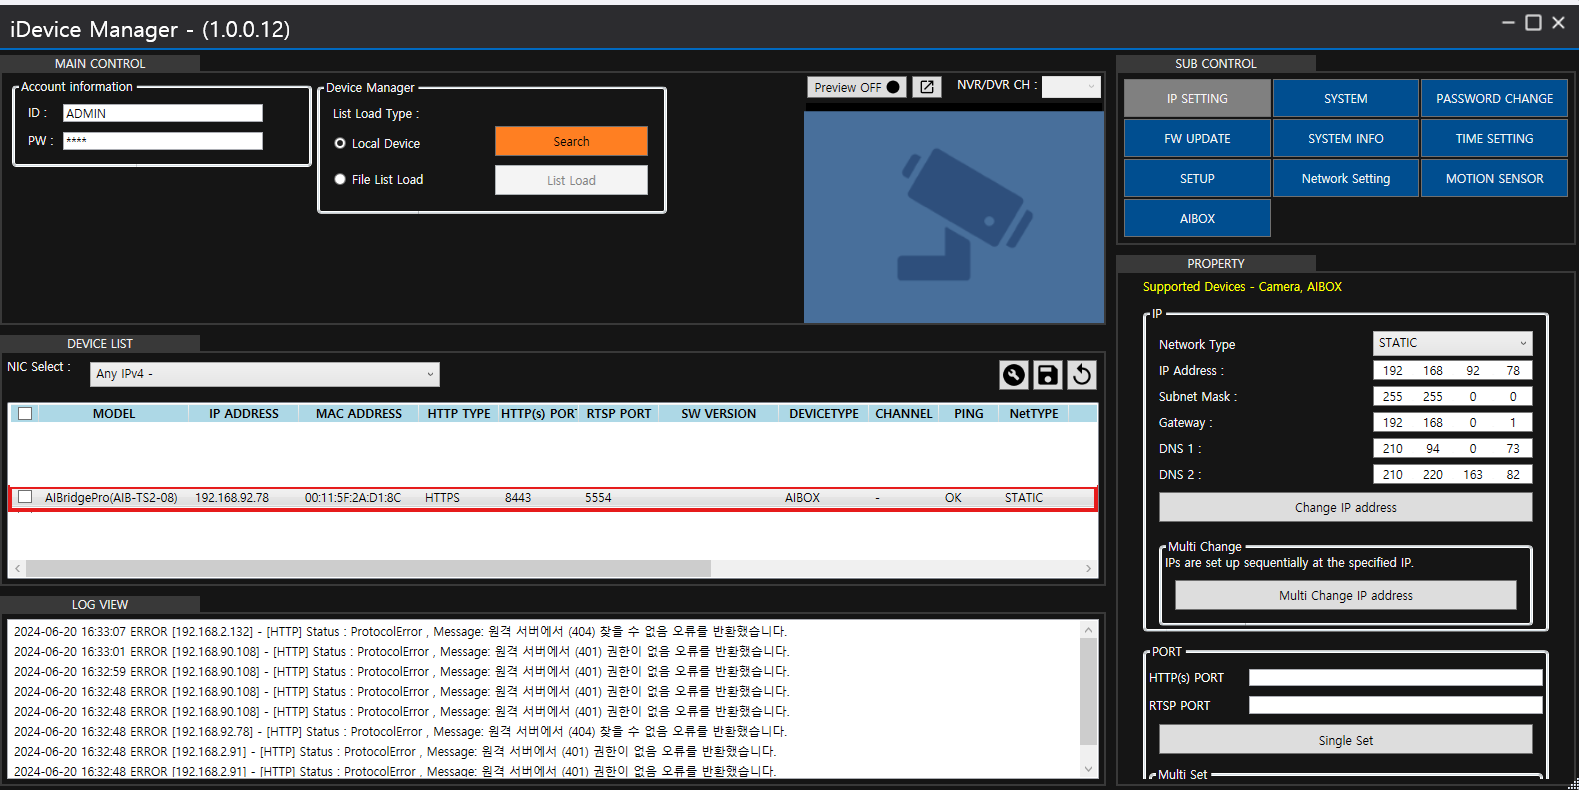
Scan tool screen
*TIP
To avoid confusion during future changes such as camera registration changes or area modifications, set the video source's 'channel name' to be the same as the 'camera name' registered on the NVR.
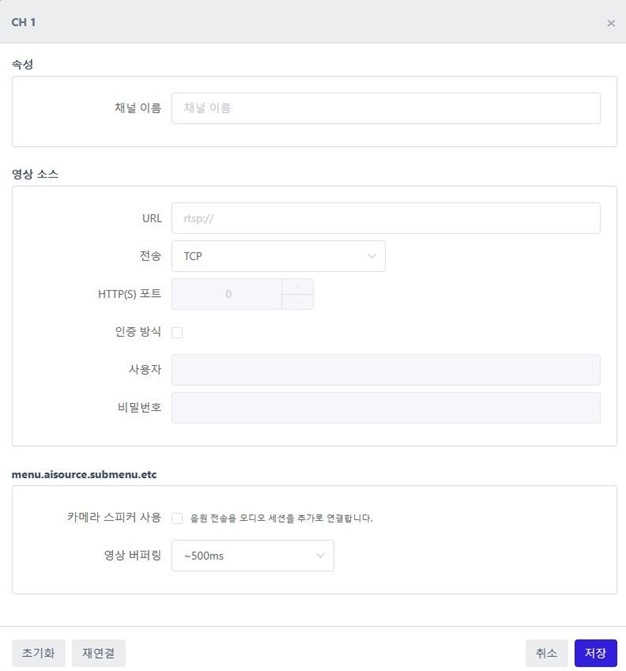
Video reception settings
rtsp://NVR's IP address/streaming URL path
ex) rtsp://192.168.90.63/low1
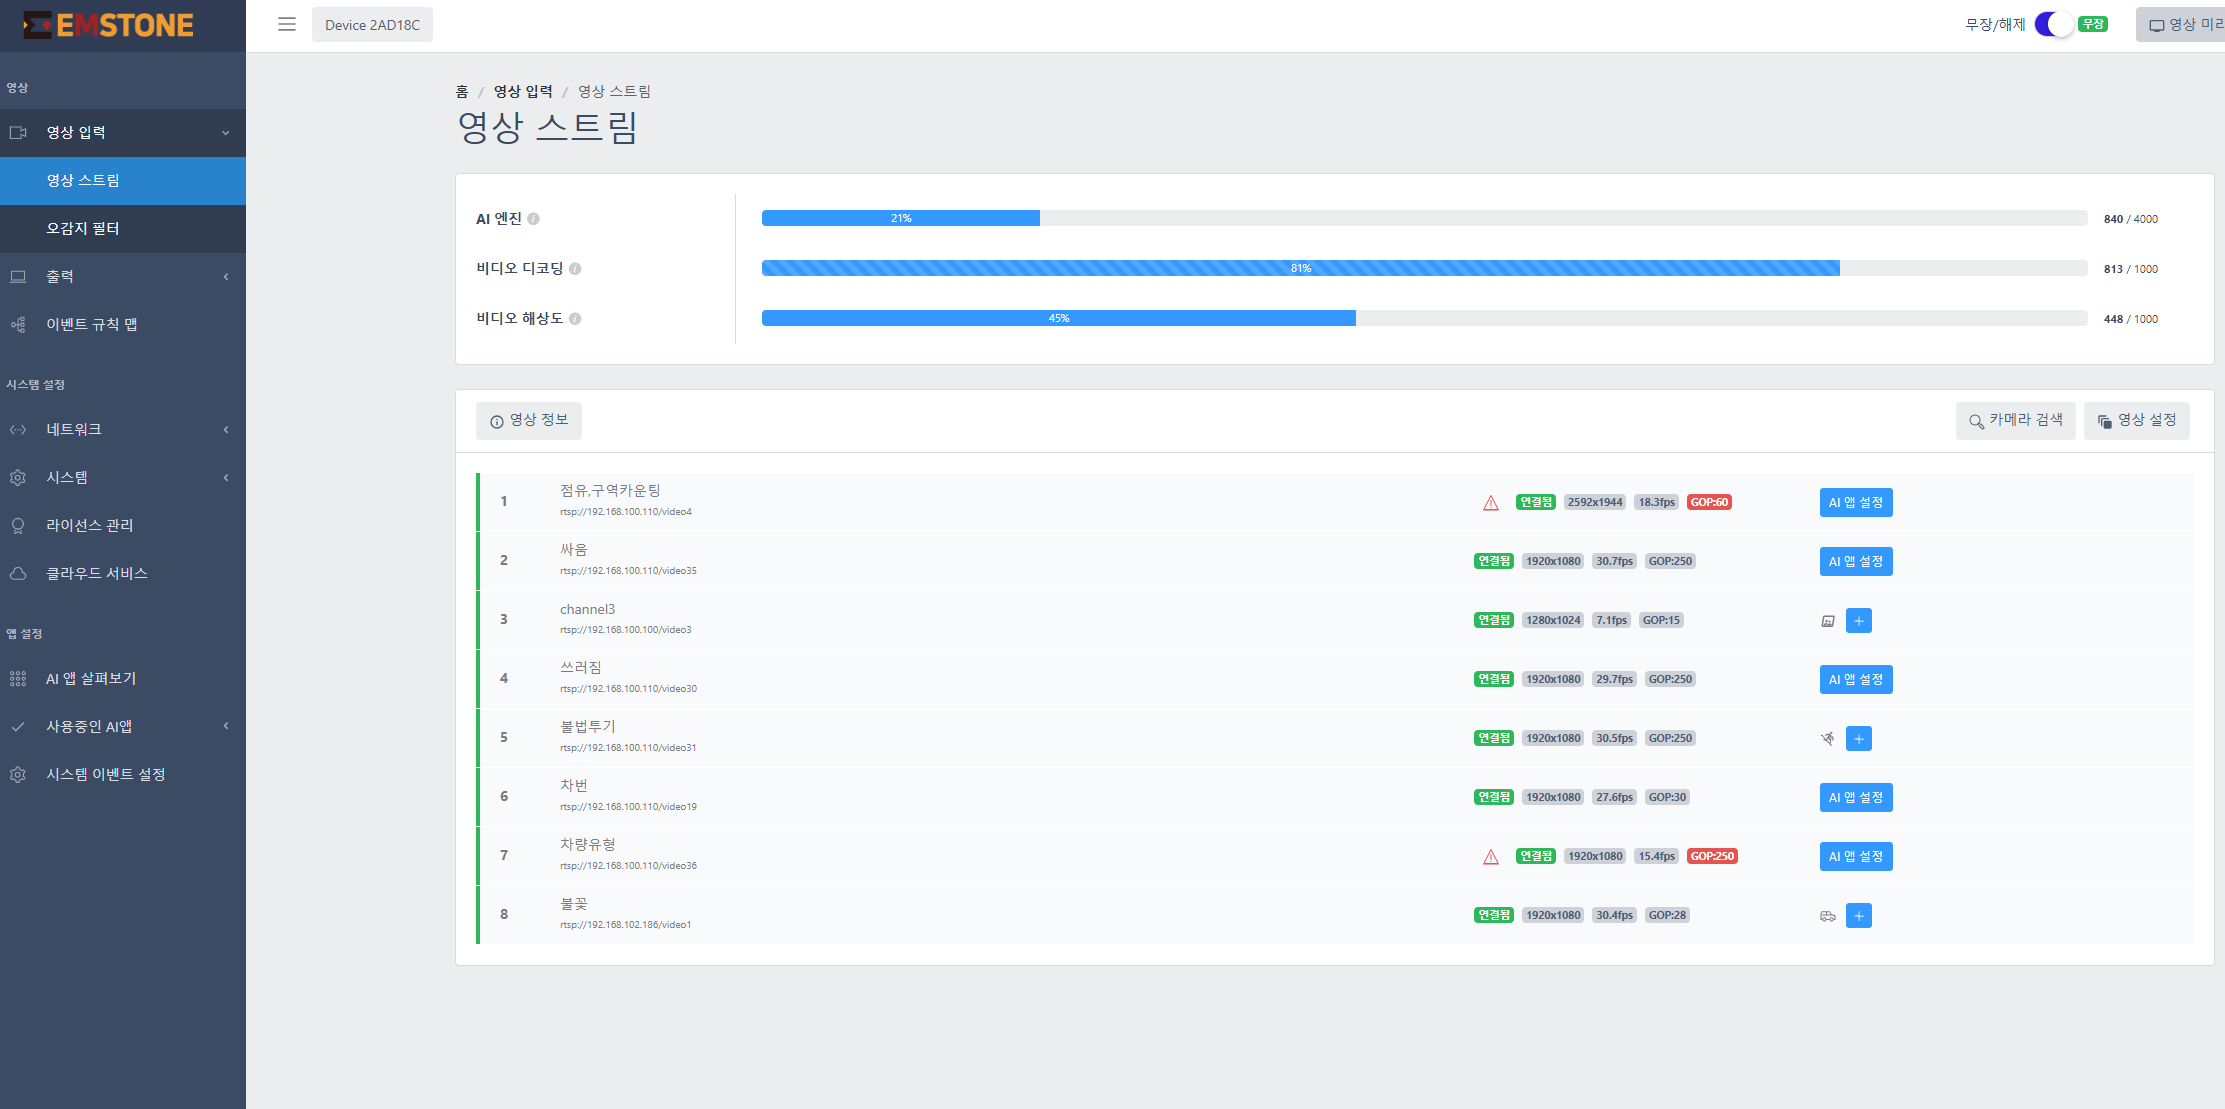
Up to 16 can be registered per AIBOX server (based on the Human/Vehicle-Normal AI algorithm)
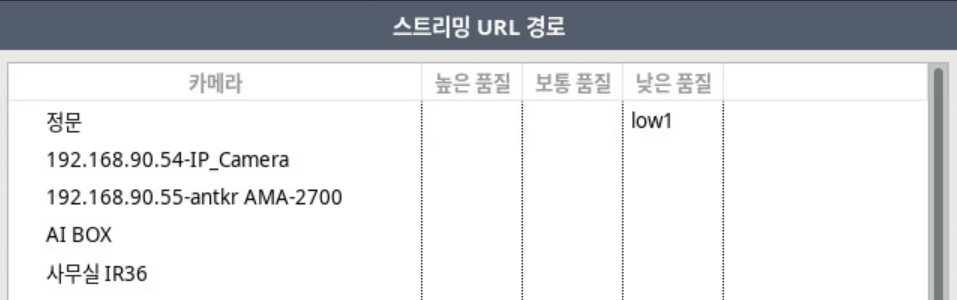
*How to check the streaming URL path
CMS program -> Host management (F2) -> right-click the registered NVR -> "Remote server control" (F7)
NVR screen -> Settings -> Network "Streaming URL path"
Checking the URL path per NVR channel
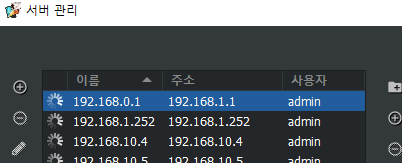
*How to check the NVR IP address
Keyboard "F2" runs the server management window; the NVR IP address is at the top left
*TIP
To avoid confusion during future changes such as camera registration changes or area modifications, set the camera name registered on the NVR as the video source name
AI trigger settings
You can configure intrusion, occupancy, loitering, stopping, entering/leaving, boundary line, etc., depending on the license you hold.
*For licenses, please contact the sales representative for that device.
Example: intrusion detection

AI app overview screen

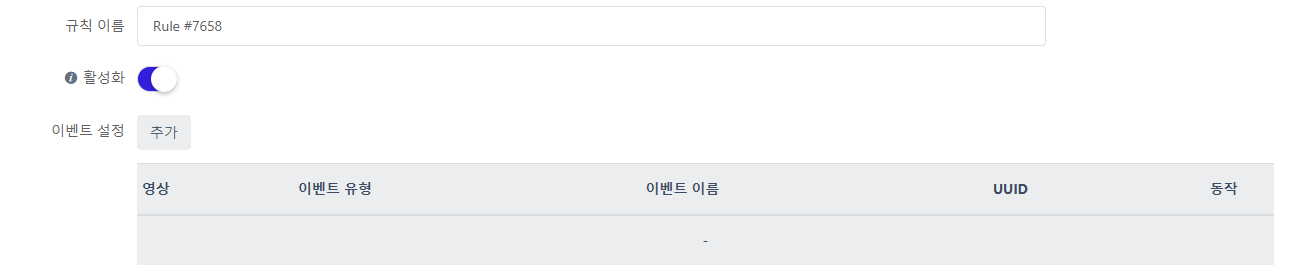
Add intrusion-detection rule
Click the 'Add rule' button at the top right of the intrusion-detection settings list to set a new detection rule.
In the rule name, enter a name to distinguish that rule.
To avoid confusion during future changes such as camera registration changes or area modifications, set the video source's 'channel name' to be the same as the 'camera name' registered on the NVR.
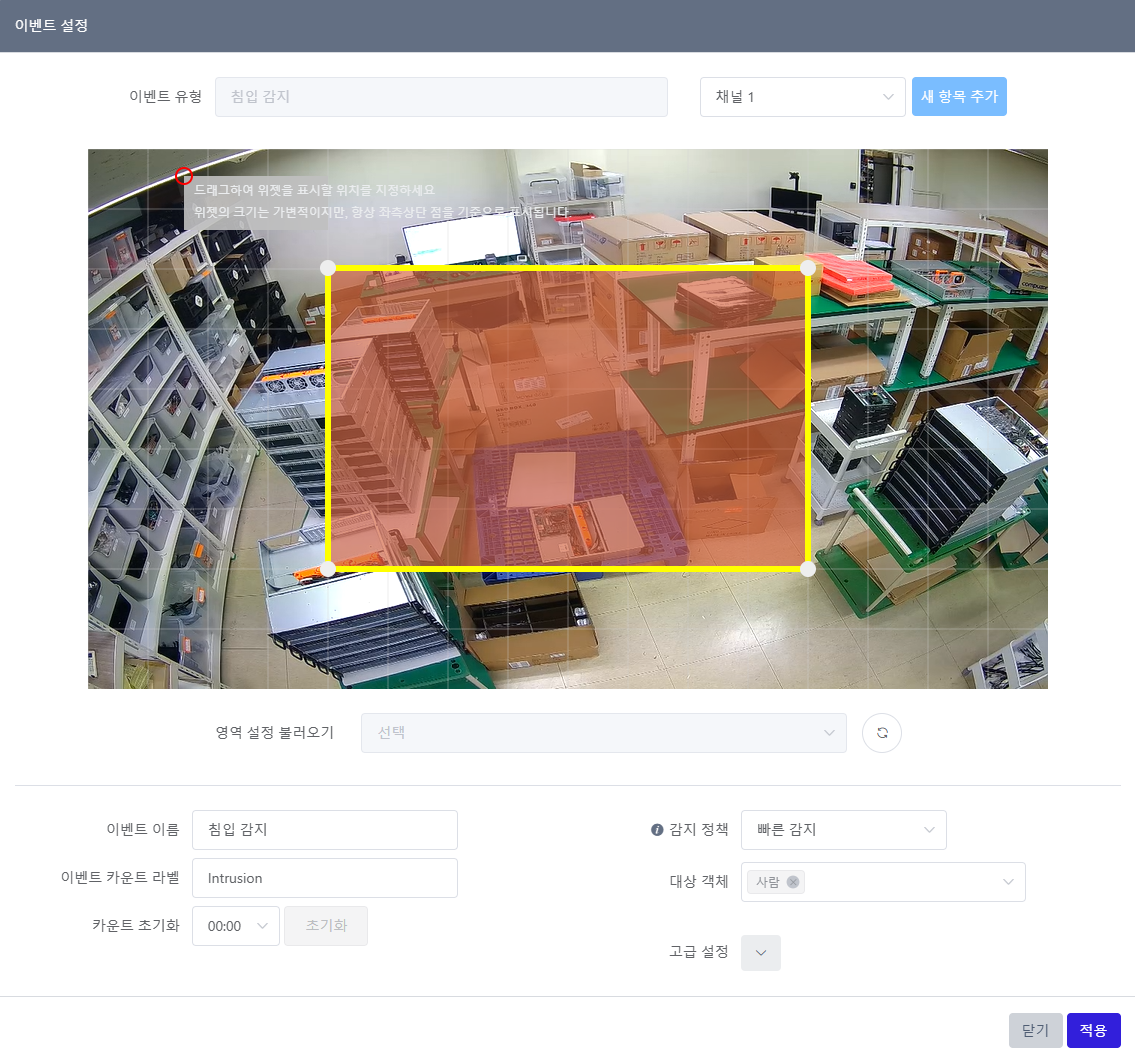
▪ Dragging within the detection area lets you move the entire area.
▪ Dragging a vertex lets you move the vertex.
▪ Clicking the yellow line of the detection area lets you add a new vertex.
▪ Right-clicking a vertex lets you delete the vertex.
▪ Drag the transparent gray rectangle to set the label position
Enter the intrusion-detection preset name.
*TIP
To avoid confusion during future changes such as camera registration changes or area modifications, set the camera name registered on the NVR + the AI feature as the "name"
EX) Video source: Front gate intrusion
▪ Event name: You can set the name of the configured event area.
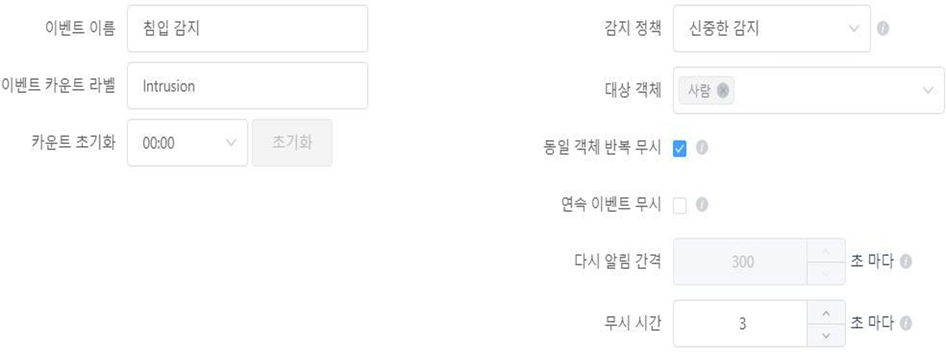
▪ Detection policy: You can choose whether to judge events on objects quickly or carefully. With careful detection, the object is observed for a certain time to judge the event more accurately and reduce false alarms, but the event occurs relatively late. With fast detection, the observation time is minimized so an event occurs as soon as detection happens, but misrecognition may occur.
▪ Event count label: You can set the name of the event count label drawn on the video.
▪ Target object: Sets the event-detection target. You can set people, vehicles, and motorcycles.
▪ Reset count: You can set whether to reset the event occurrence count value. When enabled, the count value is reset at the set time.
▪ Ignore repeated same object: If checked, it ignores when the same object enters the event area again.
▪ Ignore consecutive events: If checked, it ignores events caused by new objects while a detected event target remains in the event area.
▪ Re-notify interval: When Ignore consecutive events is enabled, if a detected event target keeps remaining in the area, it triggers an event again at the set interval.
▪ Ignore time: After an event occurs, it does not trigger a new event for a certain time.

1. Once you have finished the event and action settings in the event action rule set, click the 'Save' button at the very bottom to finally submit the intrusion-detection event action settings.
If set correctly, you can check the setting item in the list on the intrusion-detection application screen.
Set the intrusion area.
Action rule settings
Add action rule
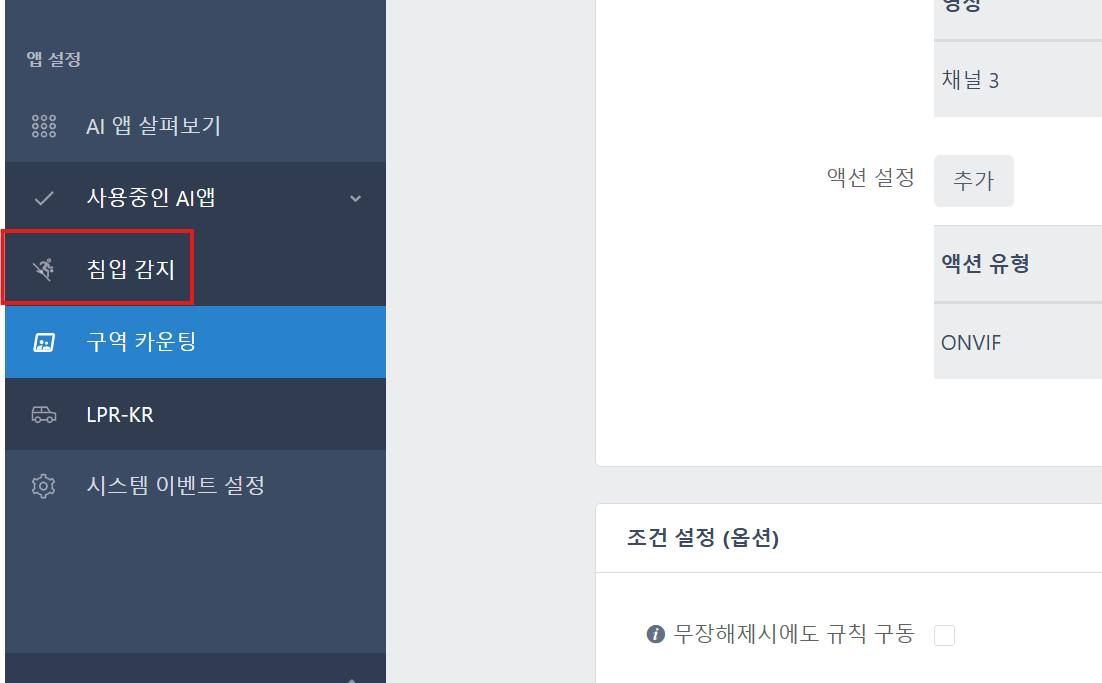

Settings -> AI app overview -> click the desired AI trigger
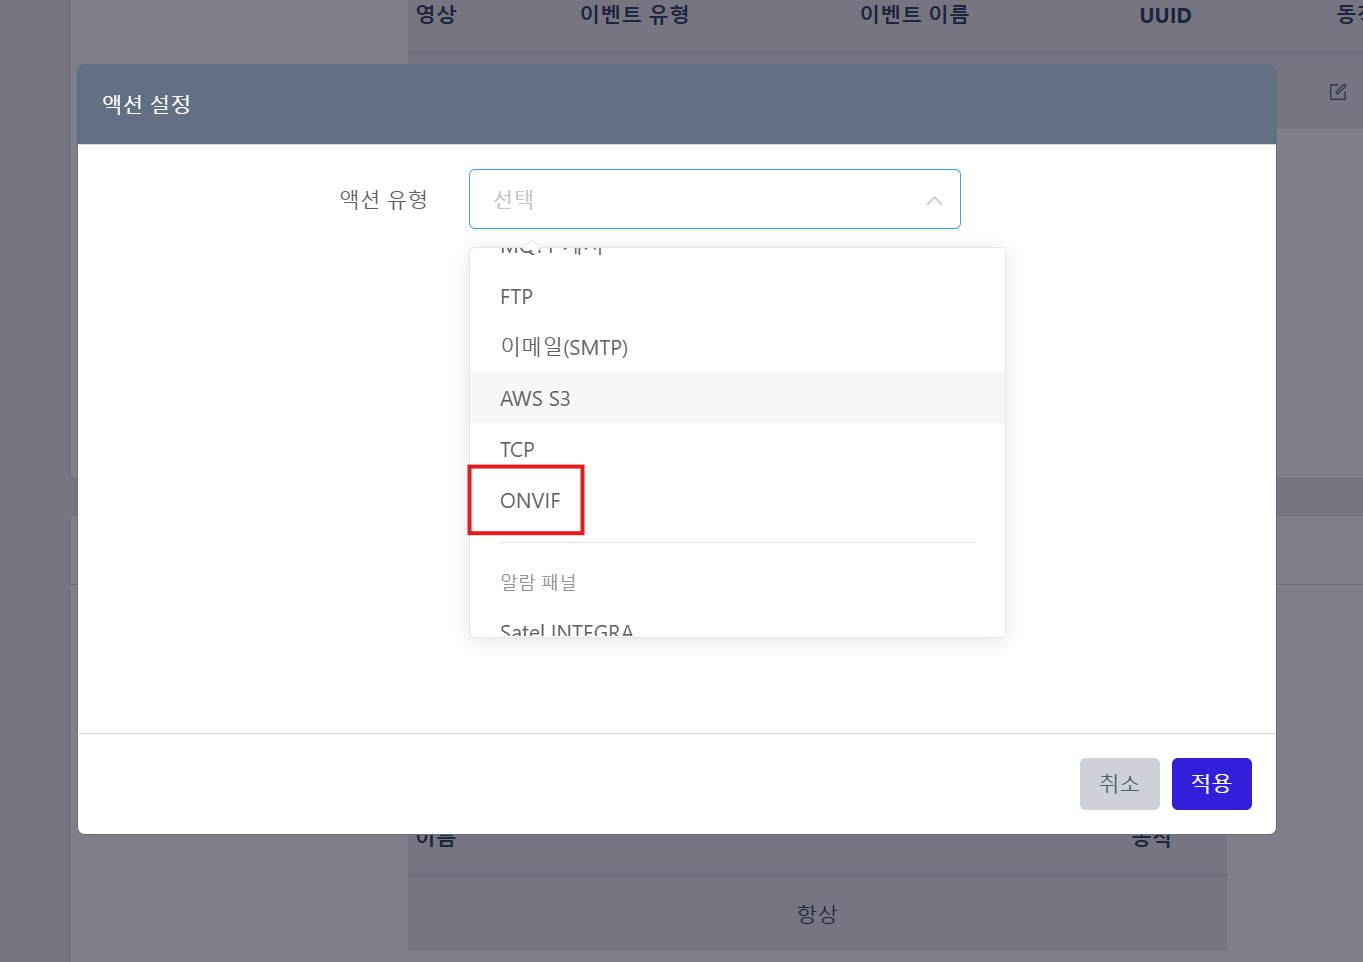
In the action settings, select ONVIF
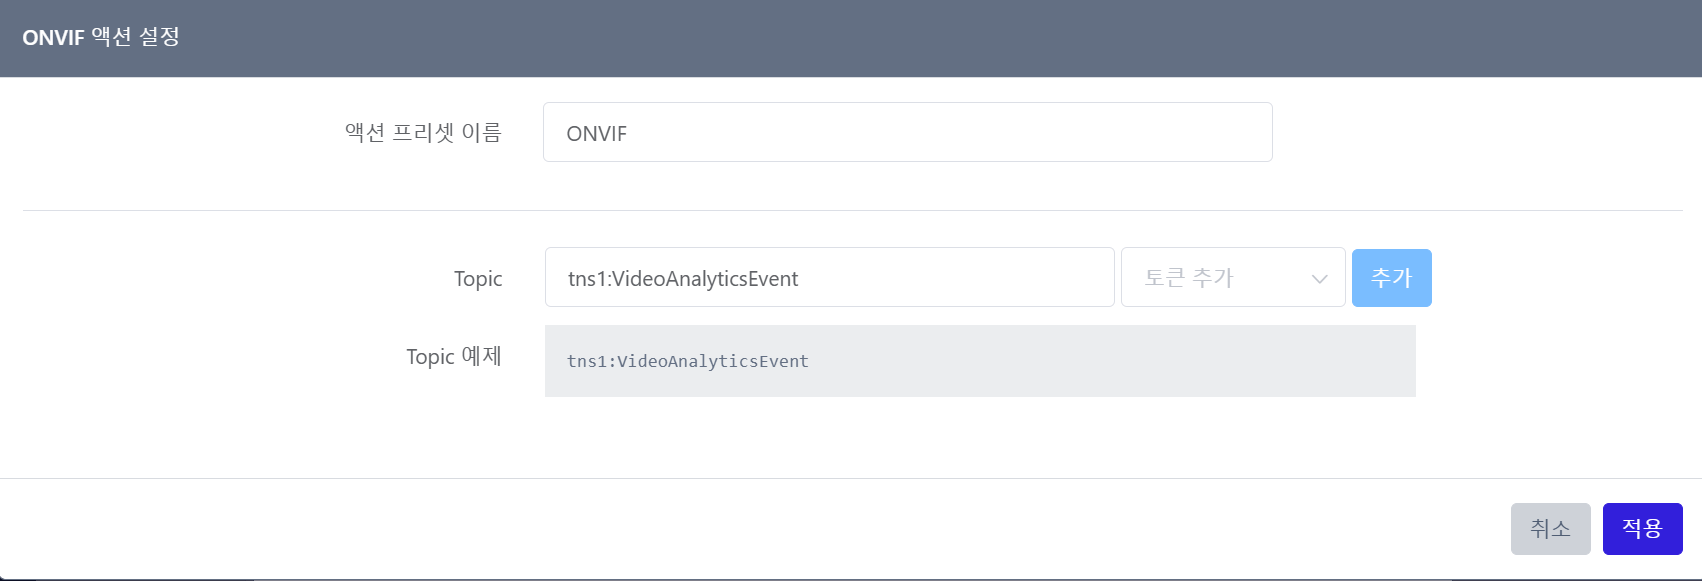
Click 'Apply' without any separate modifications
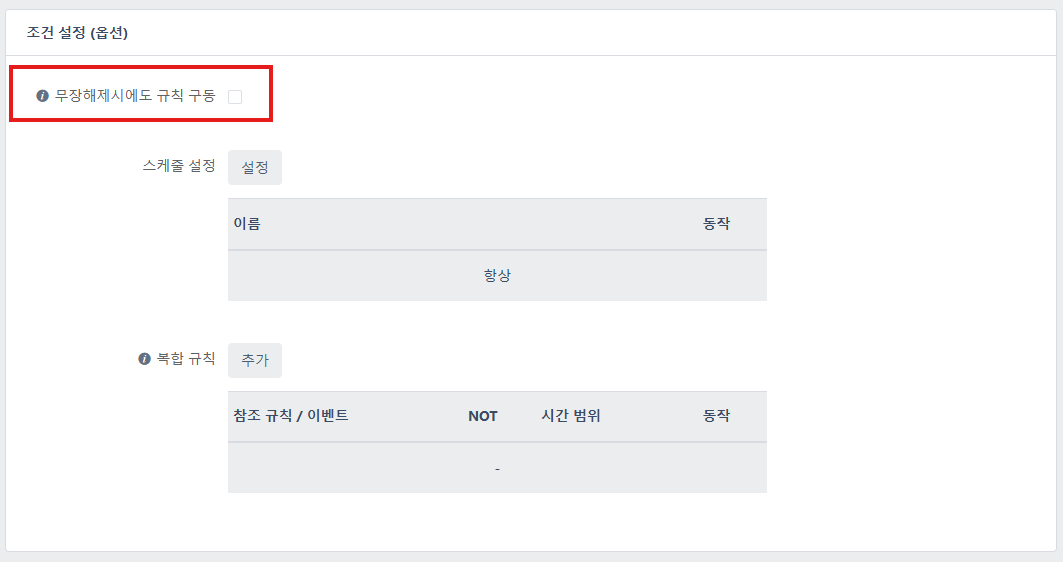
Check Run rule even when disarmed
NVR AI server event settings
Register the AI server on the AIBOX NVR
Access the NVR
CMS program -> Host management (F2) -> right-click the registered NVR\ "Remote server control" (F7)
Register the AIBOX AI server
Settings -> Event -> AI server -> Server settings
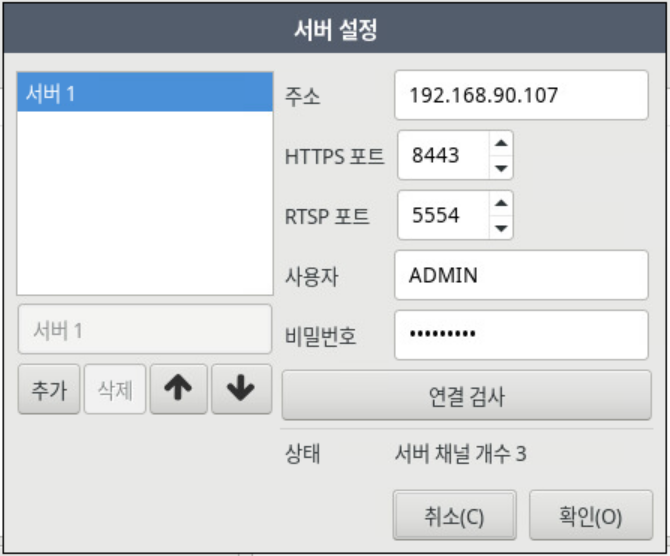
Enter the added AI server's name, IP address, HTTP/RTSP ports, user ID, and PASSWORD
During the connection test, check the "Status" server channel count (displayed the same as the number of AIBOX video sources)
NVR AI server event registration
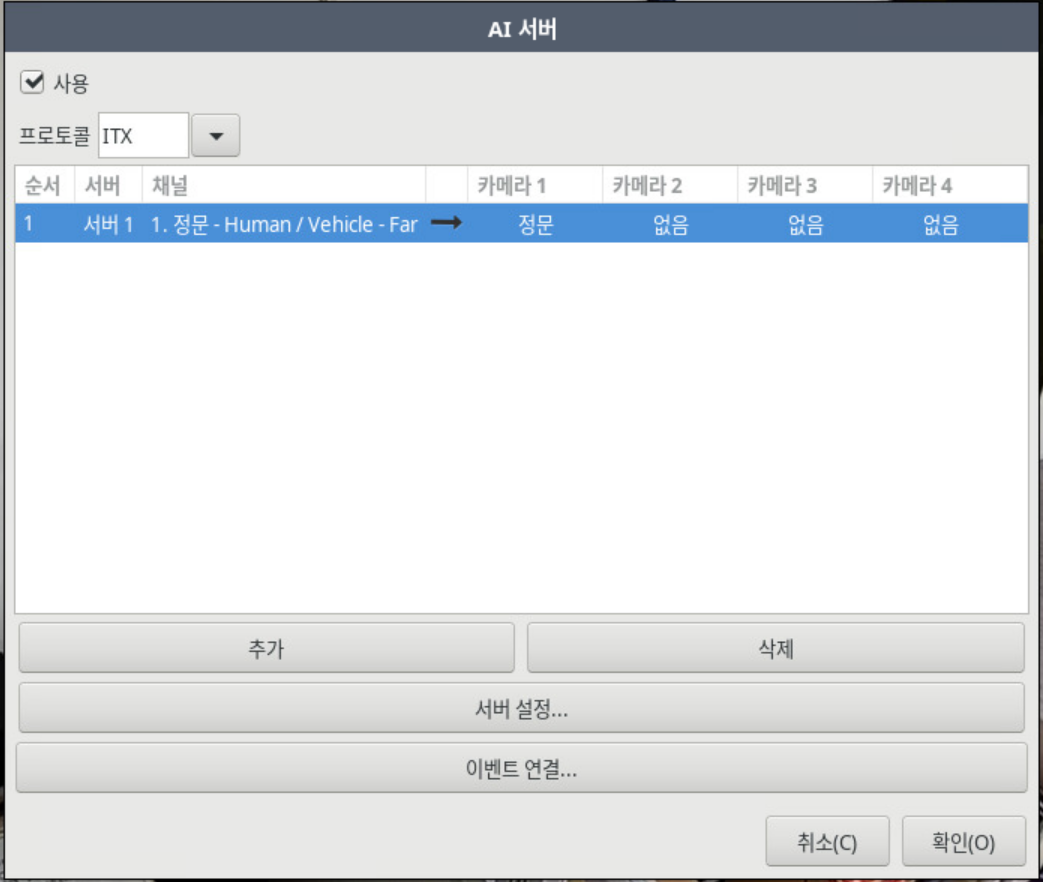
Click "Add" to add an event
Channel selection: select the AI algorithm channel registered to the AIBOX "video source"
Camera 1: select the channel on which to display the event-object area
Checking NVR AI server events
When the AI event area and event information are displayed on the NVR, they are simultaneously shown on the IPWALL
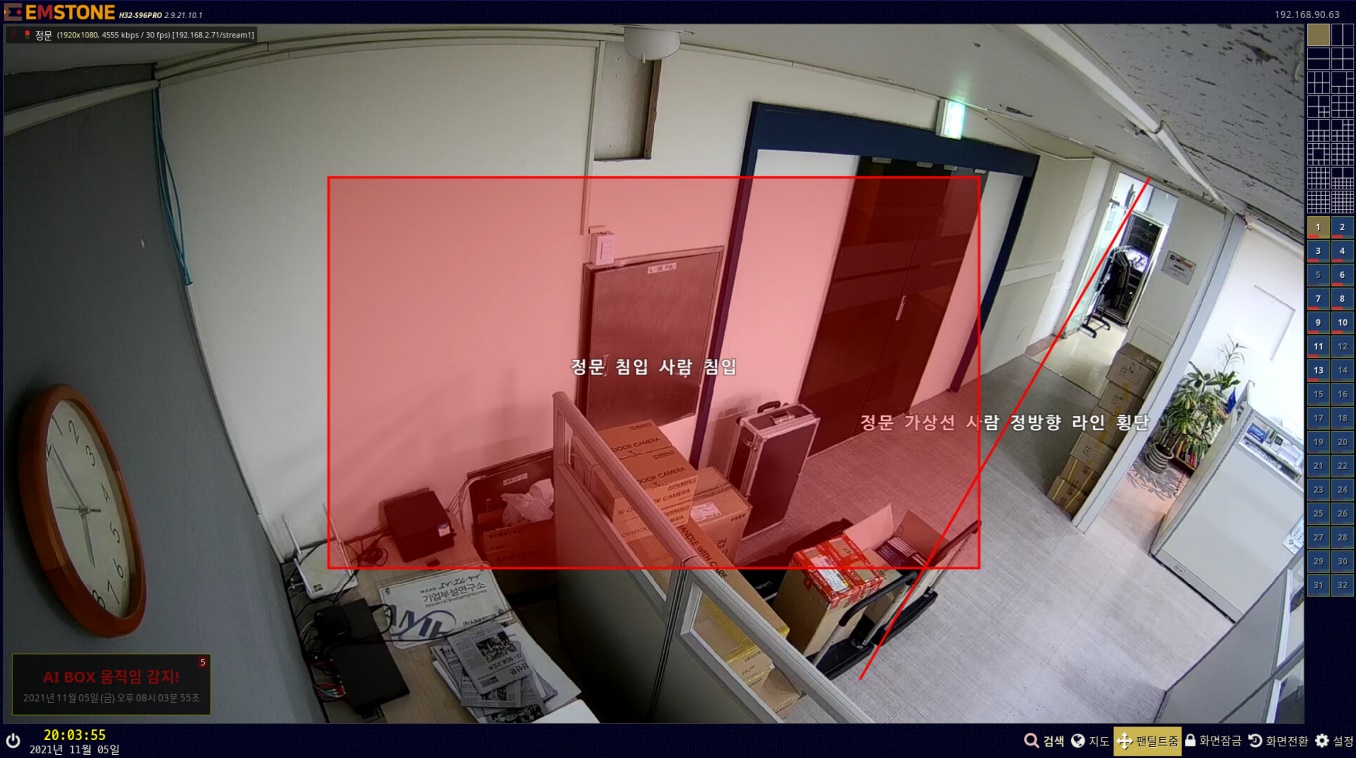
NVR event occurrence
Checking CMS AI events
CMS program -> Host management (F2), right-click the registered NVR\ "Video search"
Enable the event search display at the top
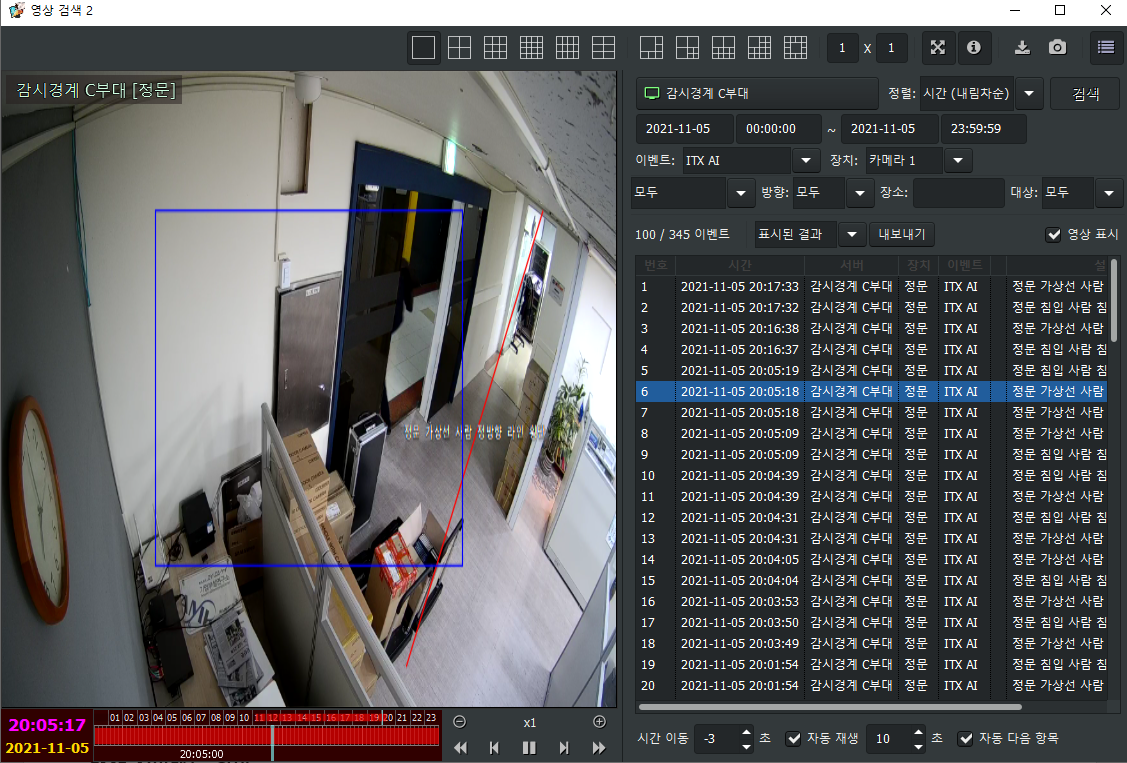
CMS event search
Select the search time, event (ITX AI), device (camera channel), and event type, then search
After the corresponding event is marked, click the event to search that event's video
At the bottom, select playback-time move, auto play, and auto next-item play to choose playback options
AIBOX server object exclusion area
Static object exclusion area
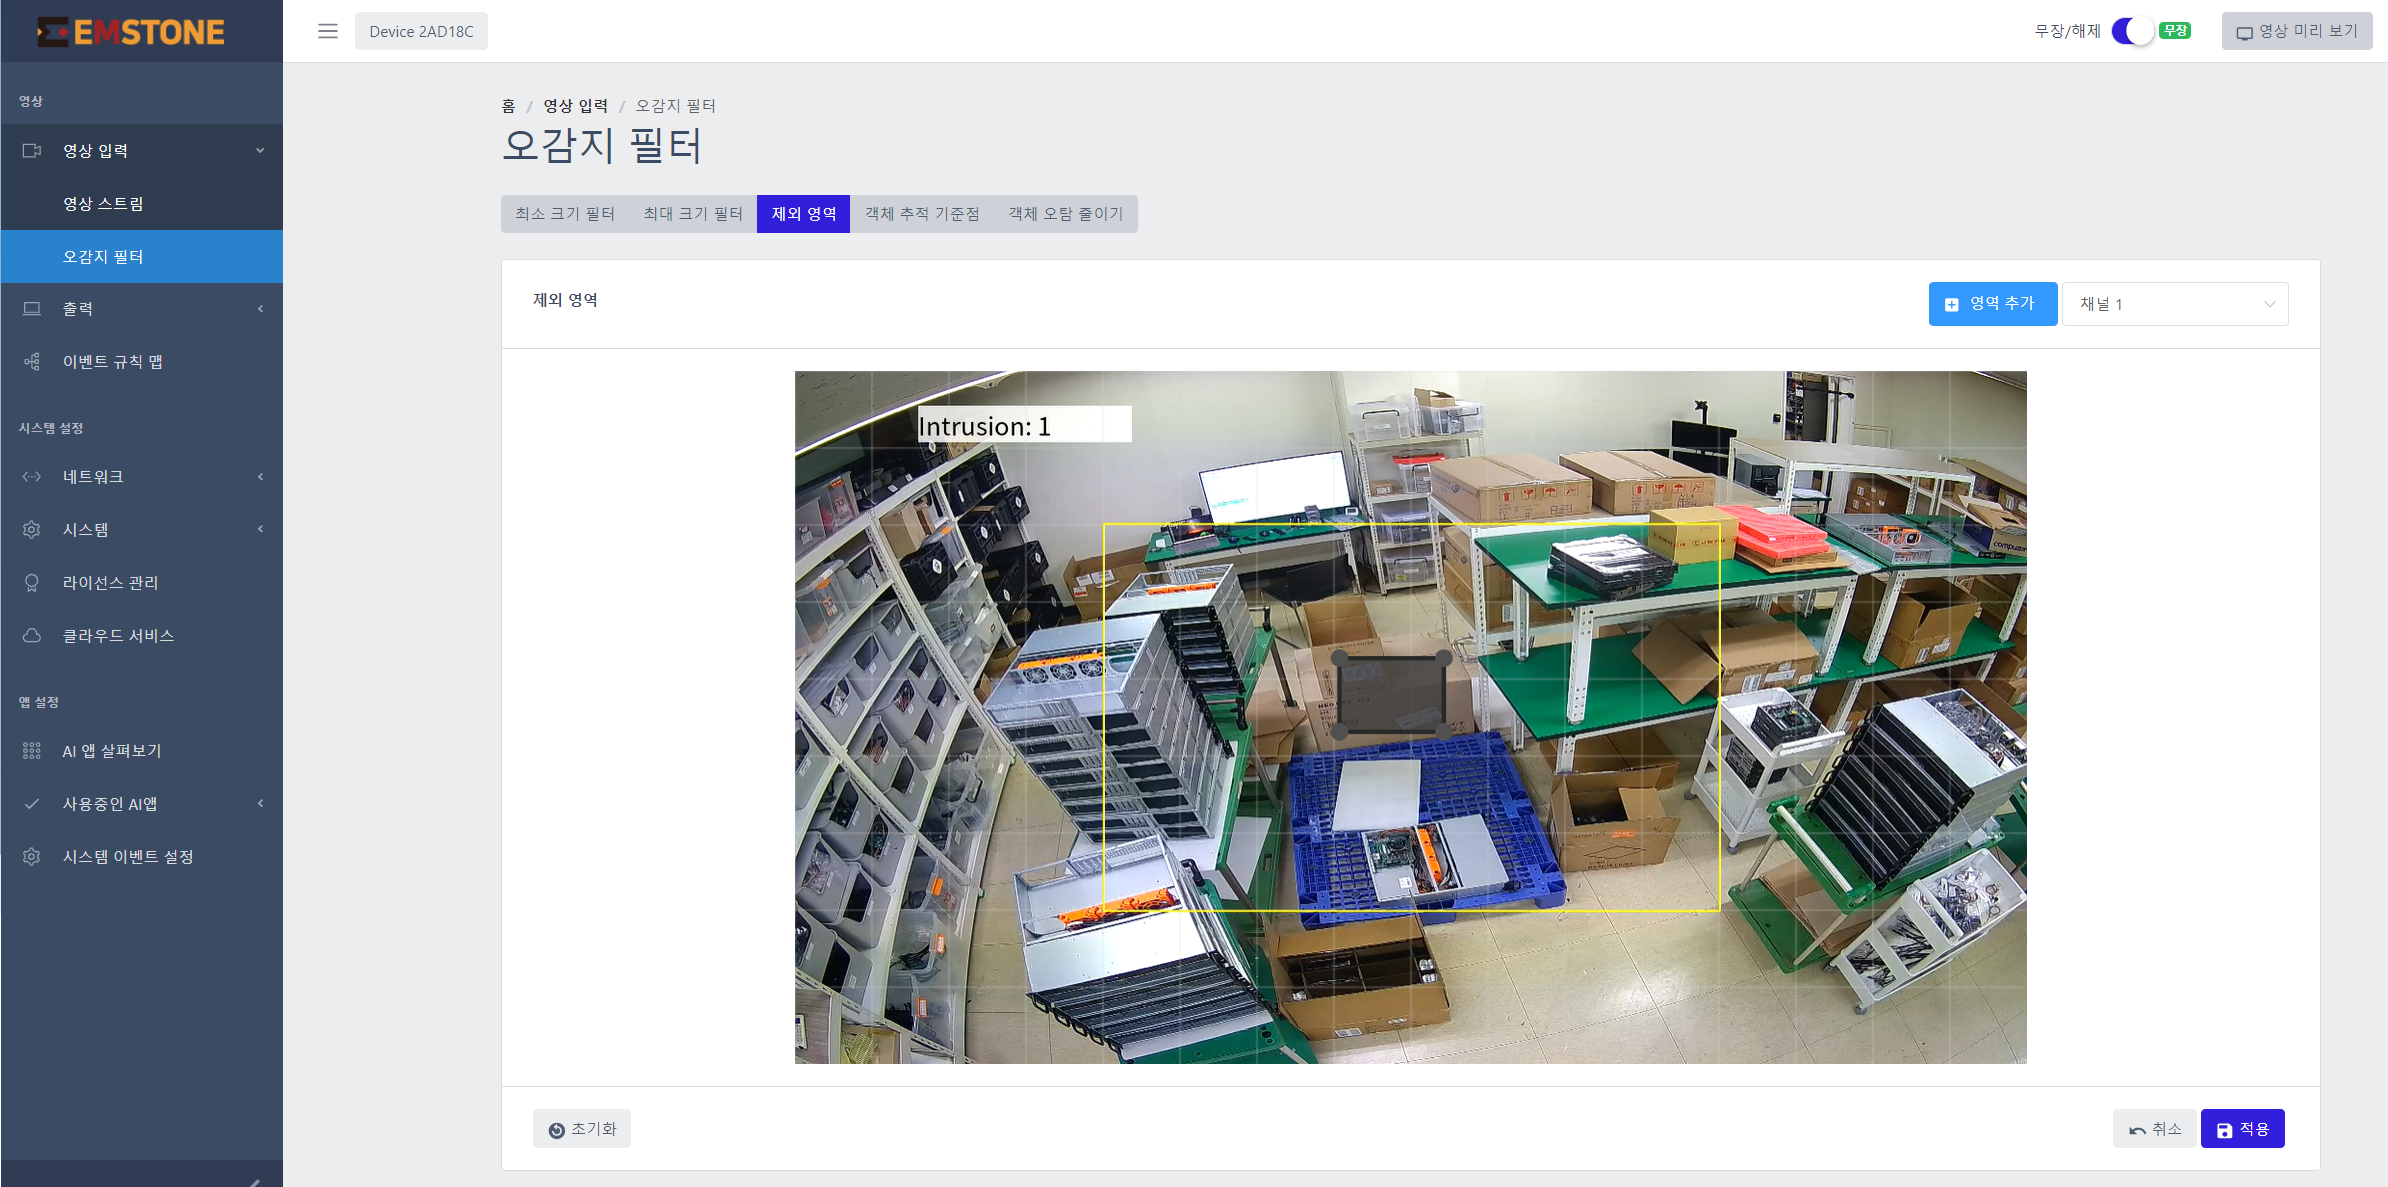
Video input -> False-detection filter -> Exclusion area
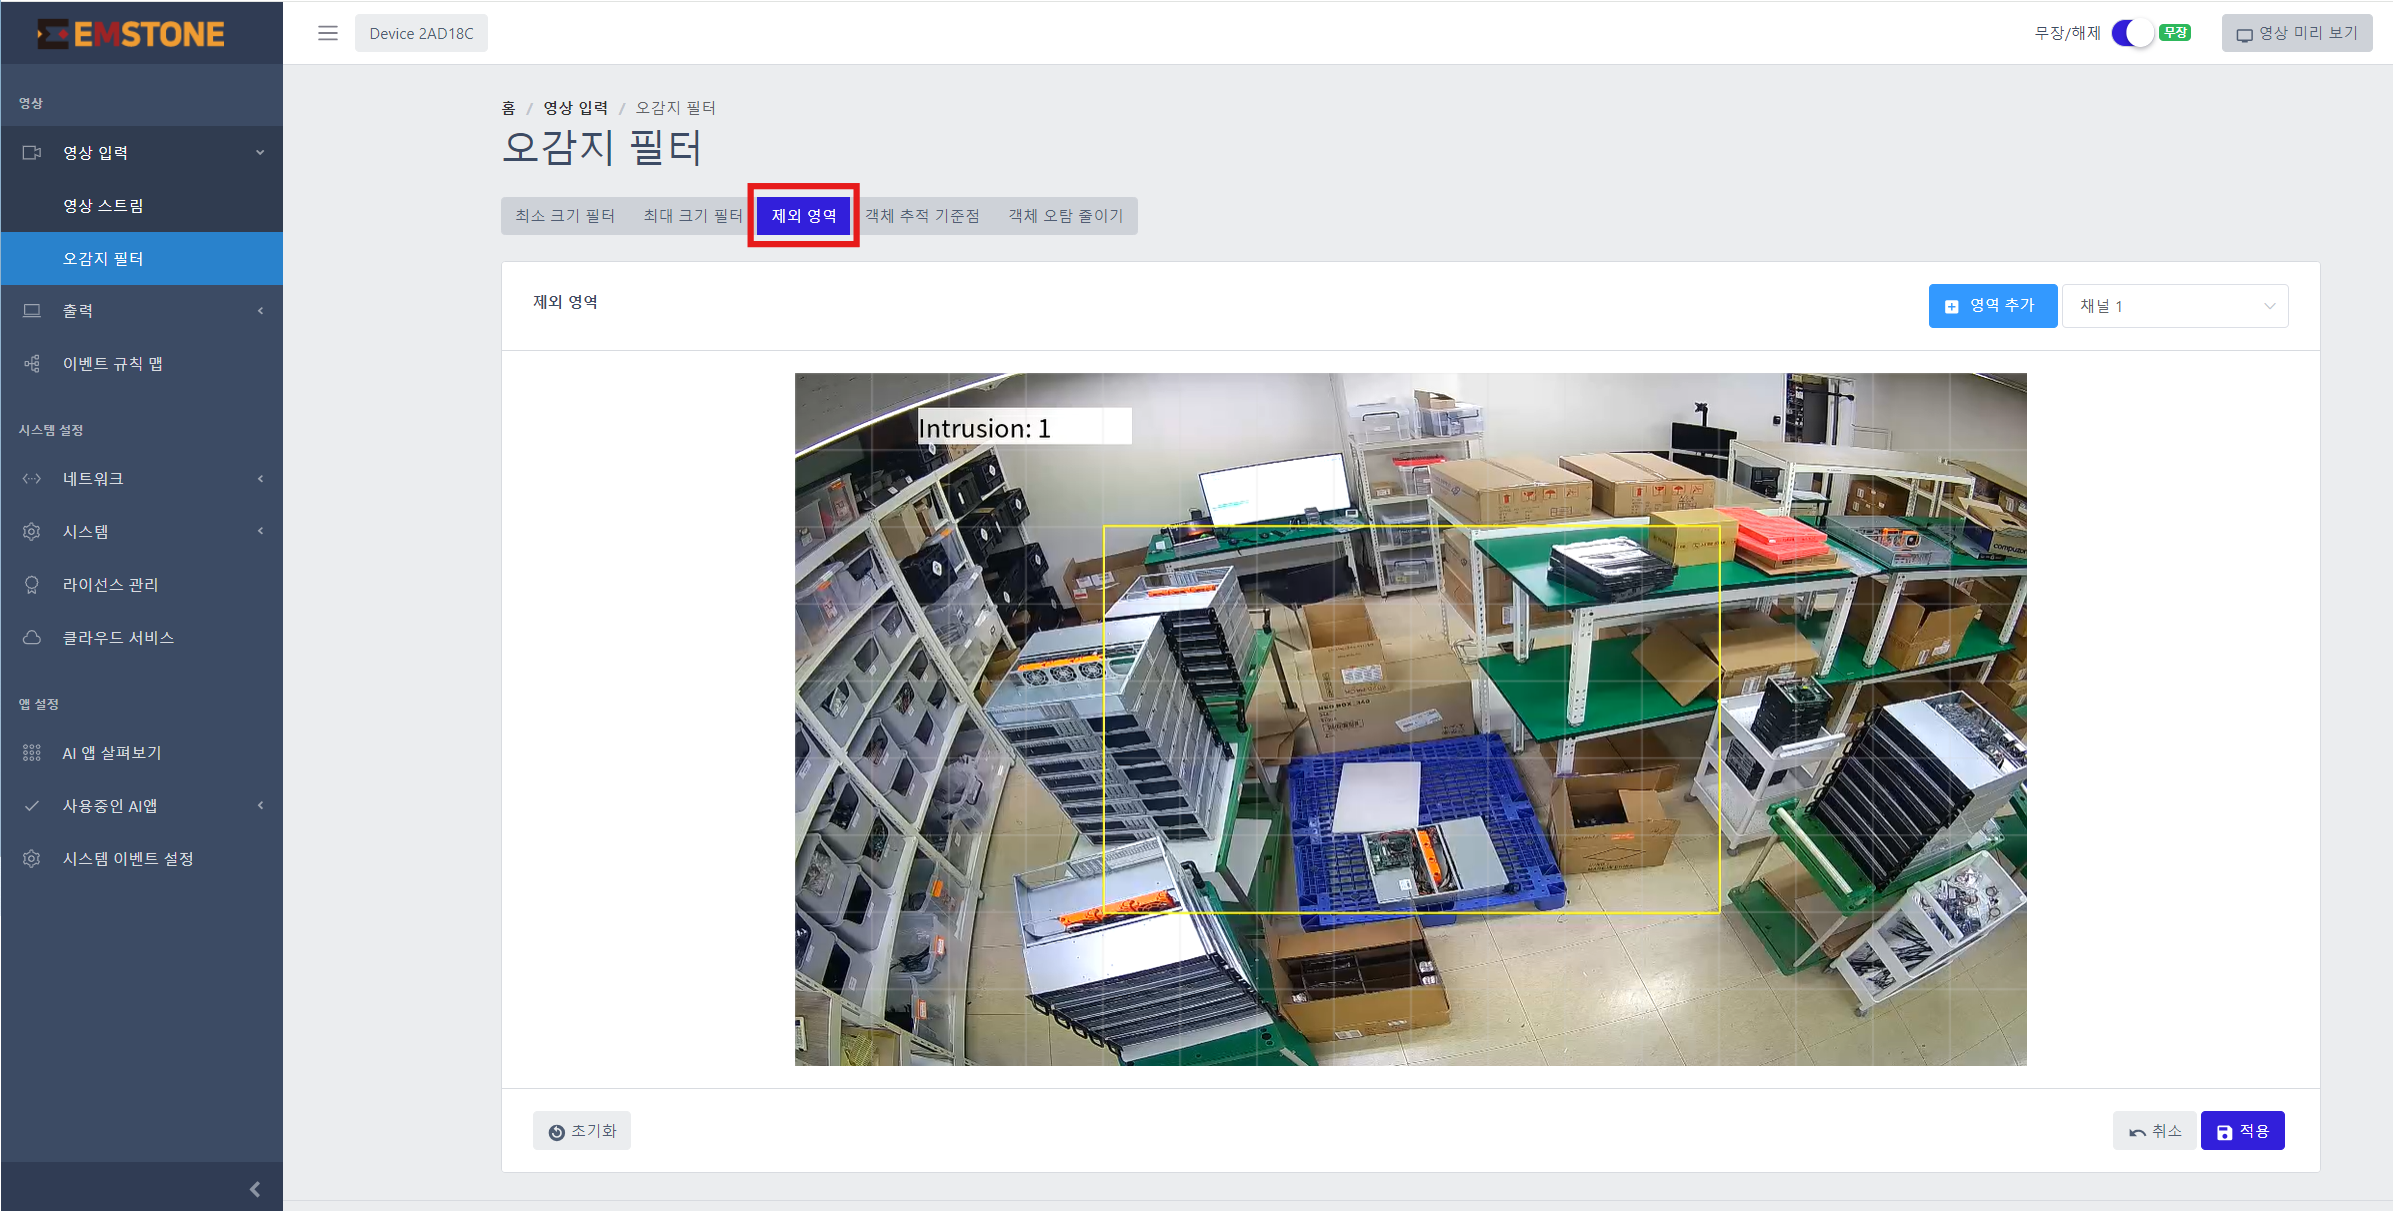
- You can designate an area that arbitrarily marks and forcibly excludes a static object that is falsely detected. For example, if a mannequin or a container box is misrecognized as a person or car that should actually be detected, this feature can forcibly exclude it.
[Note] Whether a falsely detected object falls within the static object exclusion area is judged based on the object's center coordinates. Therefore, designating the exclusion area as small as possible (just enough to include the center of the object you want to exclude) can reduce the error of excluding even objects that should actually be detected.
(As shown below, to exclude a detected box, you do not need to cover the whole box—just exclude the center of the object minimally.)