Hanwha Techwin BestShot integration
BEST SHOT GUIDE
Introduction to the Hanwha Techwin BestShot AI camera
Reduce false alarms and improve monitoring efficiency with AI-based object detection
Based on AI algorithms, the Wisenet P-series AI camera detects people, faces, vehicles, and license plates in real time. The existing motion-detection feature detected motion based on pixels of swaying leaves, shadows, animals, plastic bags, etc., which caused the inconvenience of unnecessary and frequent alarms for the administrator. Because the Wisenet P-series AI camera does not detect unnecessary motion, it greatly lowers false alarms and increases object-detection accuracy, helping improve control (monitoring) efficiency.
Attribute values and 4K BestShot
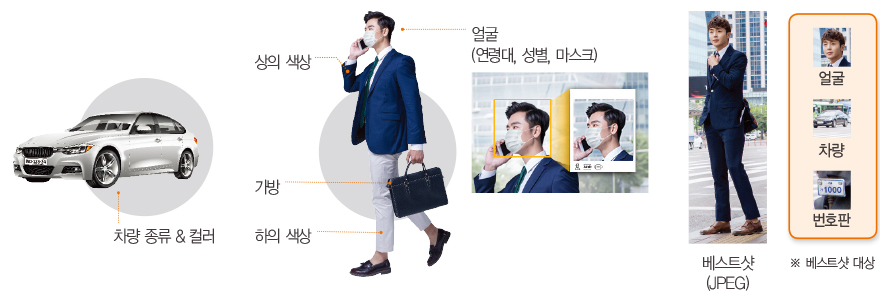
Metadata including attribute values (person: age group, gender, mask, top/bottom clothing color, wearing glasses; vehicle: type, color) is sent to the back-end server and used to extract information about specific situations, which greatly shortens the time to search the entire video.
The Wisenet P-series AI camera has a Best Shot feature that captures the most optimal image of a detected object as a JPEG of up to 4K quality. The best shot can be used as forensic data, which is important material for accurate object analysis or incidents/accidents. Apart from the best shot, the user can set the full video streaming to 4K or lower to use network bandwidth and storage space efficiently.
Setting up the best-shot camera 
Access the best-shot camera's homepage and click ① Settings → ② Analysis → ③ Object detection menu.
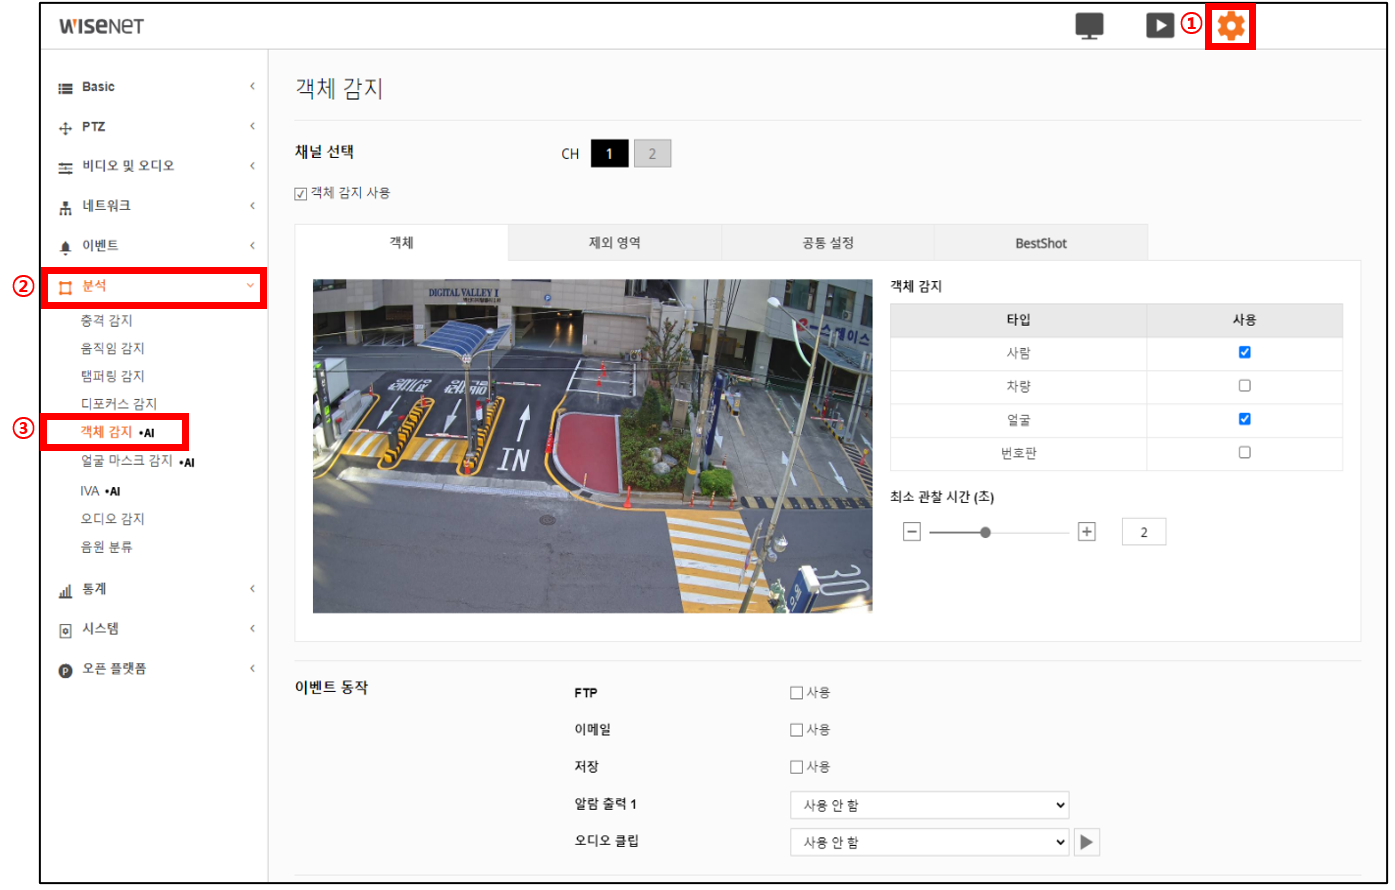
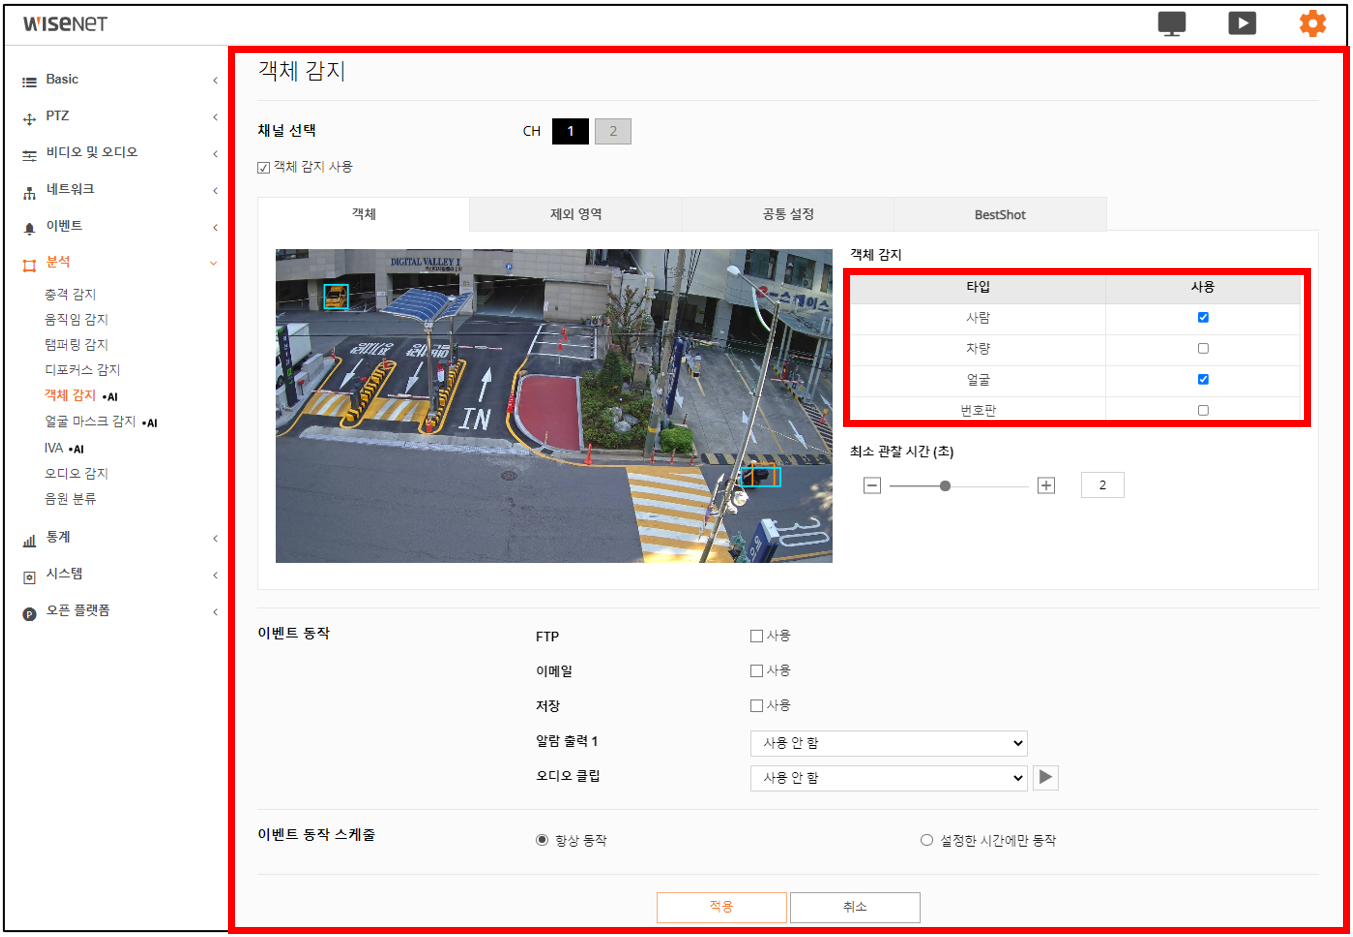
In the object detection window, click Use object detection, then select the object you want from the object-detection list (people, vehicle, face, license plate) and press the Apply button.
Registering the camera on the EMSTONE NVR
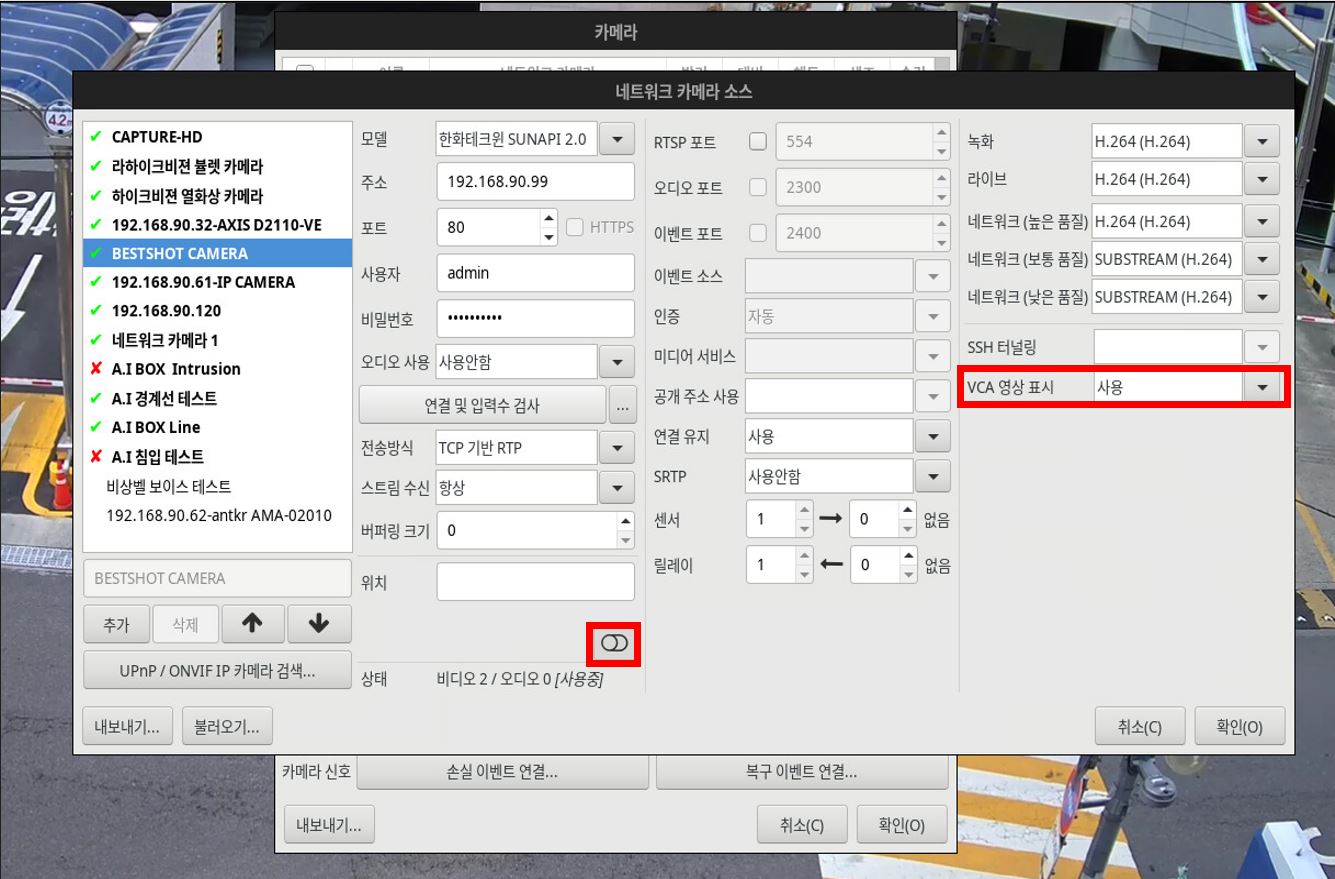
On the NVR live screen, click the  button and enter the model, IP address, user, and password to register the camera. (Use the VCA video display menu in the advanced options to detect/track objects on the real-time live screen.)
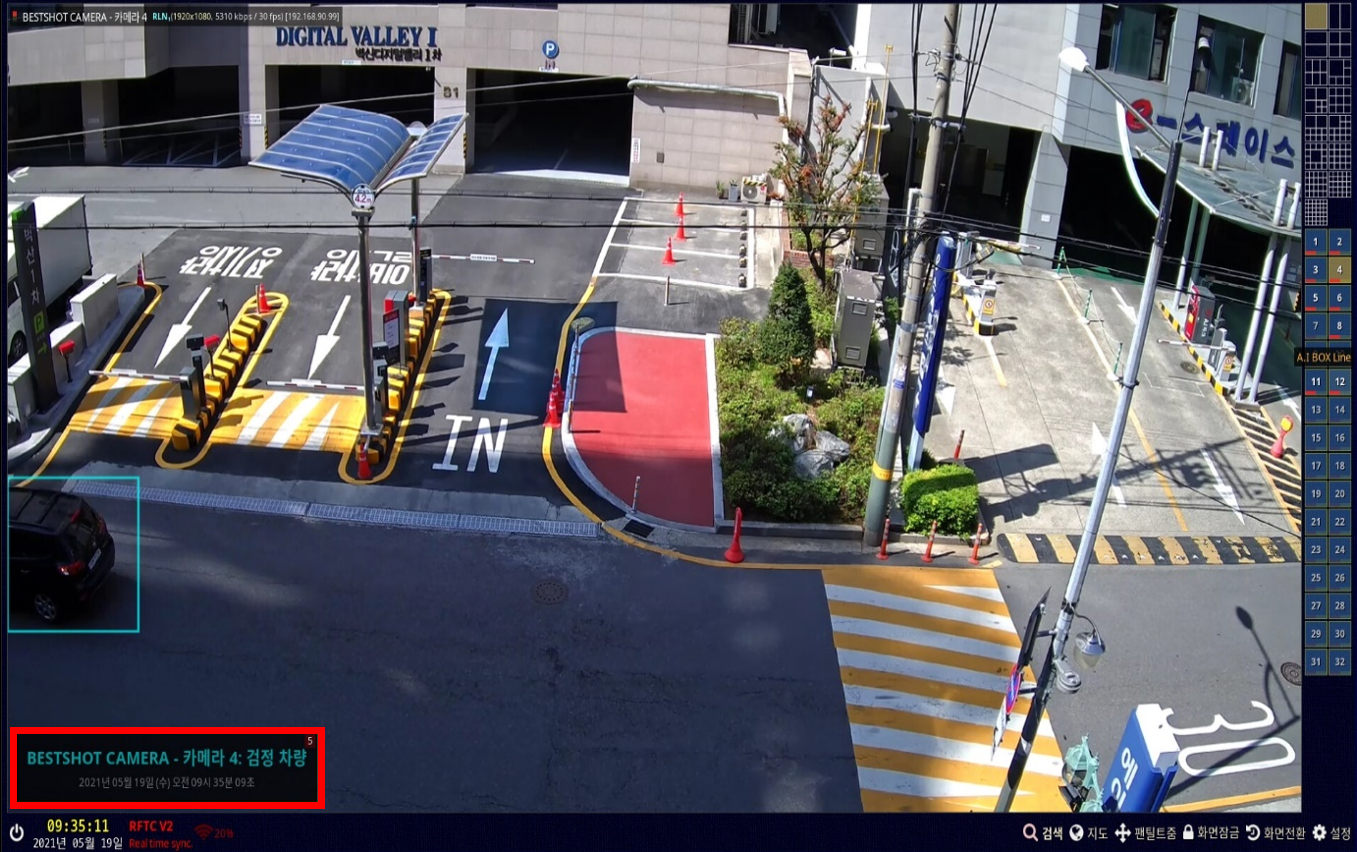
On the NVR live screen, the object detection and event warning message windows appear as follows.
NVR event search
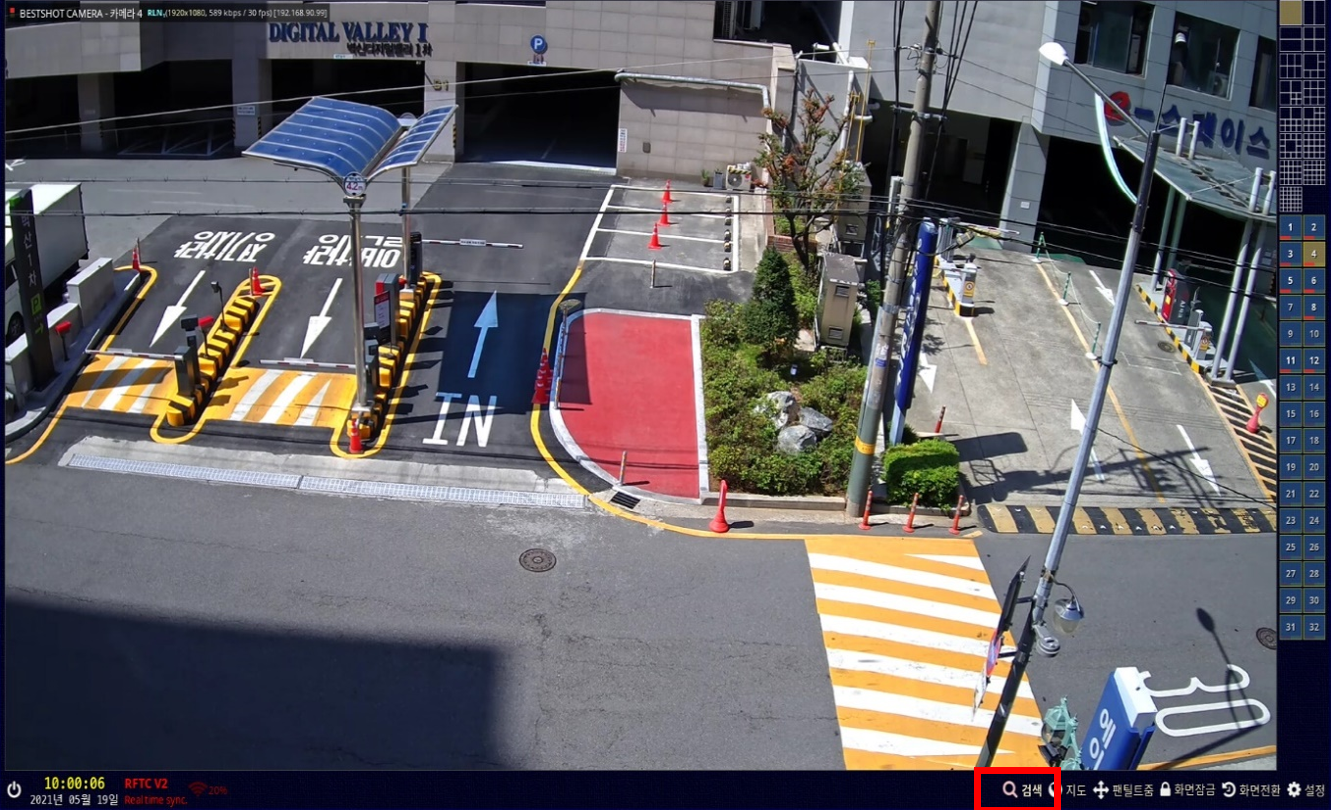
On the NVR live screen, click the Search button at the bottom right.
This is the NVR search screen. You can search recorded video, audio, events, etc. You can search and play back data recorded on the disk by date/time, and you can also save still images and back them up to various media such as CD-RW/DVD/USB.
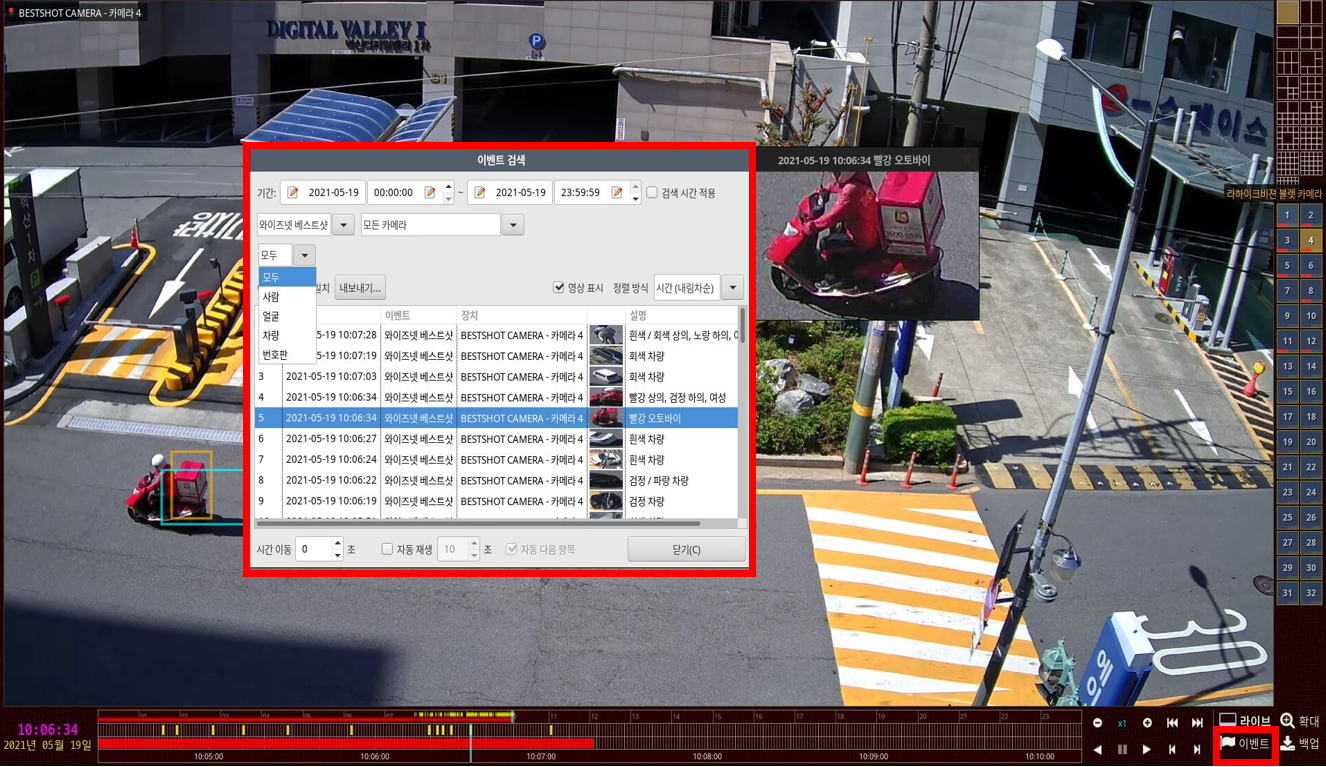
In the search screen window, click the Event menu at the bottom right to open the event search window as follows.
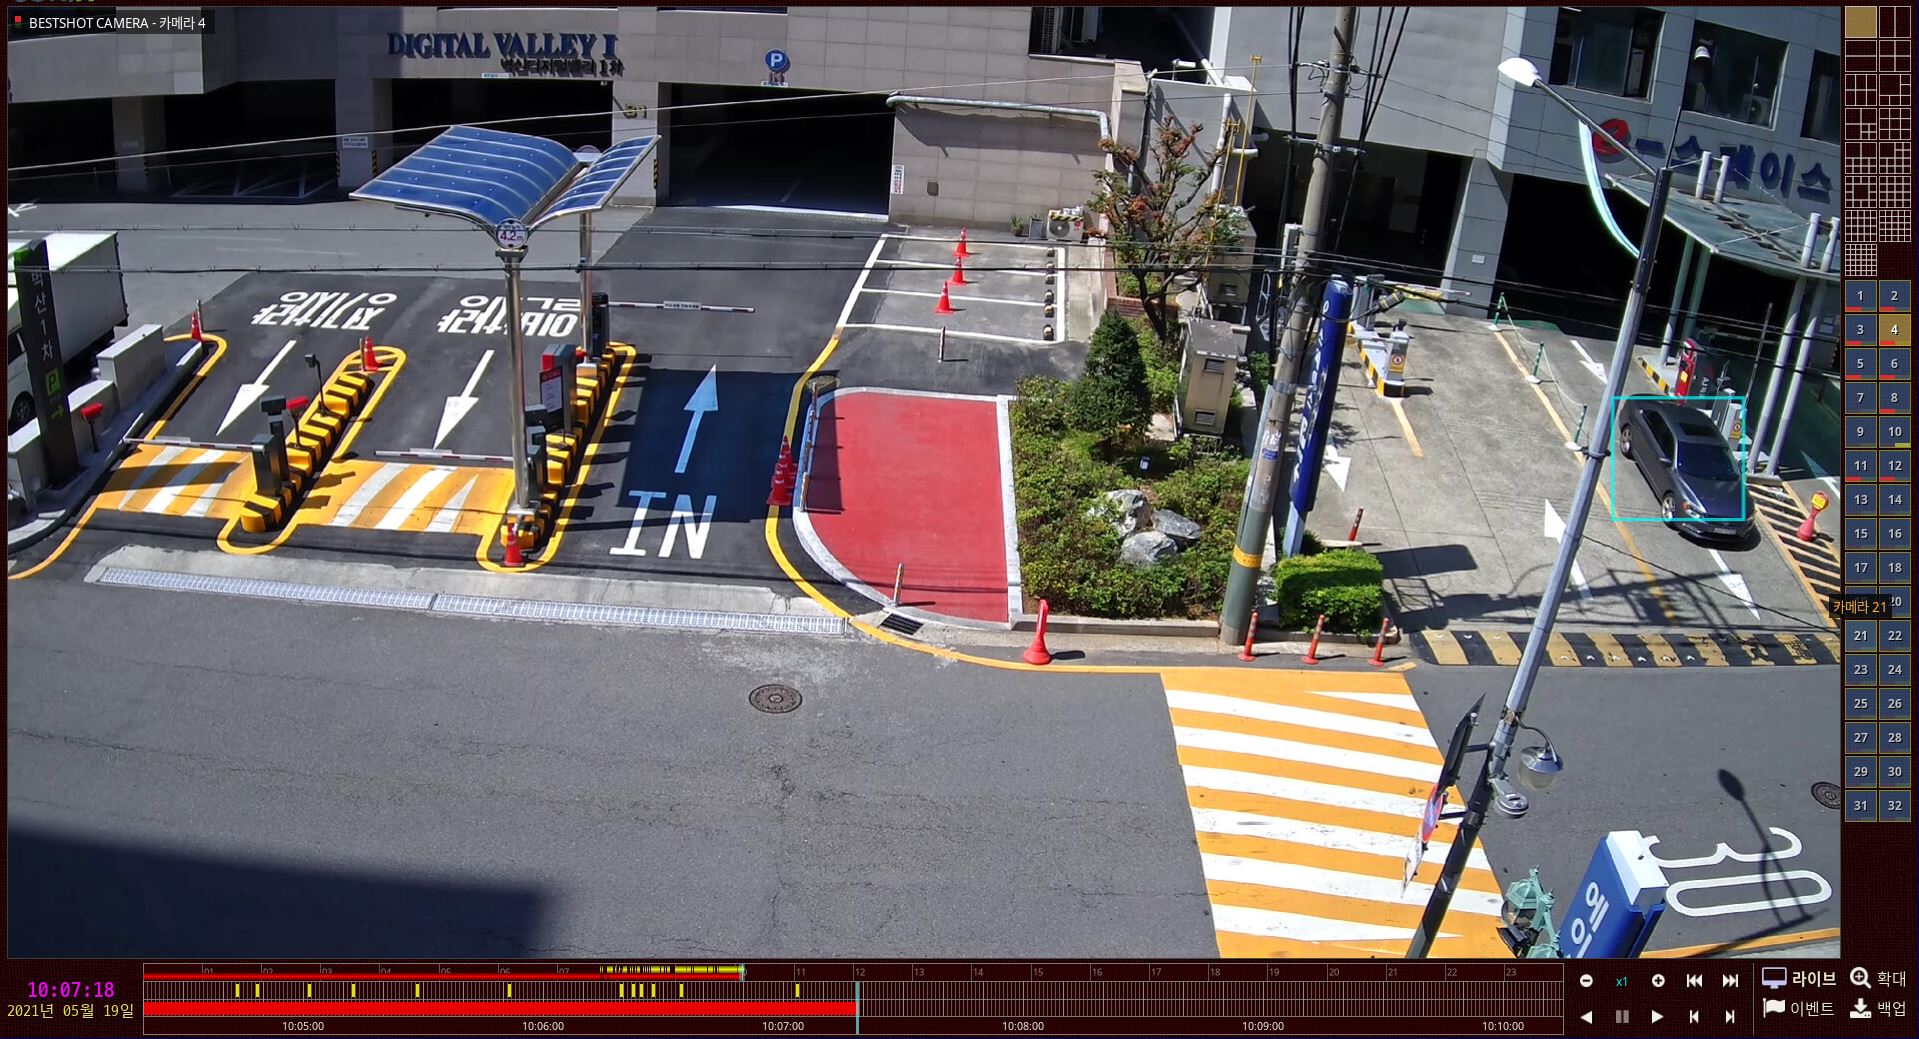
Select the date, time, and the event you want, then after searching, double-click the list of events that occurred at that time
to check the recorded event video in real time.
CMS event search
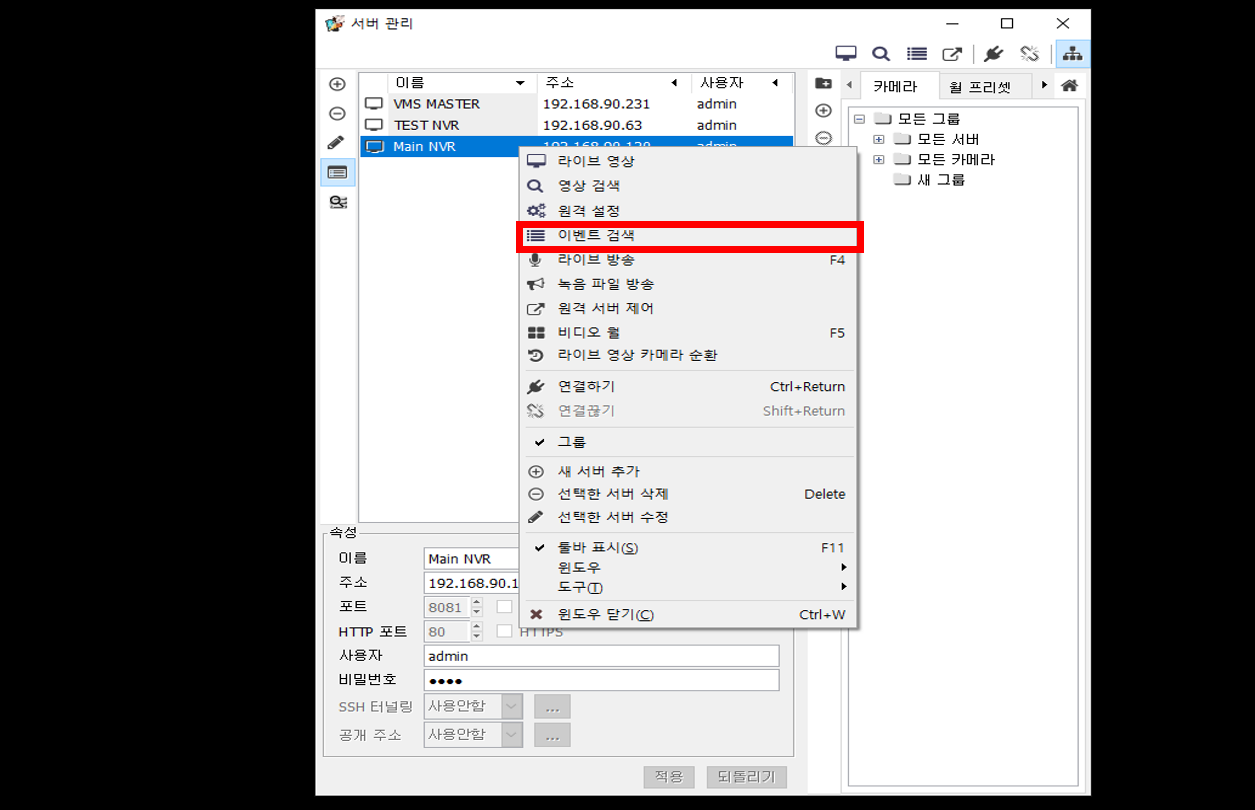
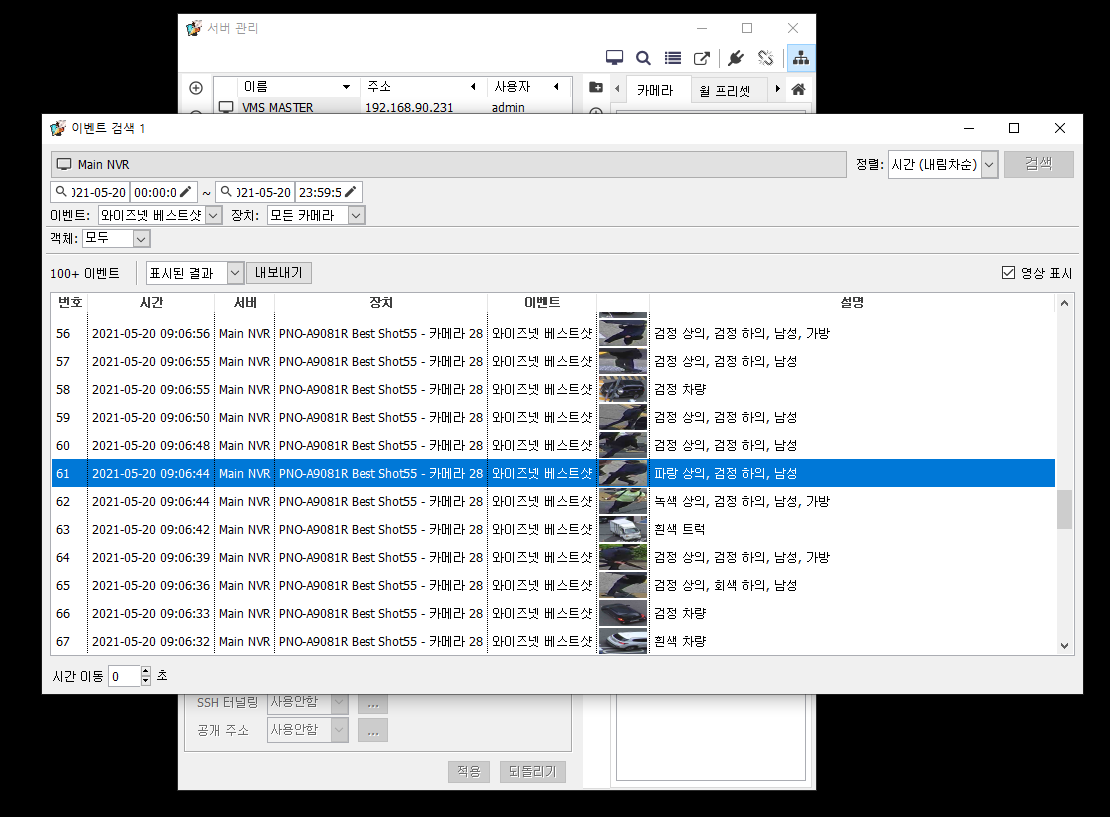
Register and select the NVR host that the best-shot camera is integrated with, then right-click and select the Event search menu.
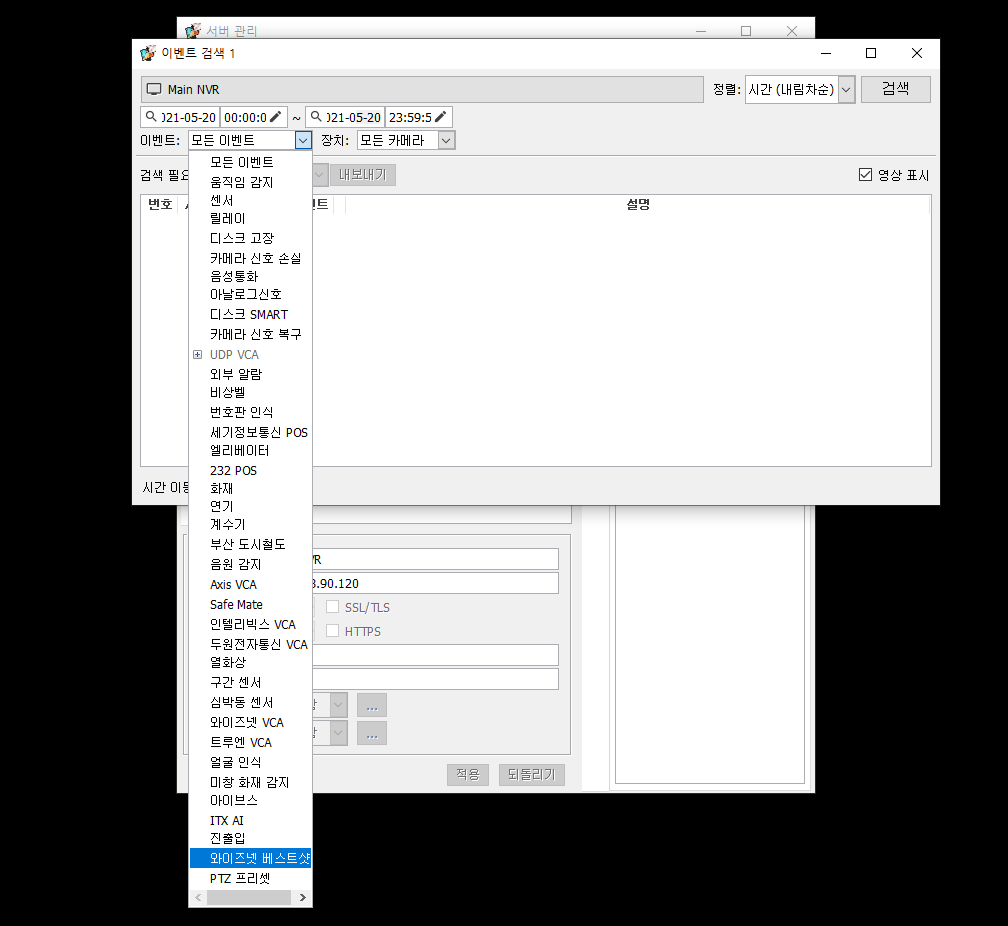
When the event search window appears, select the desired date and time, then select the best-shot event from the event list.
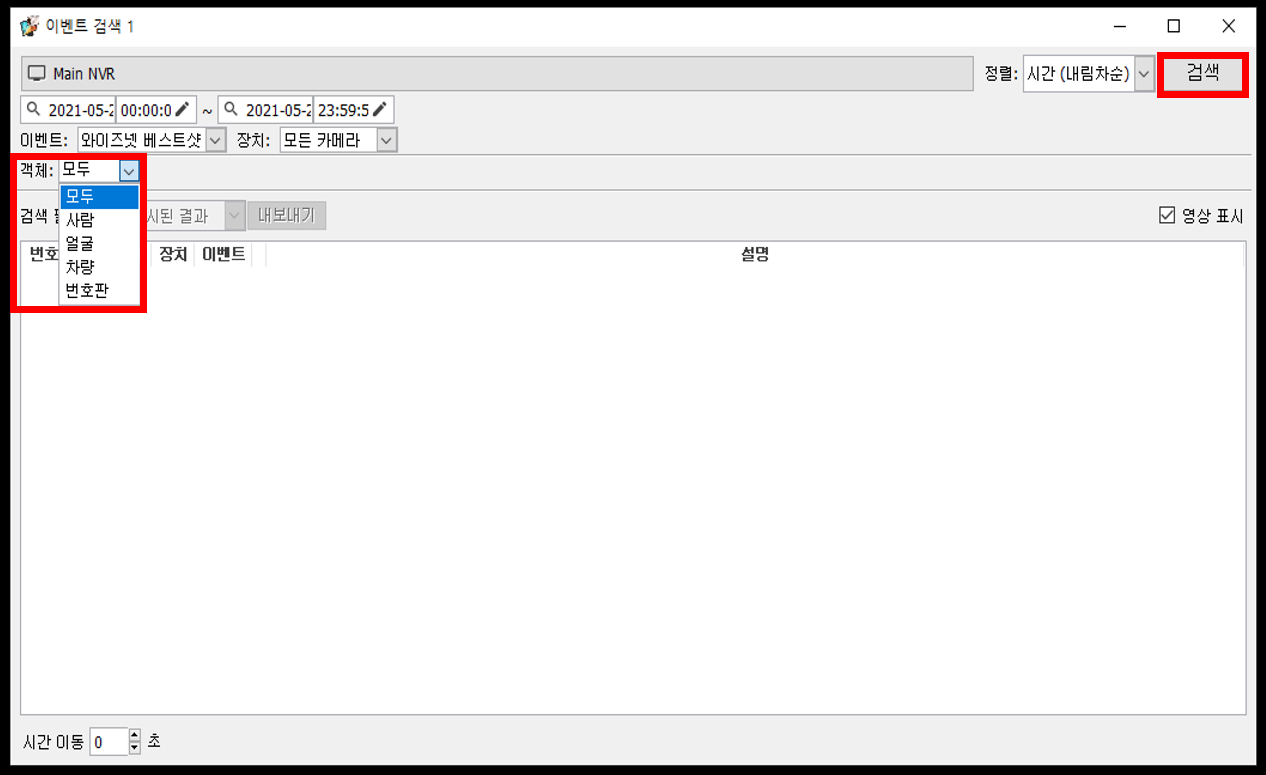
Select the object you want to search for, then press the Search button.
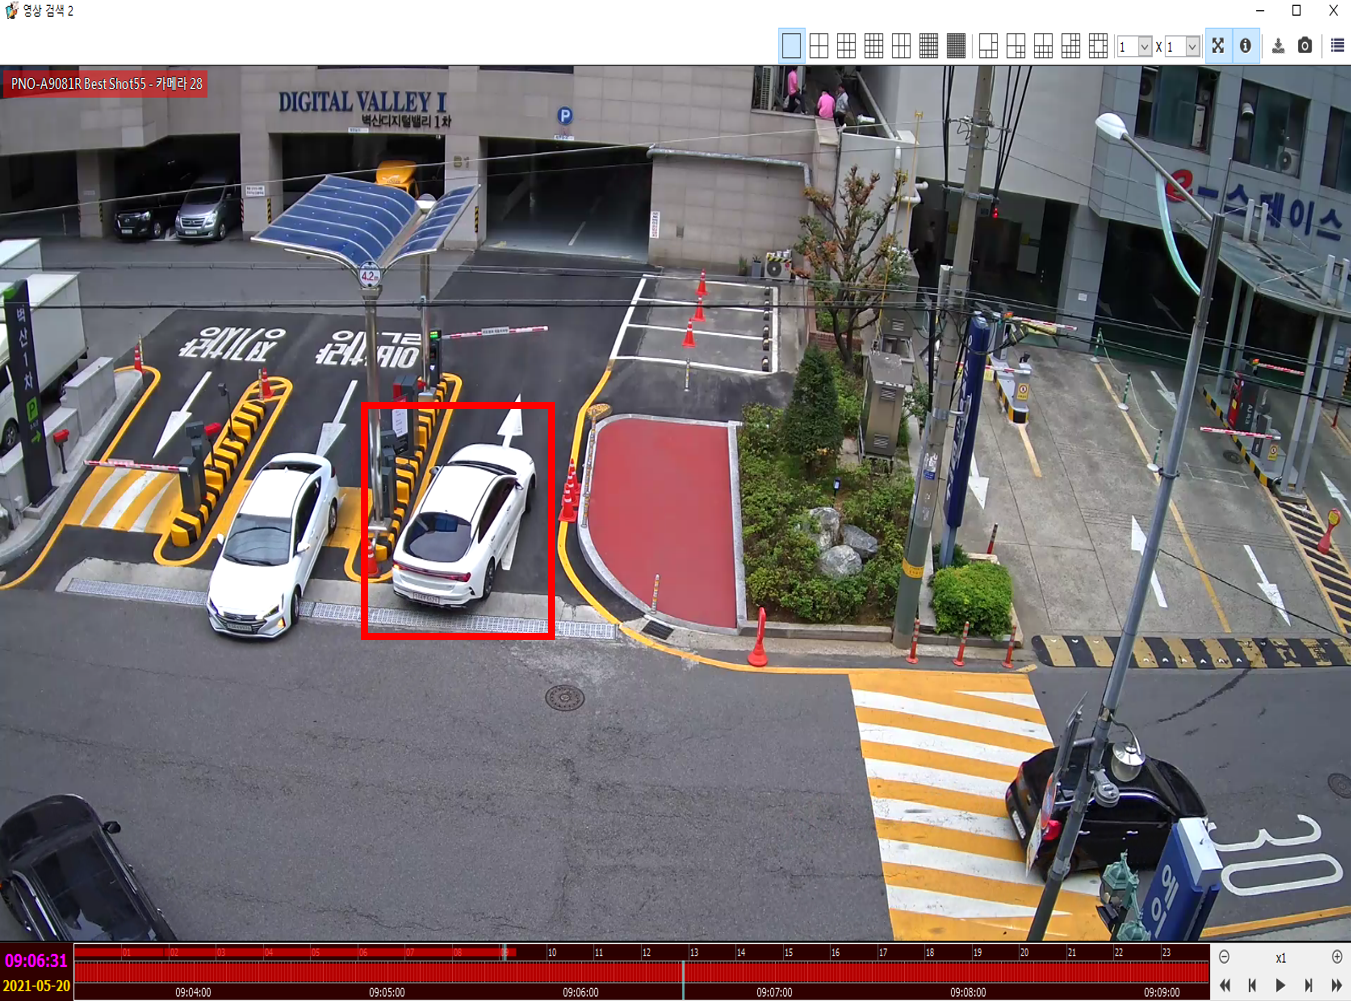
This is the search list of best-shot cameras where events occurred.
If you select the object where the event occurred, it is automatically enlarged as follows so you can check it.
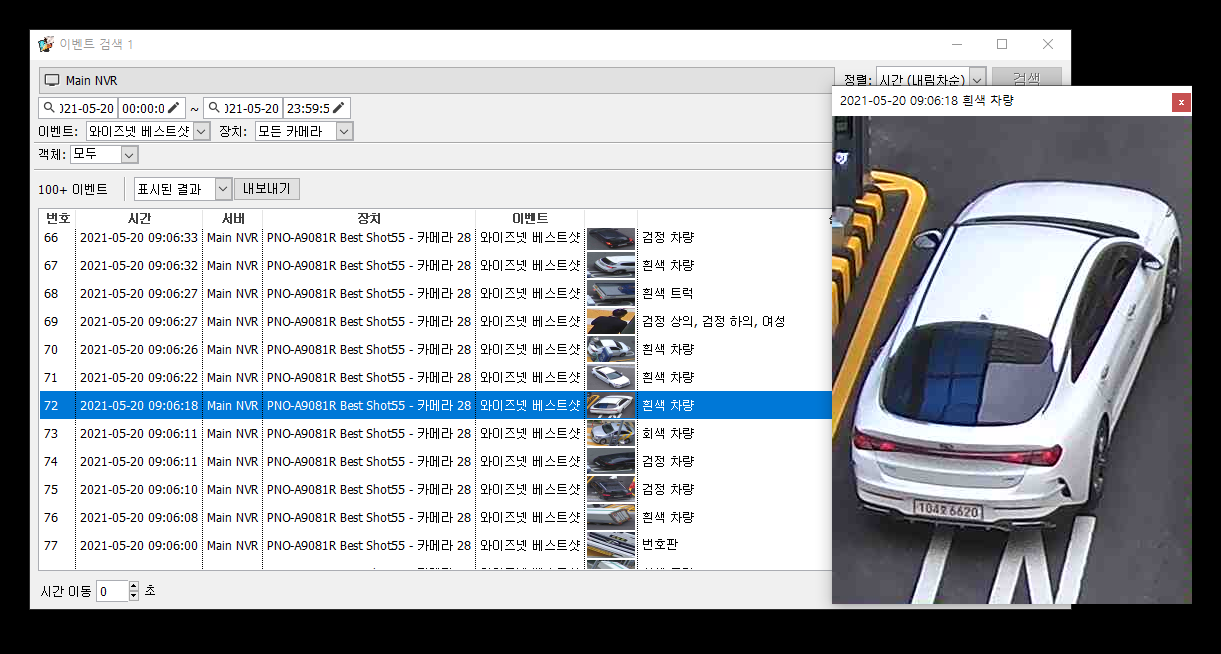
Double-clicking the search list lets you check the object where the event occurred as a real-time video, as follows.