DISK RAID Setting & Disabled RAID
How to set up RAID (based on EM-128B16H)
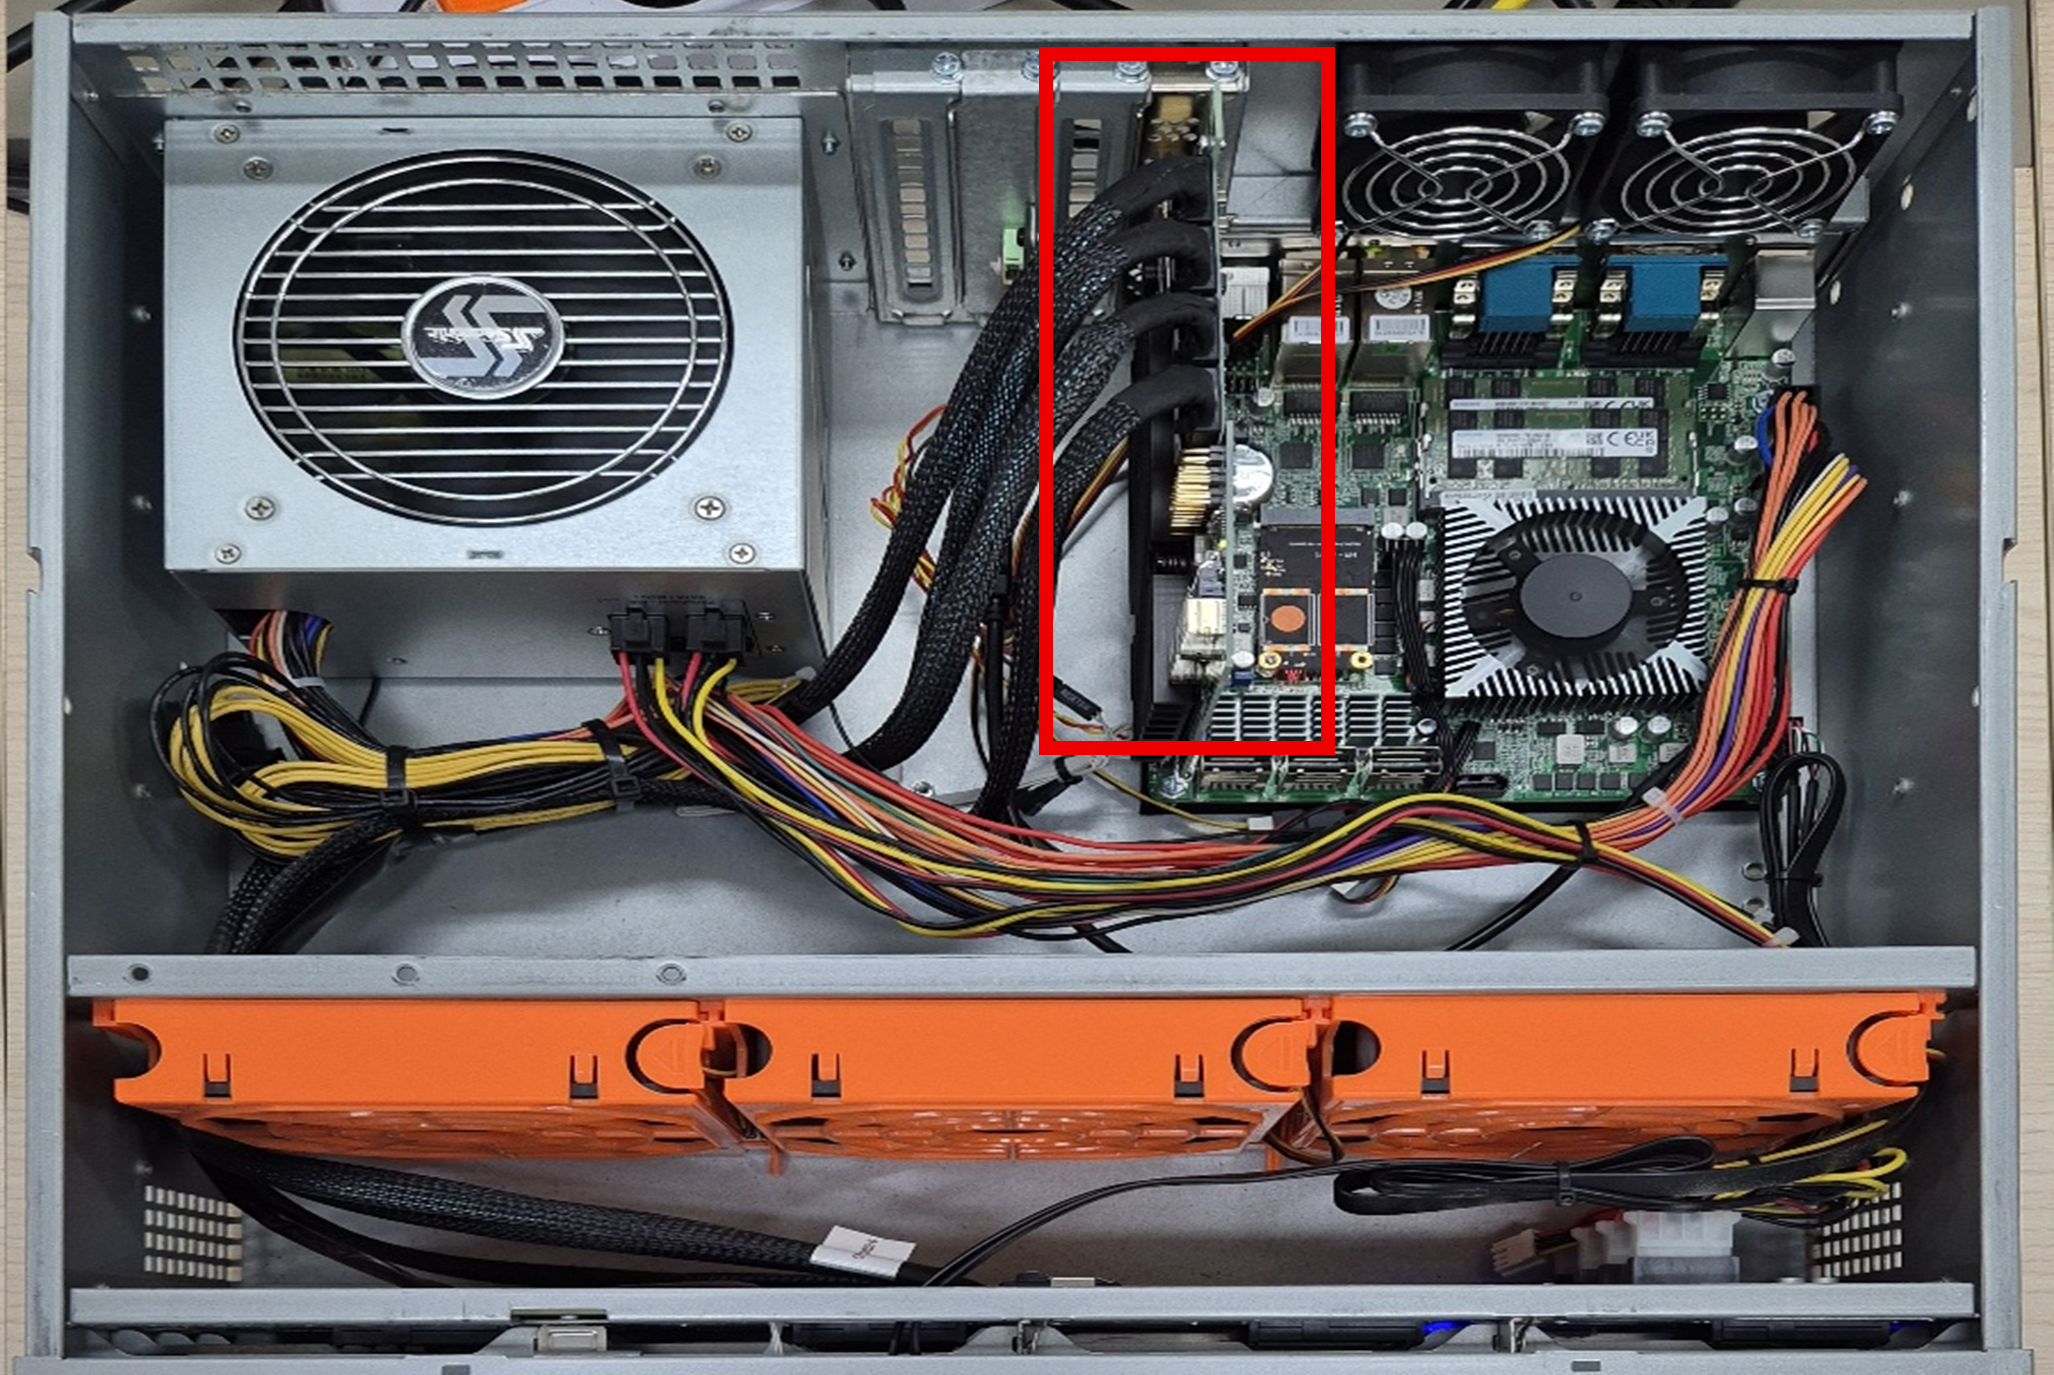
With the NVR power off, install the LSI9280-24i4e RAID CARD in the motherboard's PCI slot, then connect the hard-disk-recognition SATA CABLE to the card.
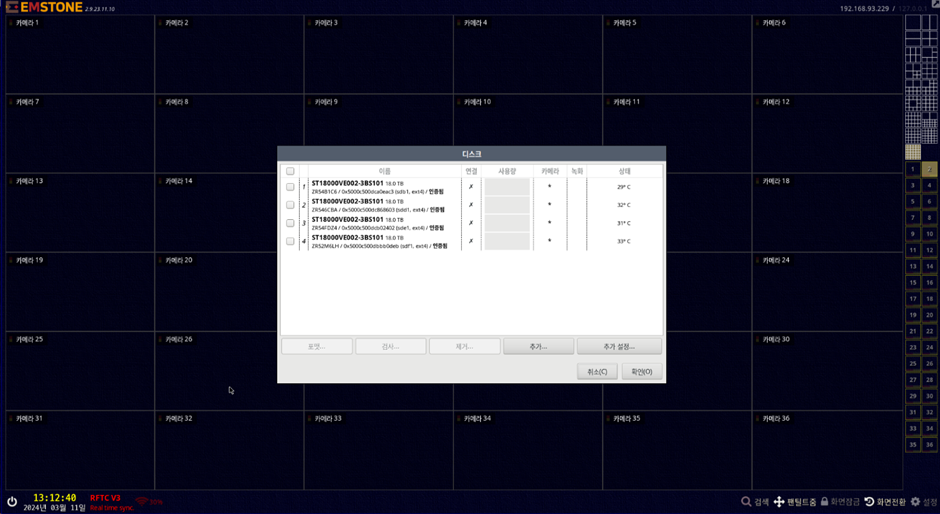
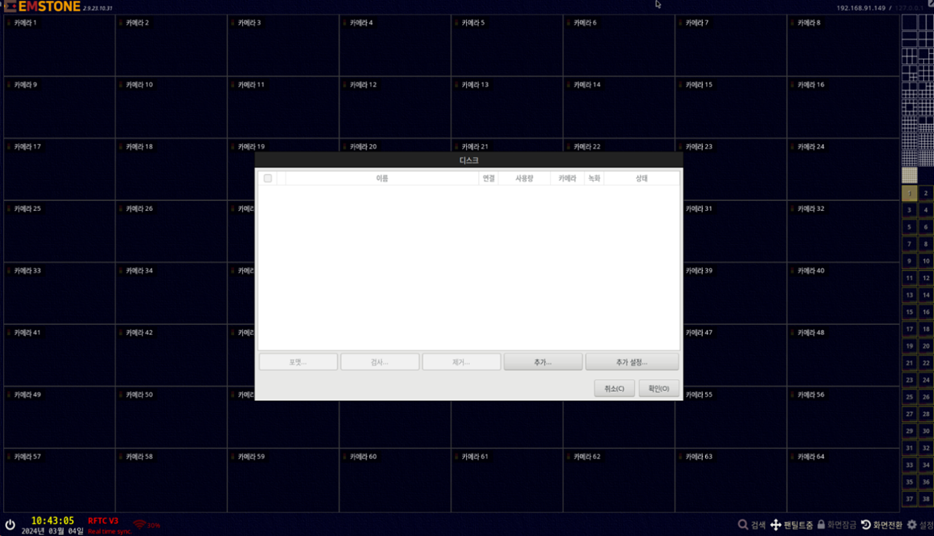
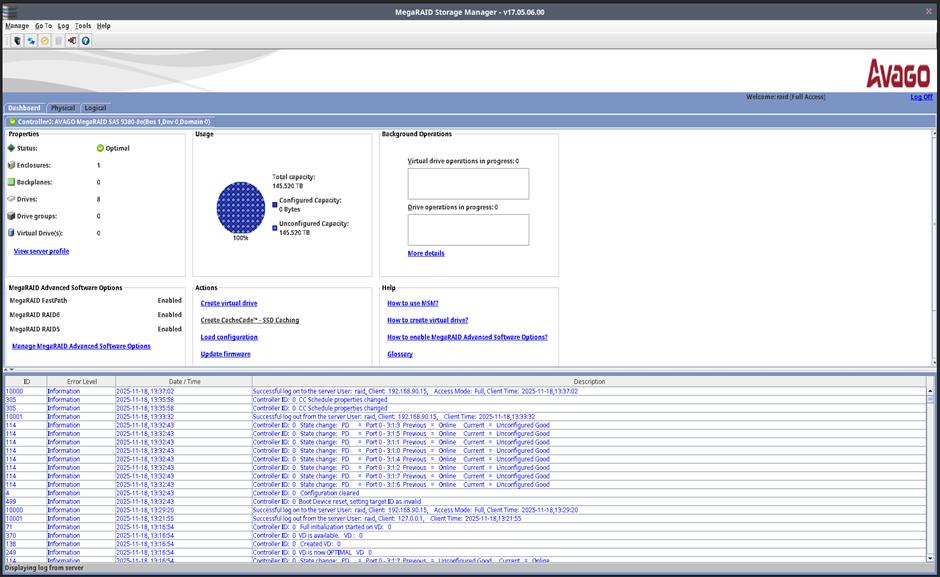
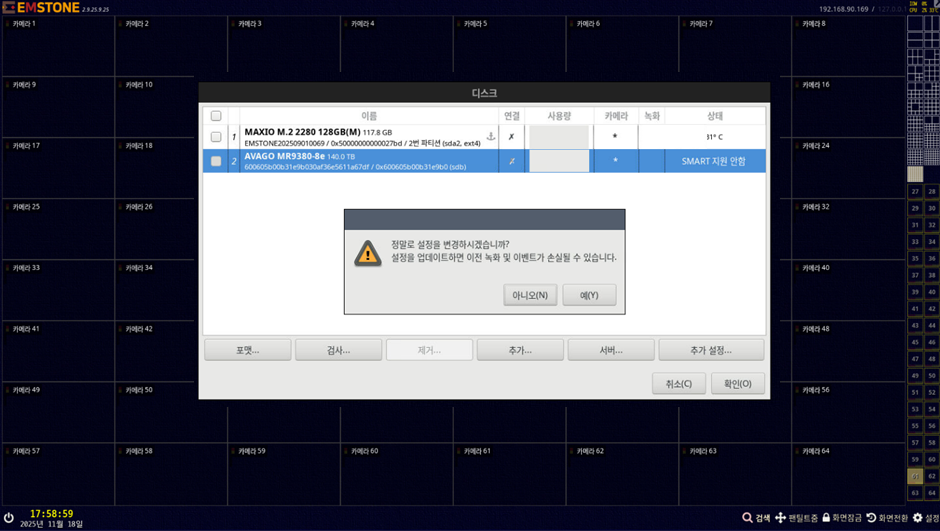
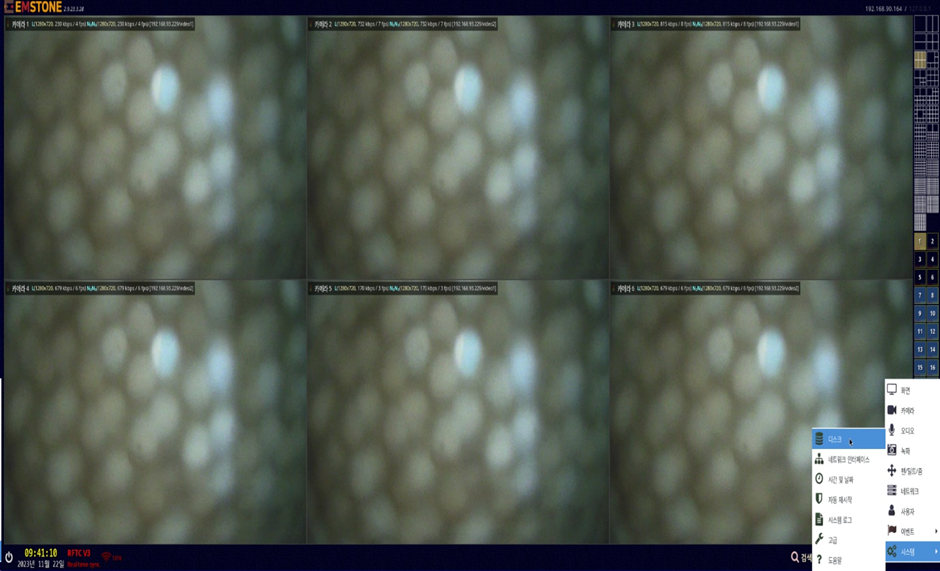
After booting, enter the Settings → System → Disk menu.
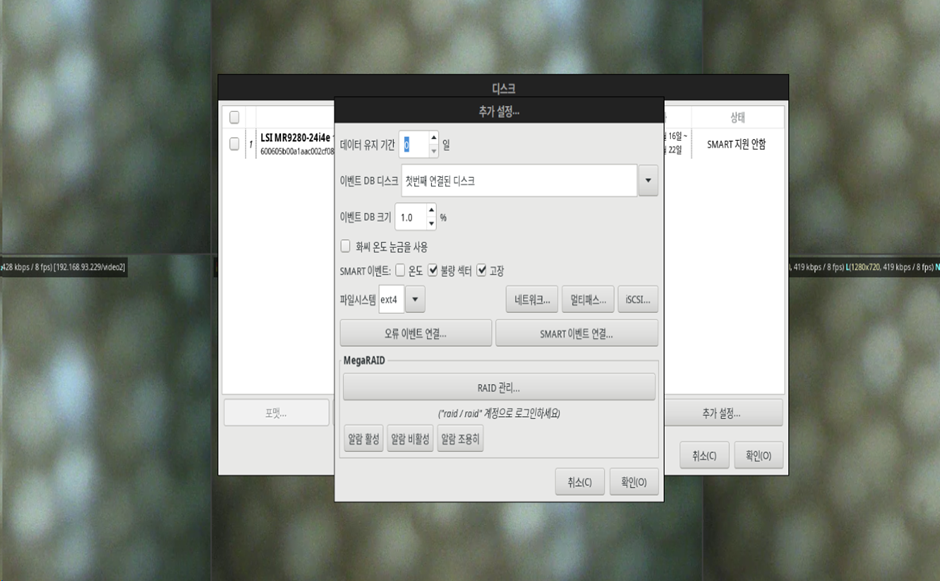
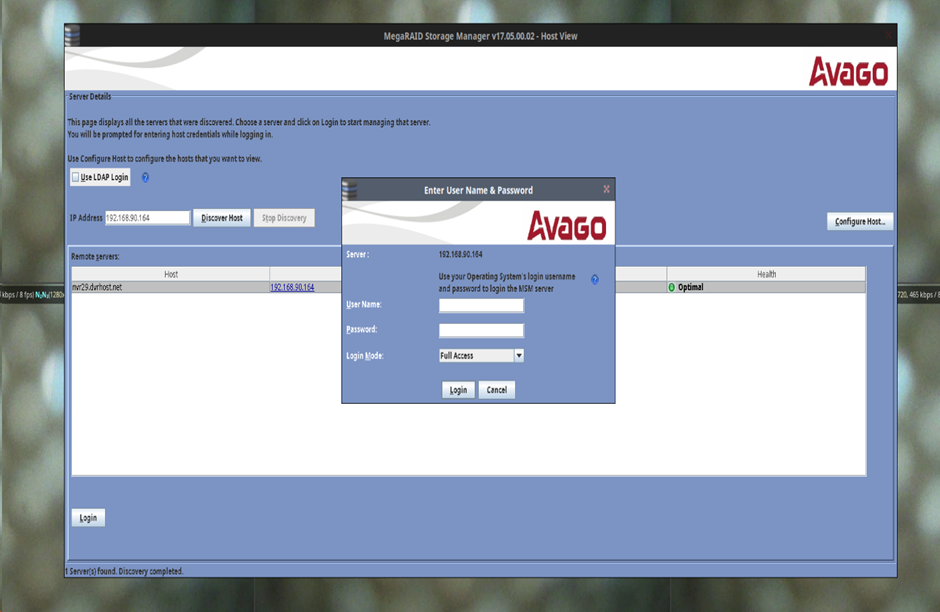
Enter the Additional settings → RAID management menu.
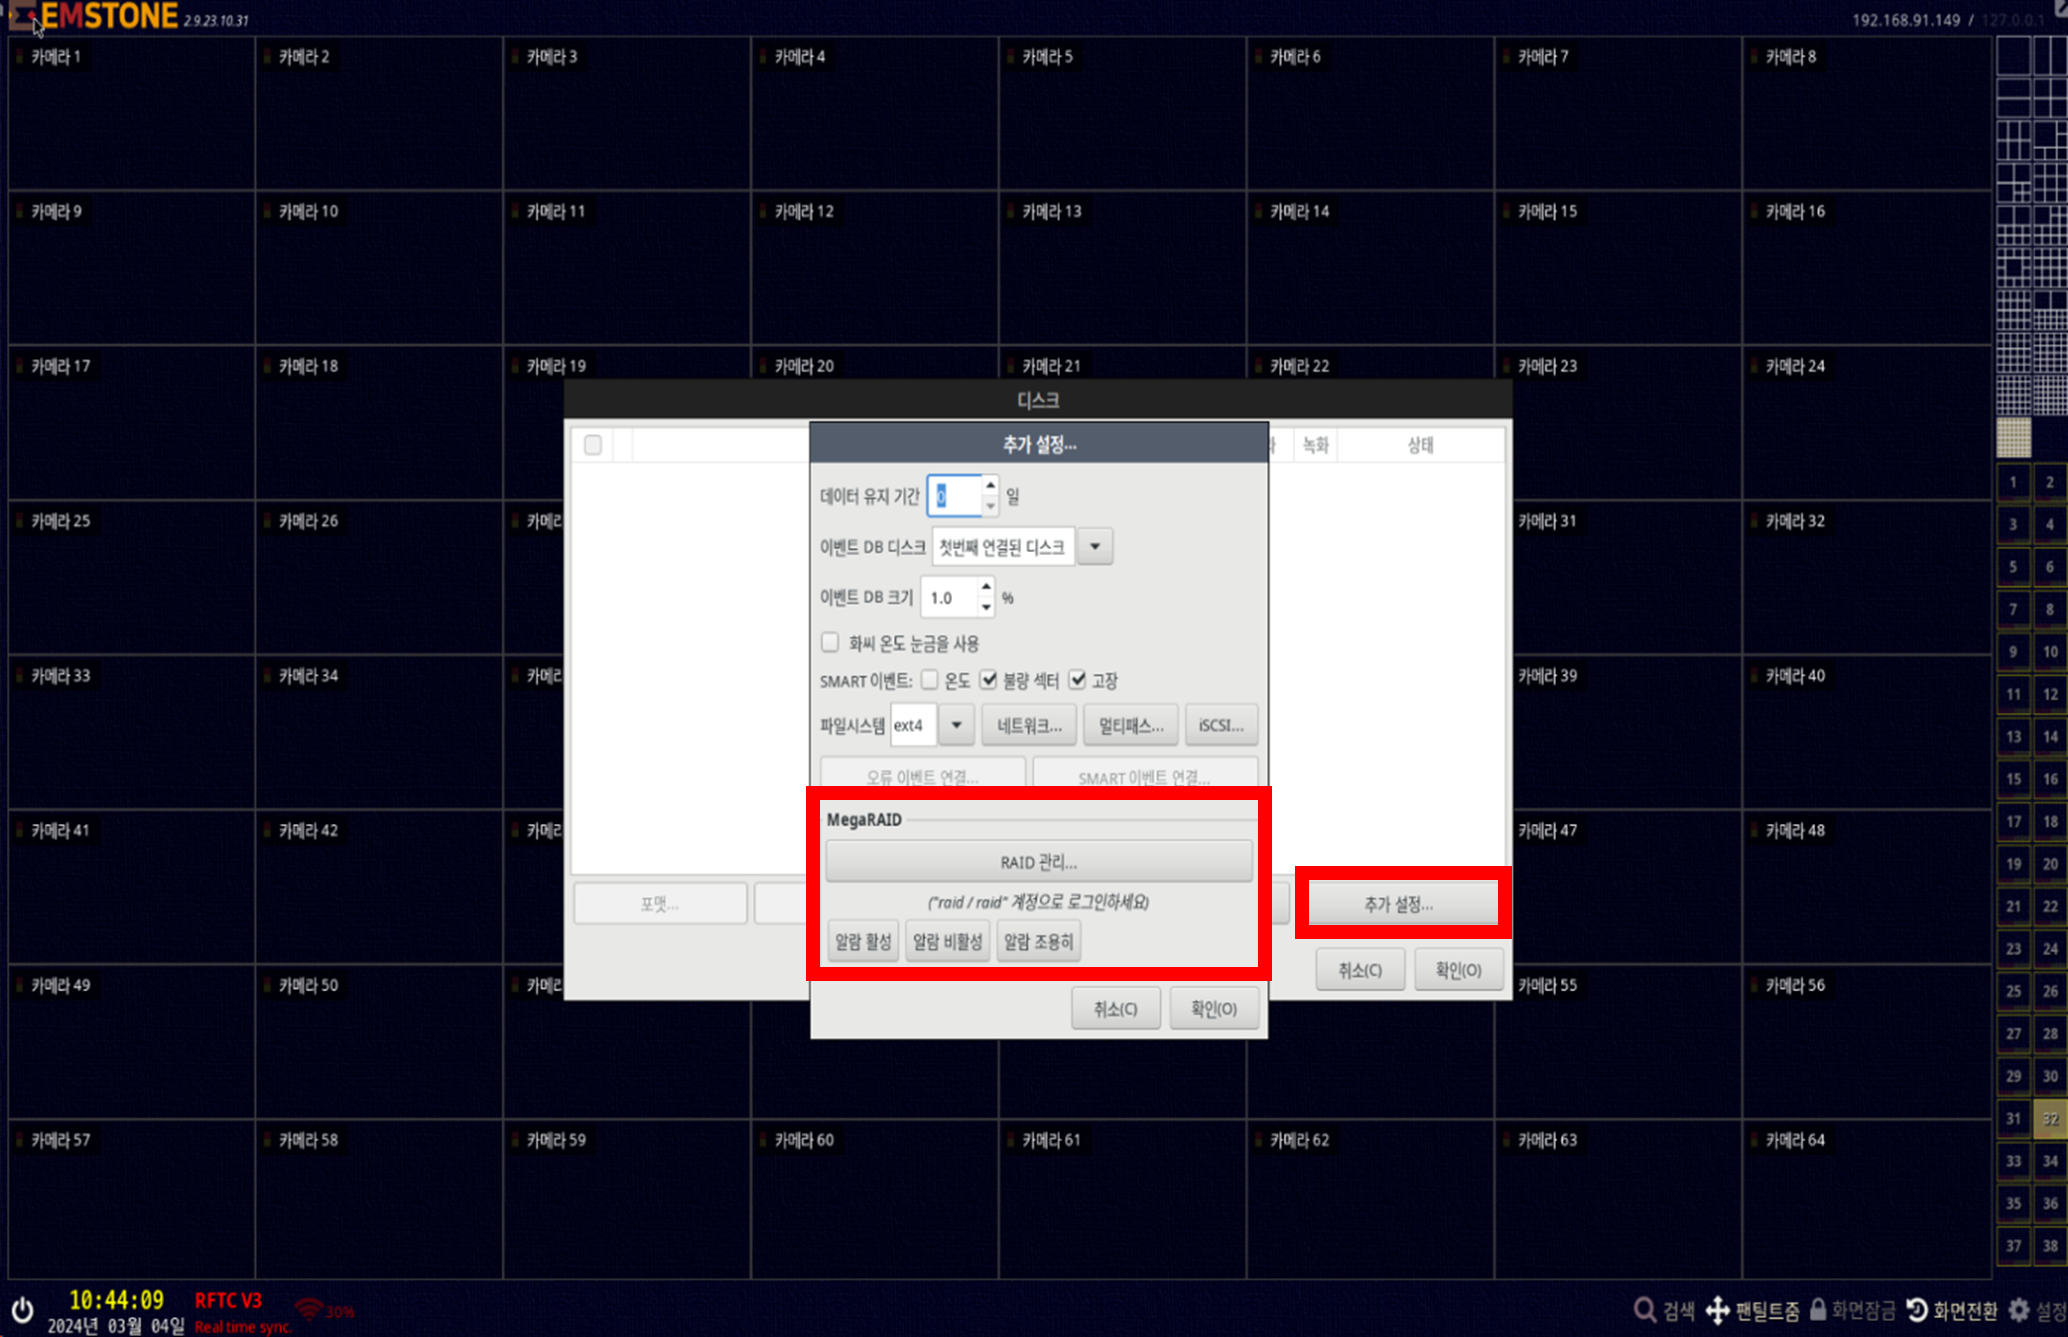
For the User Name and Password, please contact your sales manager.

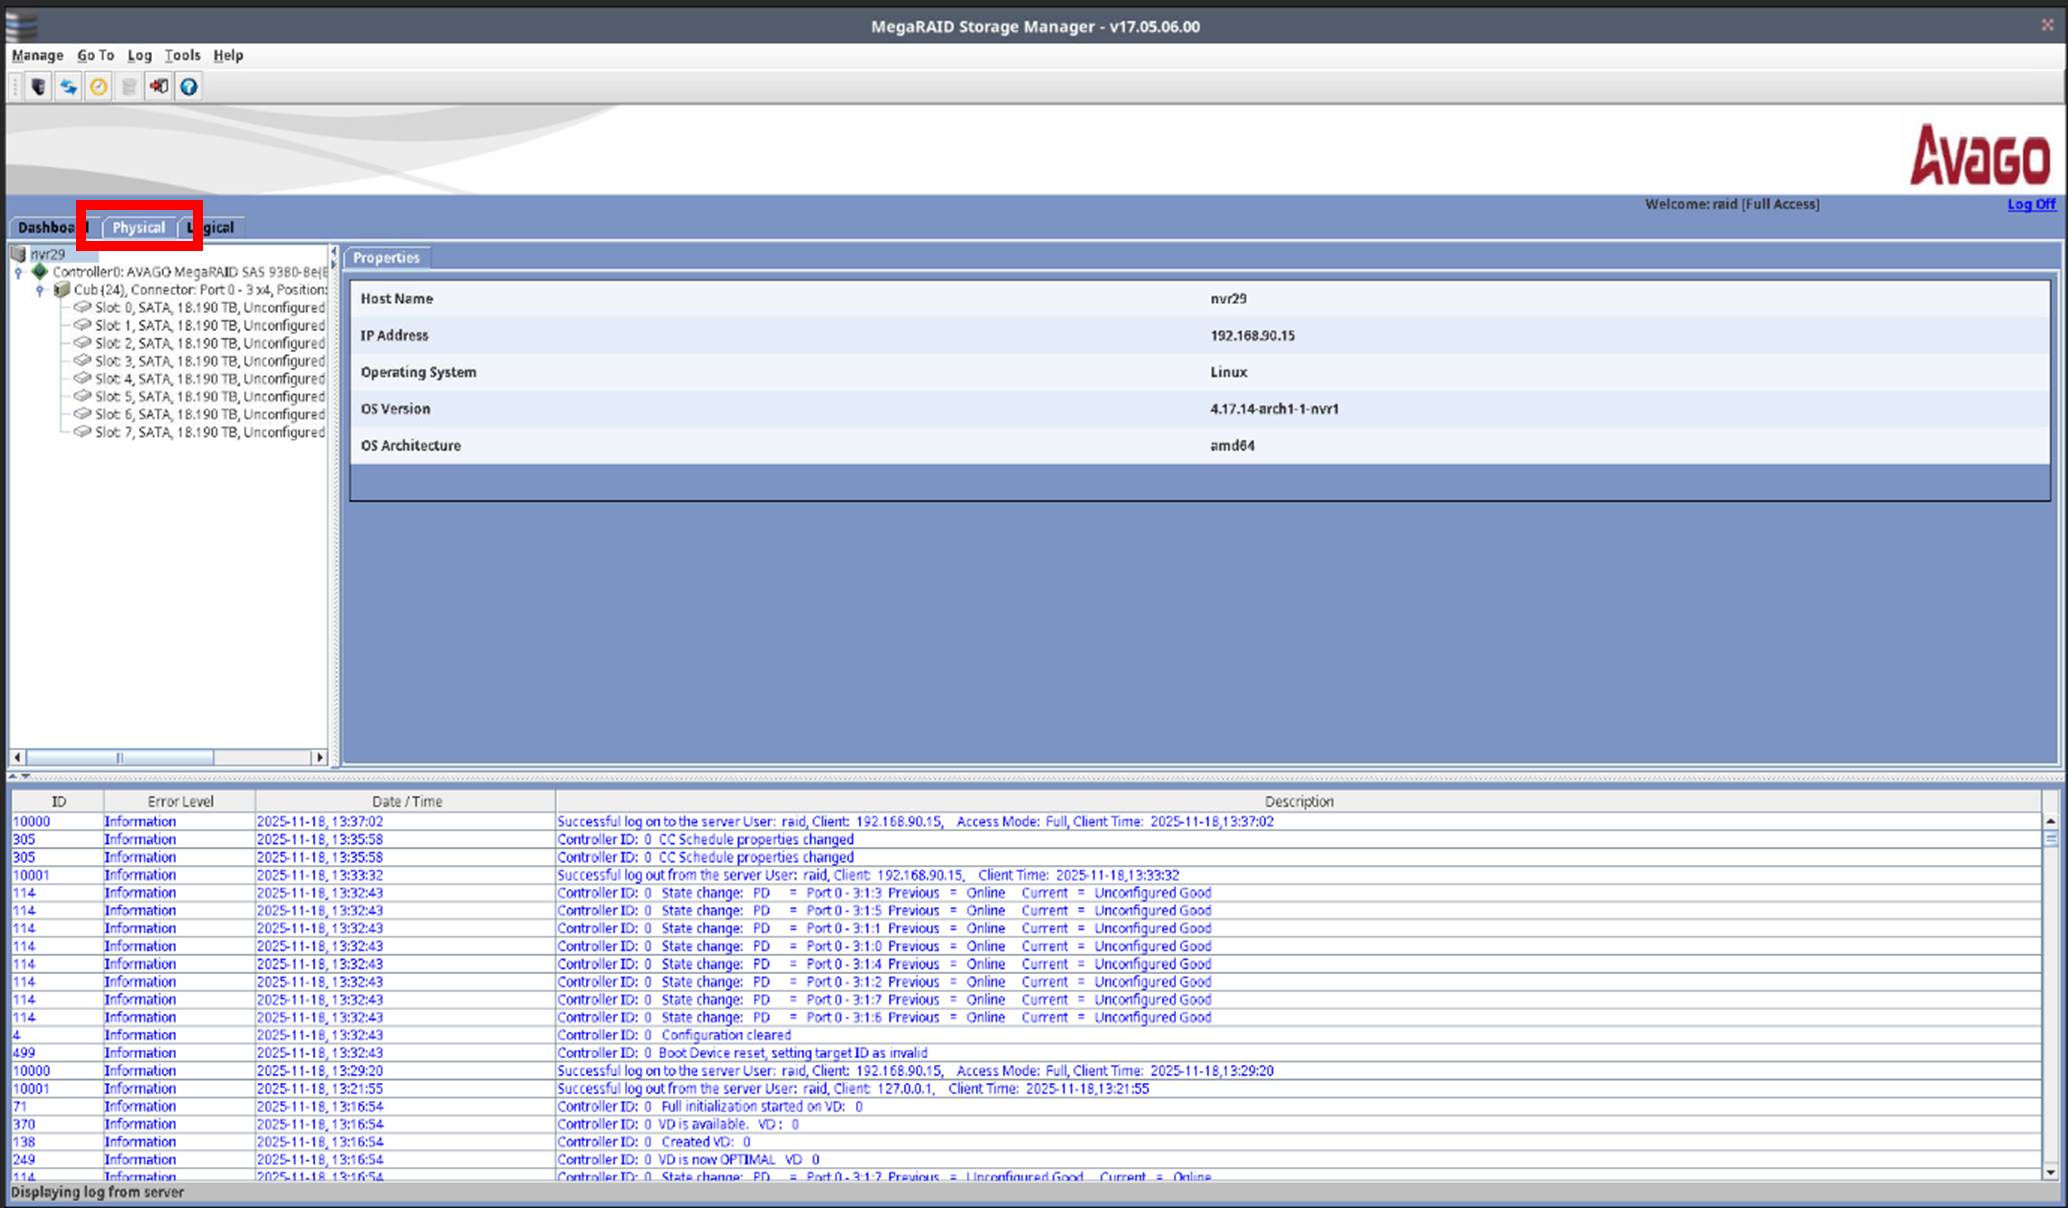
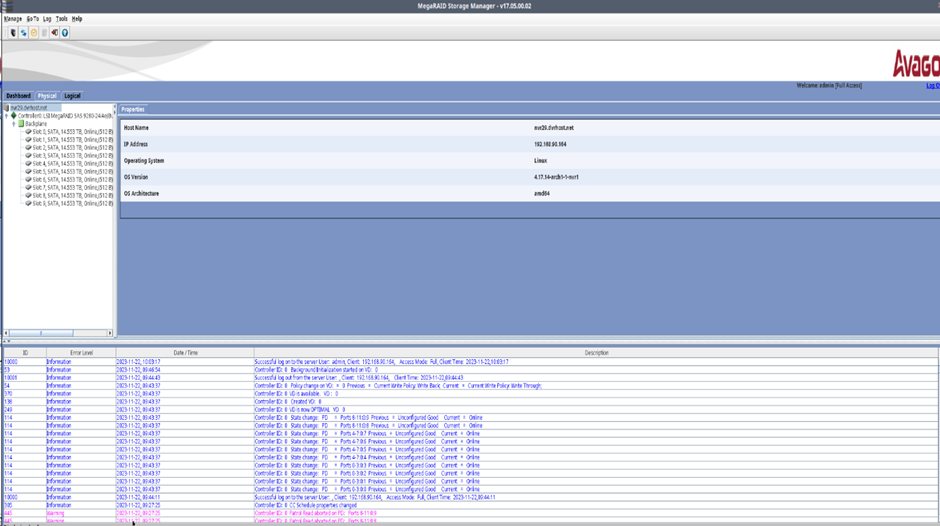
Enter the top Physical menu and check the recognized hard disks.
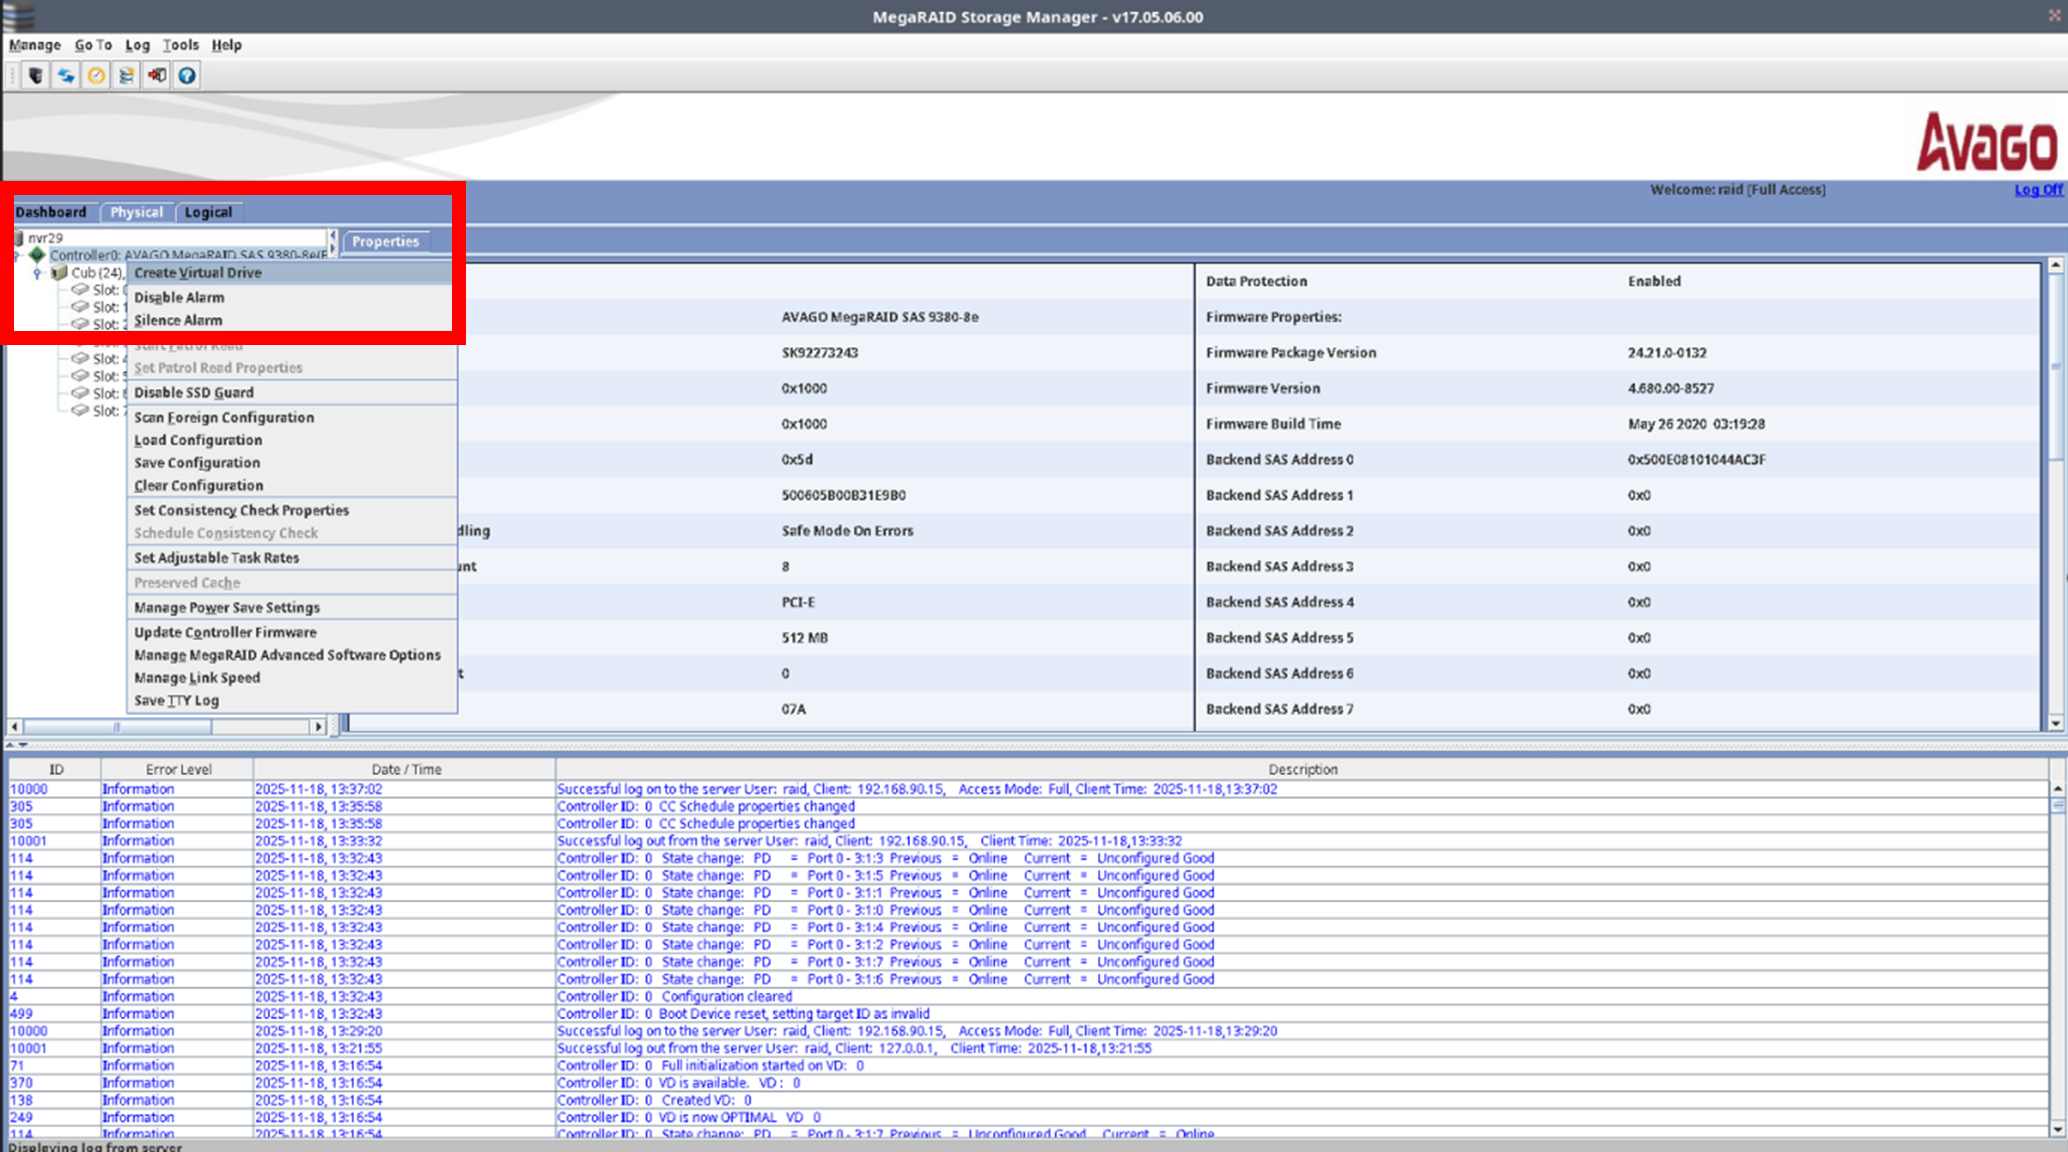
Hover the mouse over the Controller LSI MegaRAID menu, right-click, and select the Create Virtual Drive menu.
This is the step for selecting the configuration method when creating a RAID group. Simple is used when you want a standard configuration such as a quick RAID 1 or RAID 5 setup, and it is the fastest and easiest mode.
Generally, the Advanced mode is used, when you need to optimize performance for a specific purpose and directly control things like selecting only specific disks among several to configure a volume and the cache policy.

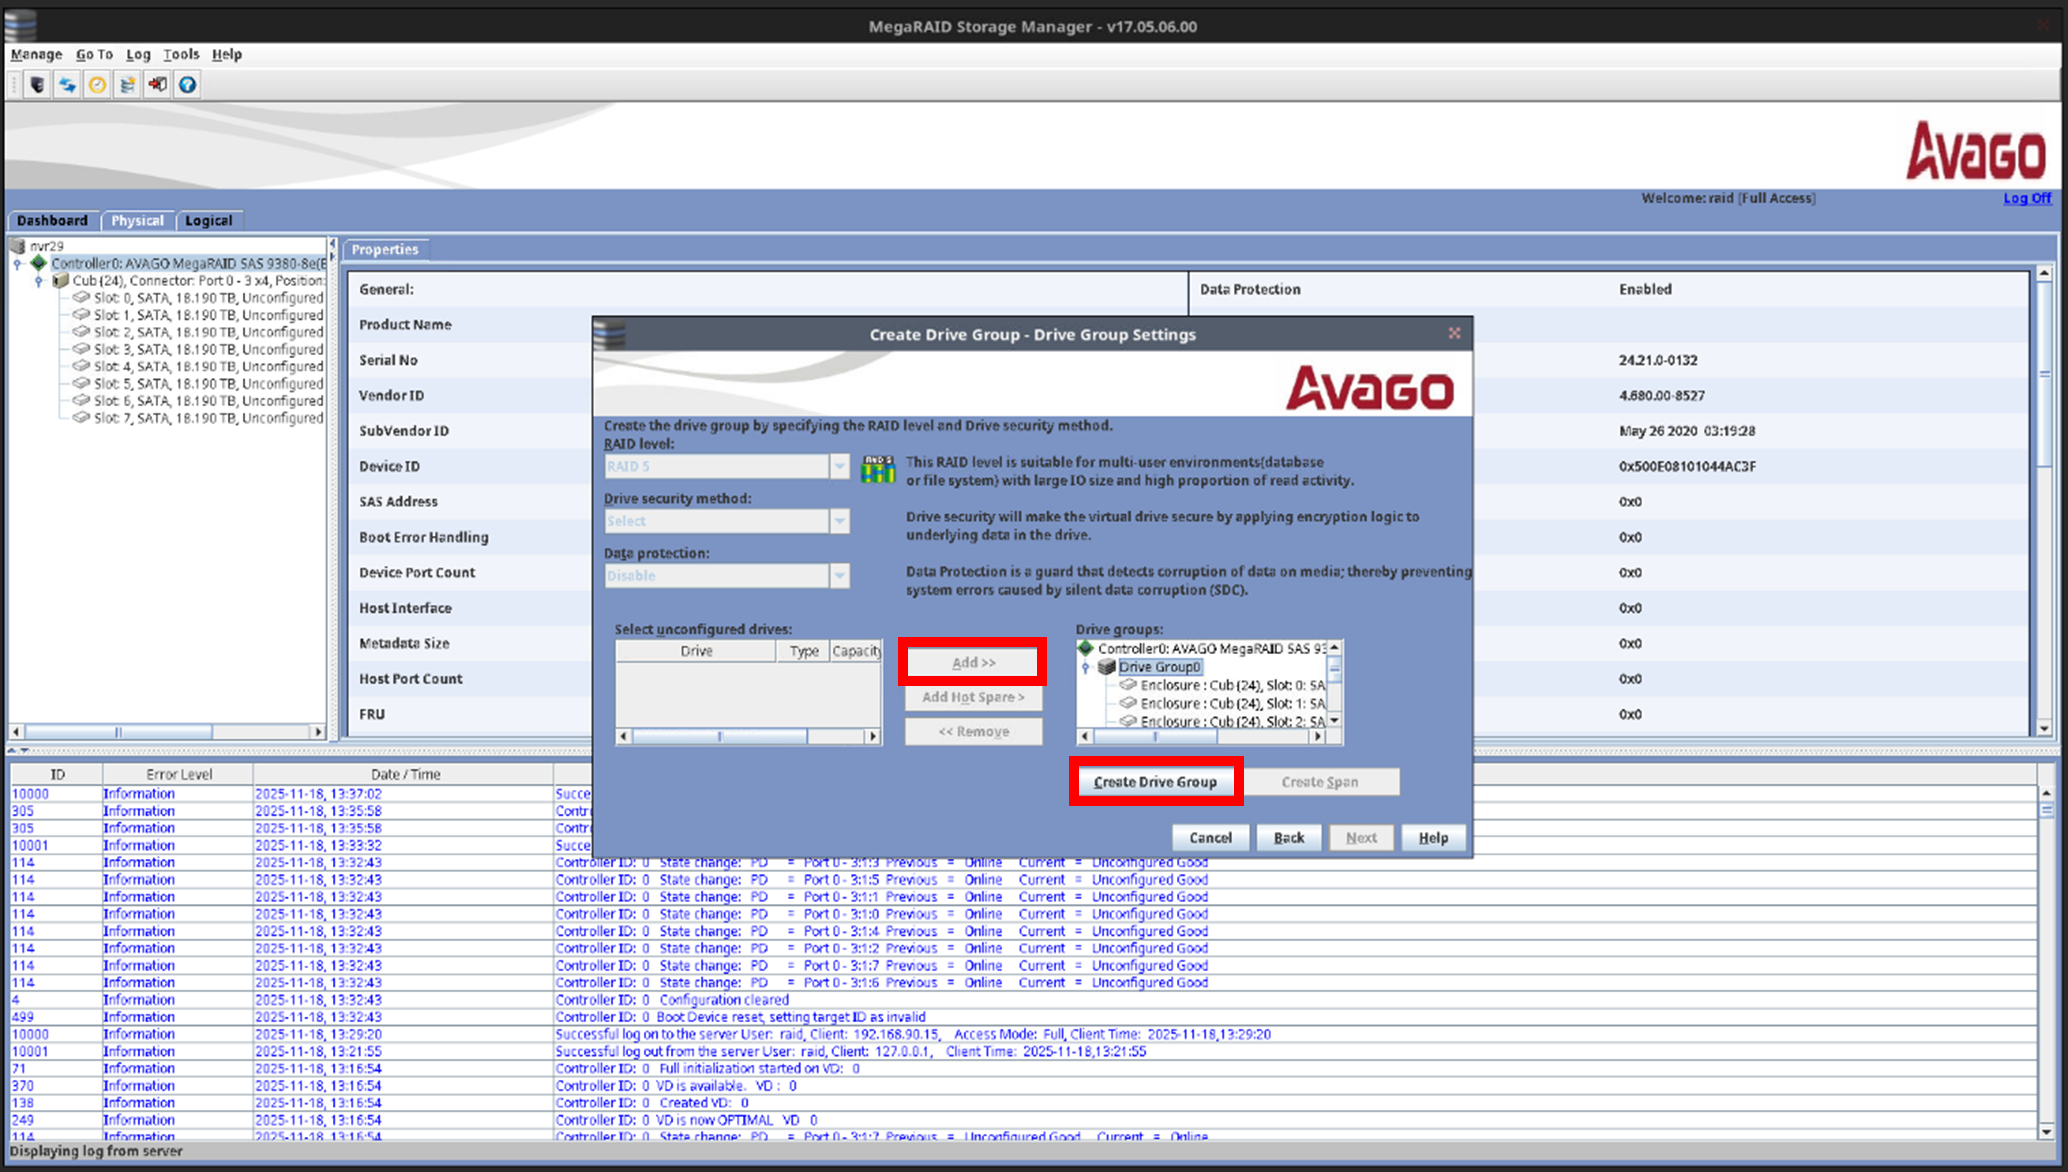
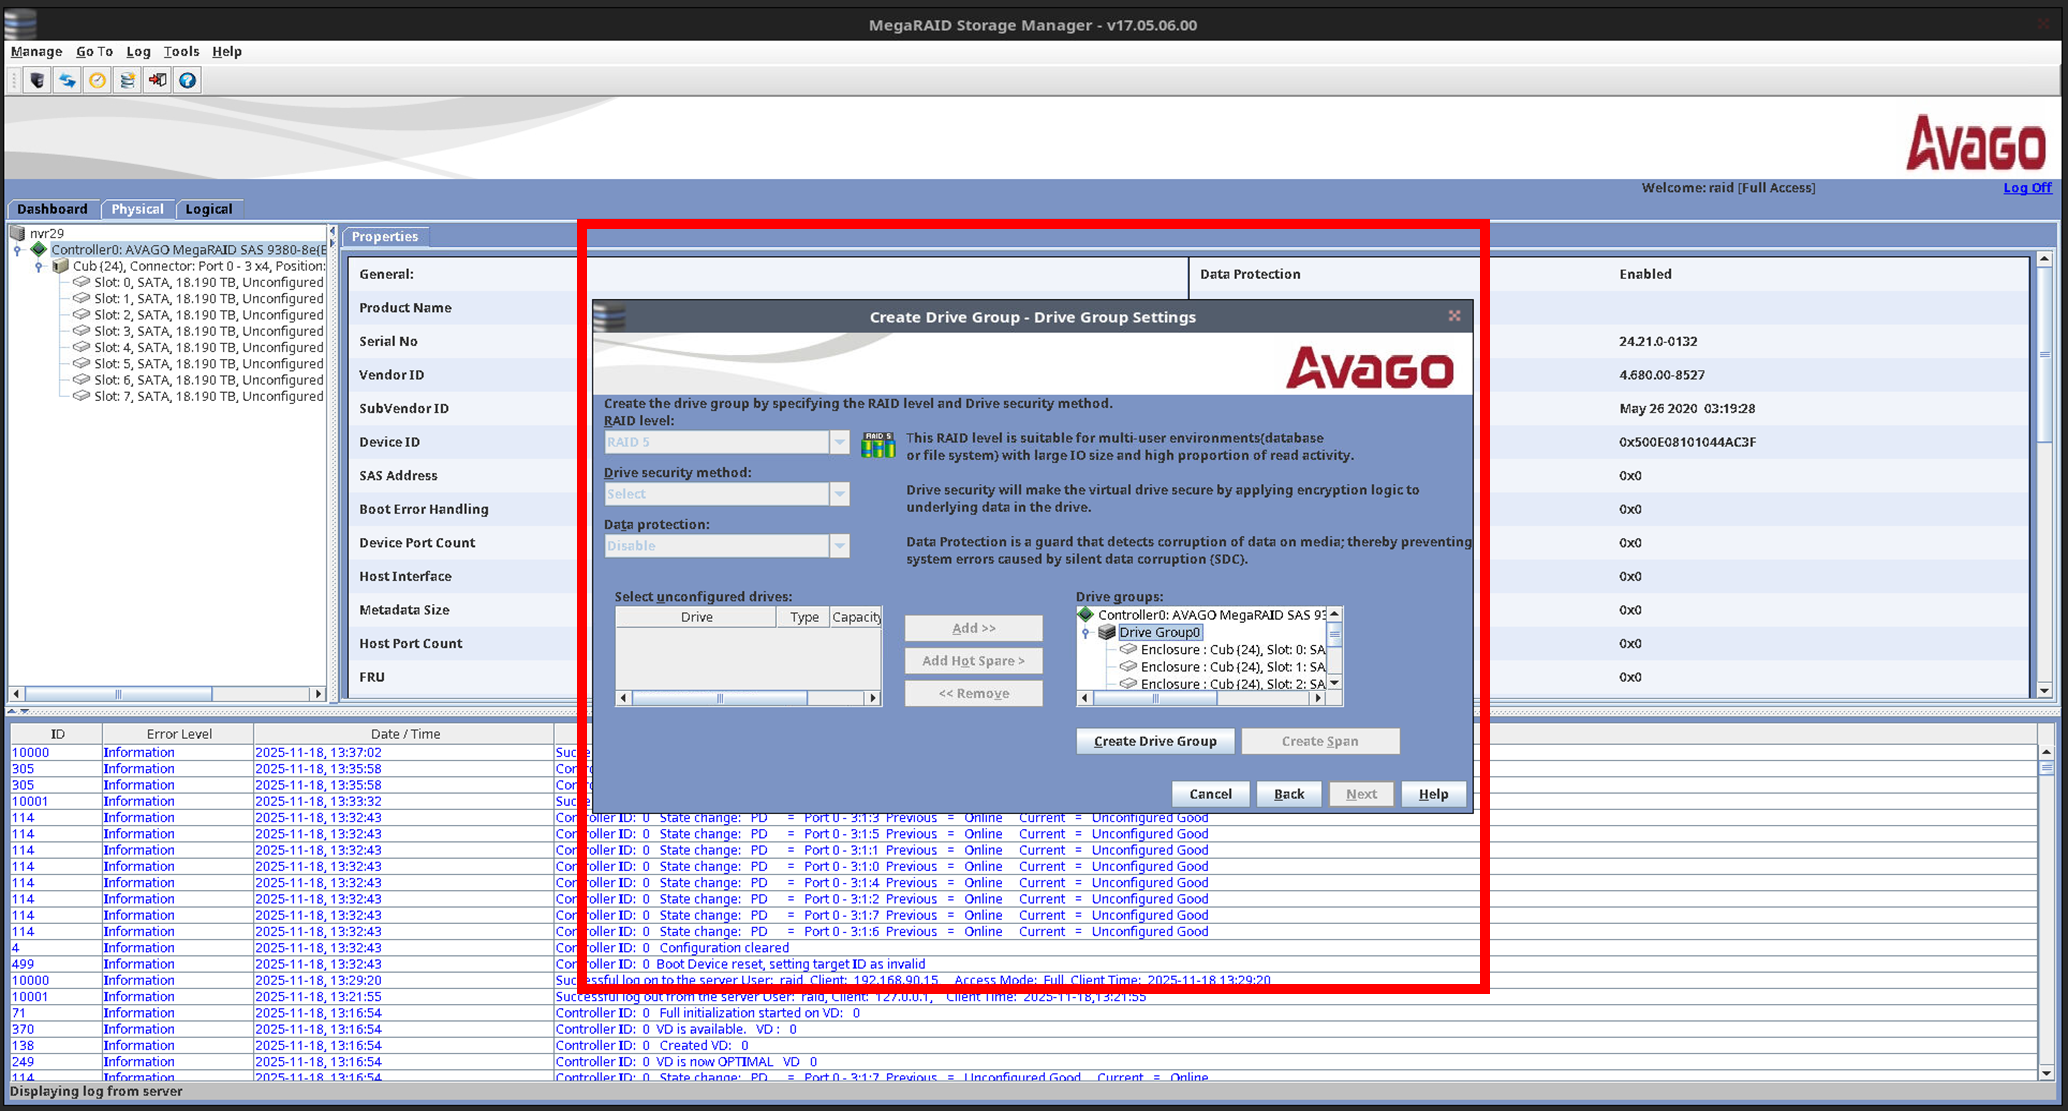
Select the RAID configuration method you want (RAID 0, 1, 5, 6, 00, 10).
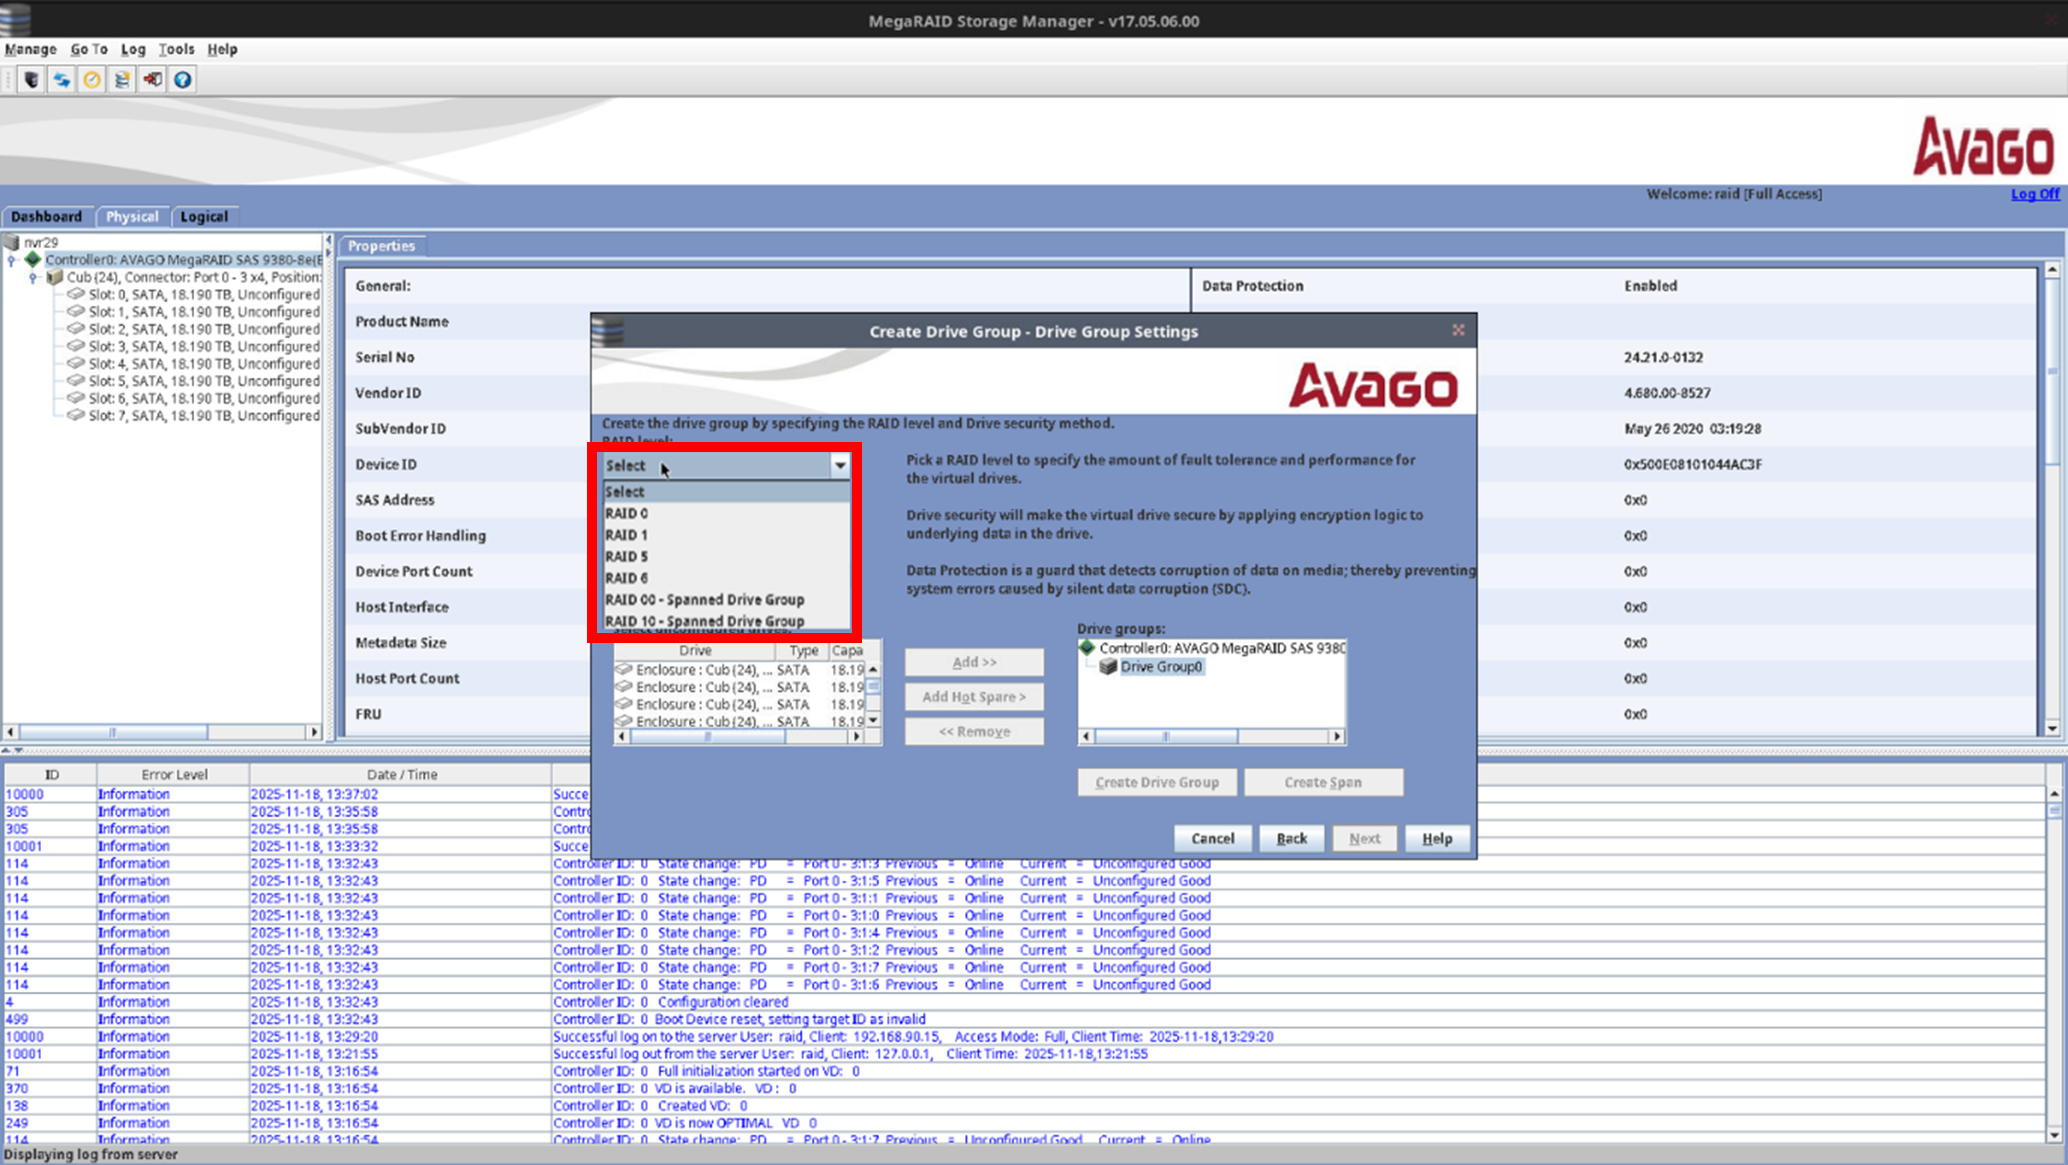
Among the recognized hard disks, select the disks to configure as RAID → press the Add button, then click the Create Drive Group menu to create a Drive Group.
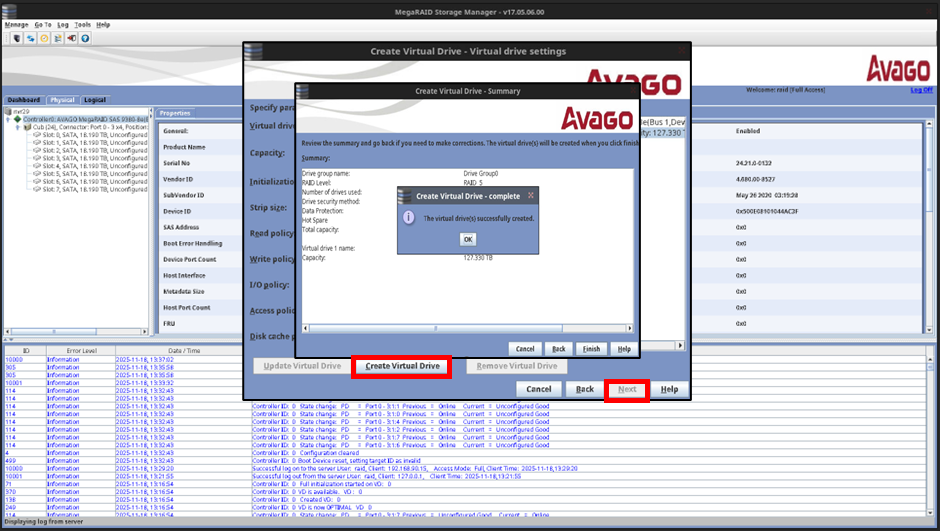
Set up the virtual drive.
Virtual drive name: Check the virtual drive number and name.
Capacity: Check the maximum available capacity of the RAID group.
Initialization state: If you need to use the new RAID array immediately, proceed with Fast Initialization; if you have time to spare, proceed with Full Initialization, the most stable option, which checks for disk bad sectors and guarantees 100% parity consistency.
※ For stability, we recommend proceeding with Full Initialization whenever possible.
Strip size: Set it to 256KB, which is suitable for sequential I/O, improved data throughput, large file backup/storage, media streaming, and other continuous access to large files.
Read Policy: Always Read Ahead is the always-read-ahead method, which gives very fast sequential file read speeds.
Write policy: Always Write Back is a method for maintaining uninterrupted, stable recording performance and always keeping a fast mode to continue recording.
I/O policy: With Direct I/O, the application communicates directly with the controller cache without going through the OS file-system cache. It is used to avoid duplicate caching and maximize performance when using the Write Back cache.
Access policy: Set it to Read Write so that data can be read and written.
Disk cache policy: This is a policy on whether to use the small cache built into each individual physical disk, rather than the RAID controller cache.\ Disabled is the standard setting; all data control is entrusted to the safe controller cache (Write Back) protected by the BBU, and the unprotected individual disk caches are turned off.
Select the Create Virtual Drive menu to create the virtual drive, press the Next button, and check the virtual drive creation completion window.
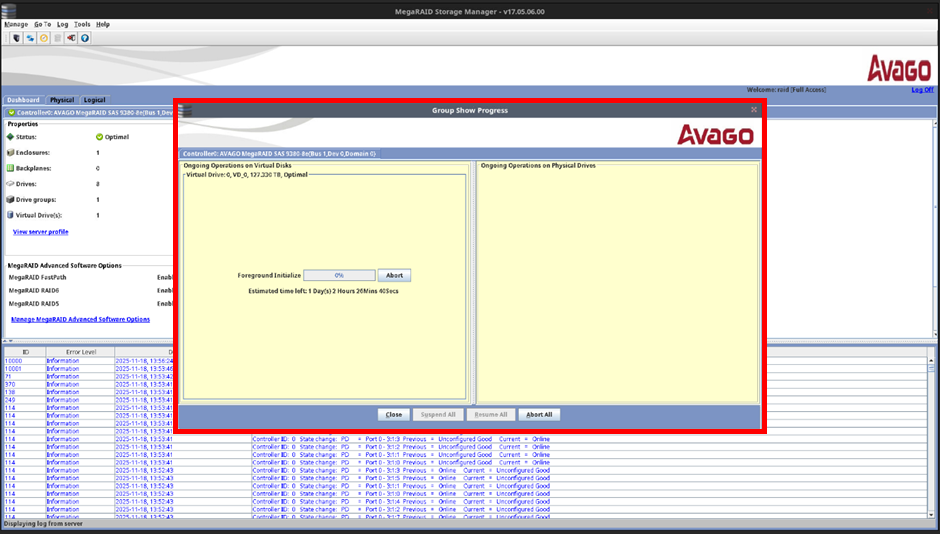
Access the More details menu in the Dashboard window and check the disk being initialized.

Check the progress of the initialization task, which prepares the volume in the most stable state by guaranteeing 100% RAID parity consistency and checking whether there are bad sectors on the disk.
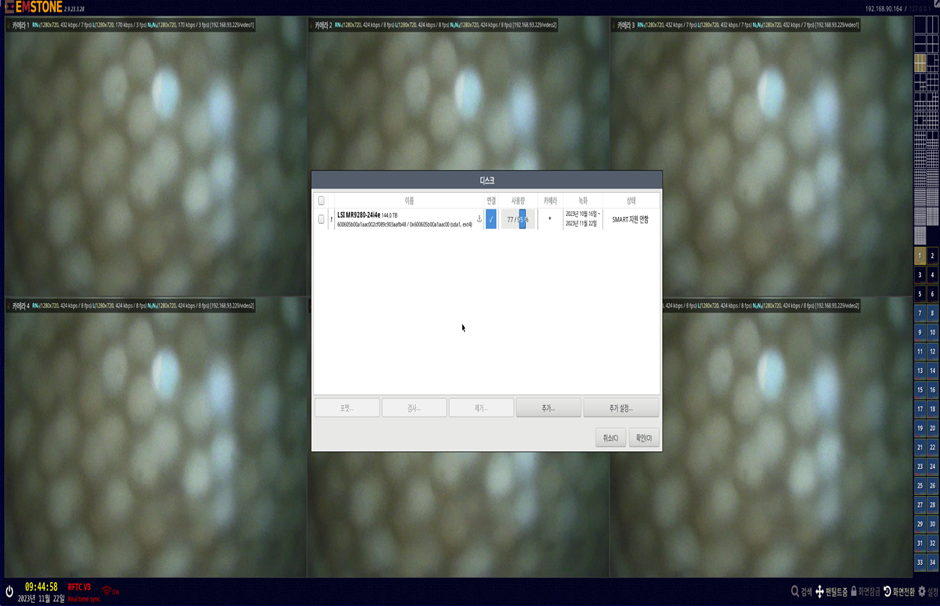
Enter the Settings → System → Disk menu, and once the RAID-configured disk is recognized, perform a low-level format and then connect it.
Disabling the RAID configuration
Enter the Settings → System → Disk menu.
Check the RAID-configured disk.
Enter the Additional settings → RAID management menu.
For the User Name and Password, please contact your sales manager.
Enter the top Physical menu and check the recognized hard disks.
Hover the mouse over the Controller0: LSI Mega RAID SAS 9280-244i4e menu, right-click, and select Clear Configurations.
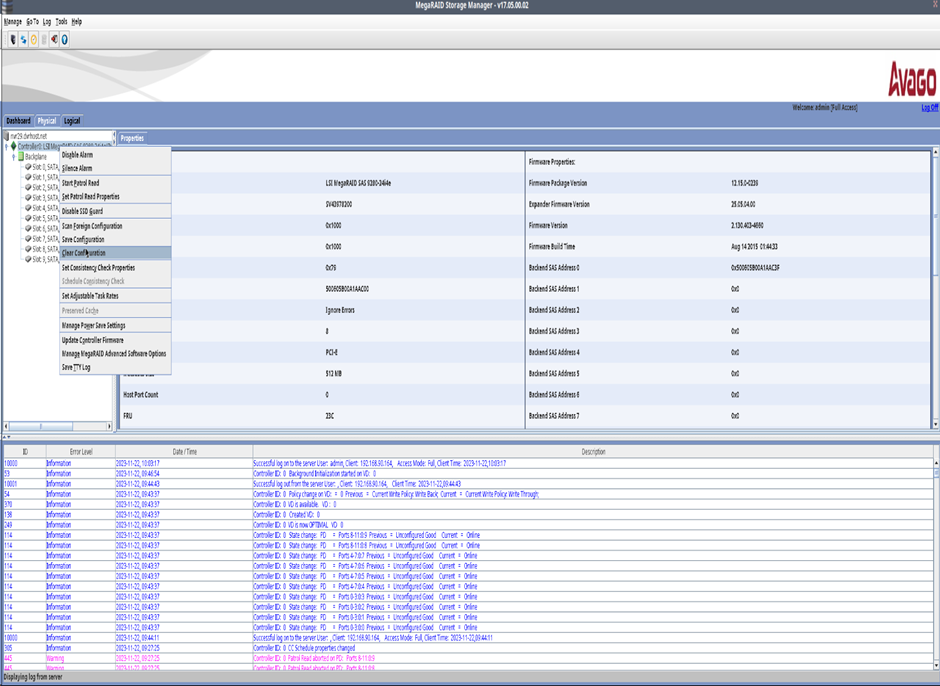
As the RAID configuration is released, the existing hard-disk connection is deactivated.
To use the standard hard-disk method after powering off the NVR, you must remove the RAID card and connect the attached SATA cable to the motherboard's SATA port.

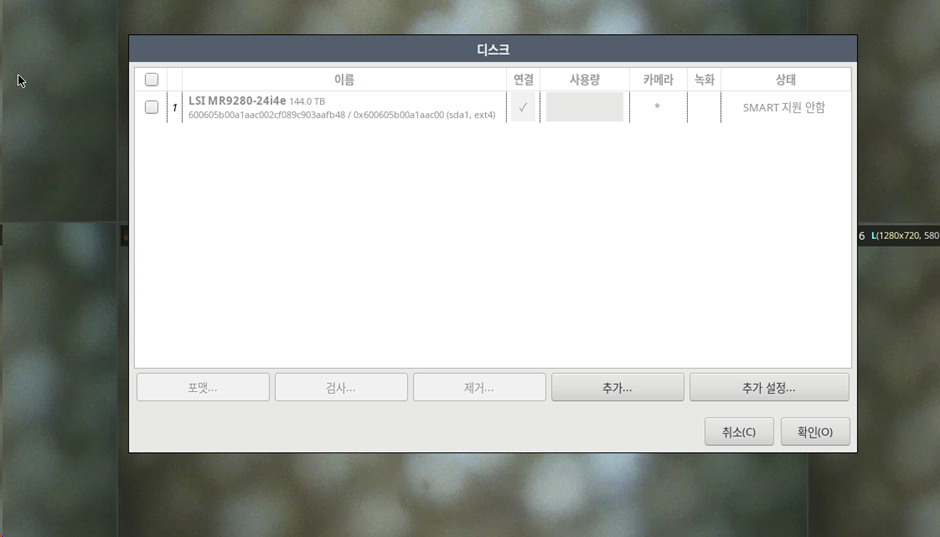
The hard disk with the RAID configuration released is now recognized.