Guide to Enabling Recording via NVR DI Signals
This guide explains how to enable NVR recording using a DI (Digital Input) signal from an external device or a camera.
Reference document: EMSTONE NVR User Manual (2022.10.20)
Overview
Recording based on a DI signal is configured in the following order.
- Connect the DI signal to an NVR sensor number
- Configure sensor properties
- Link recording to the sensor event (Event Mapping)
- Check recording options
- Verify operation
1. Connecting a DI signal to an NVR sensor number
There are two ways to receive a DI signal.
Method A. Using a camera DI
- In
Settings > Camera Settings > Add & Manage Network Camera, select the target camera. - Click the Check Connection & Inputs button to update the sensor/relay information provided by the camera.
- In Advanced settings > Sensor, assign the camera's DI to an NVR sensor number.
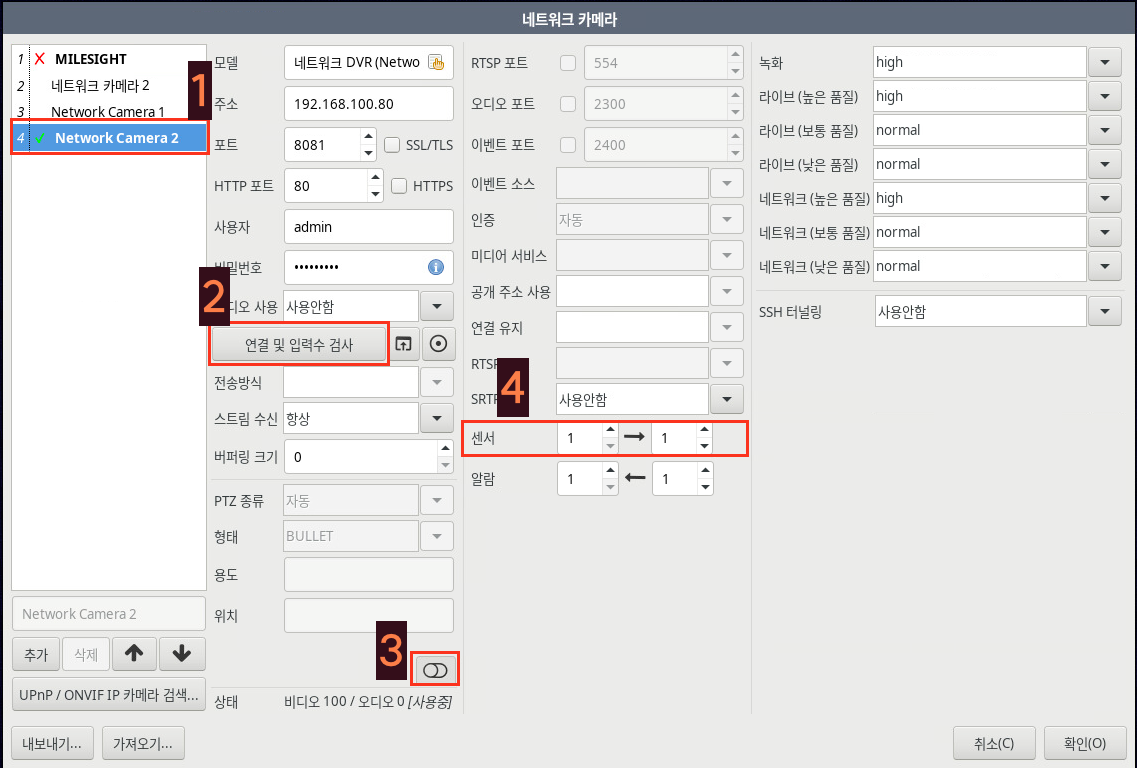
Method B. Using a USB DIO device
- Connect the USB DIO device to the NVR.
- Simply connecting it automatically assigns sensors 1–4, so no additional configuration is needed.
2. Configuring sensor properties
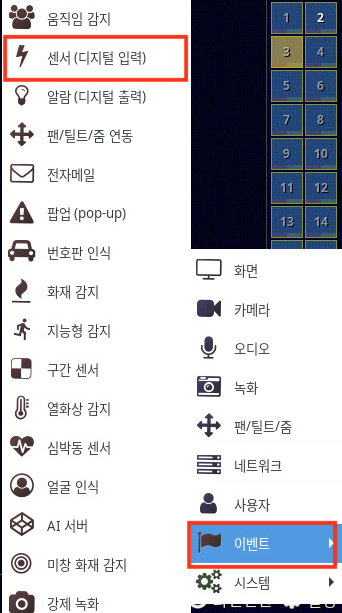
Go to Settings > Event Settings > Sensor.
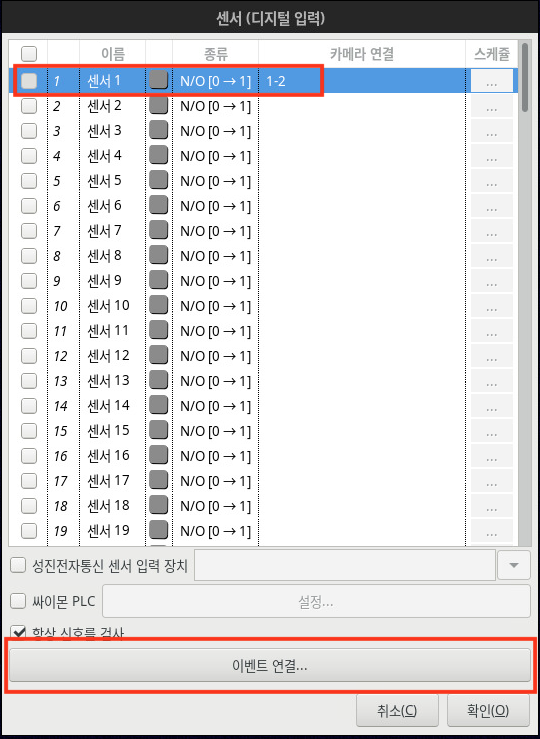
- Select the Type for the sensor number you'll use, according to the characteristics of the external device.
- N/C [0→1]: Normally Closed
- N/O [1→0]: Normally Open
- To configure multiple sensors identically, select them with the checkboxes in the first column and configure them together.
Note: The Type setting is only enabled on devices with a capture card.
3. Linking recording to the sensor event (Event Mapping)
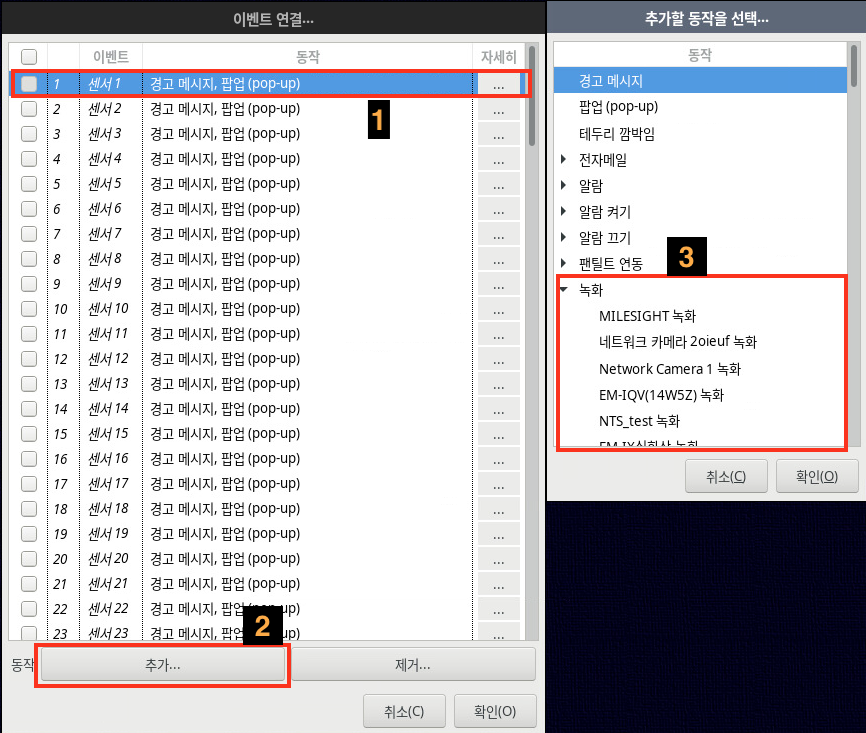
- In the sensor's advanced features, click the Event Mapping... button.
- Select the row for the target sensor (e.g., Sensor 1) from the list.
- Click the Add... button at the bottom.
- In the action selection window, expand Recording, select the camera(s) to record, and click OK.
- Confirm that
<camera name> Recordinghas been added to the Action column, then click OK to save.
List of available actions
| Action | Description |
|---|---|
| Warning Message | Displays a warning message (linked by default) |
| Pop-up | 1x1 pop-up of the camera video (linked by default) |
| Border Blink | Blinks the camera border |
| Sends an email | |
| Alarm | Triggers an alarm (DOUT) signal |
| Alarm On / Alarm Off | Turns the alarm on / off |
| PTZ Link | Links a PTZ preset |
| Recording | Records the specified camera (the core of this guide) |
4. Checking recording options
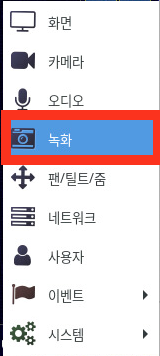
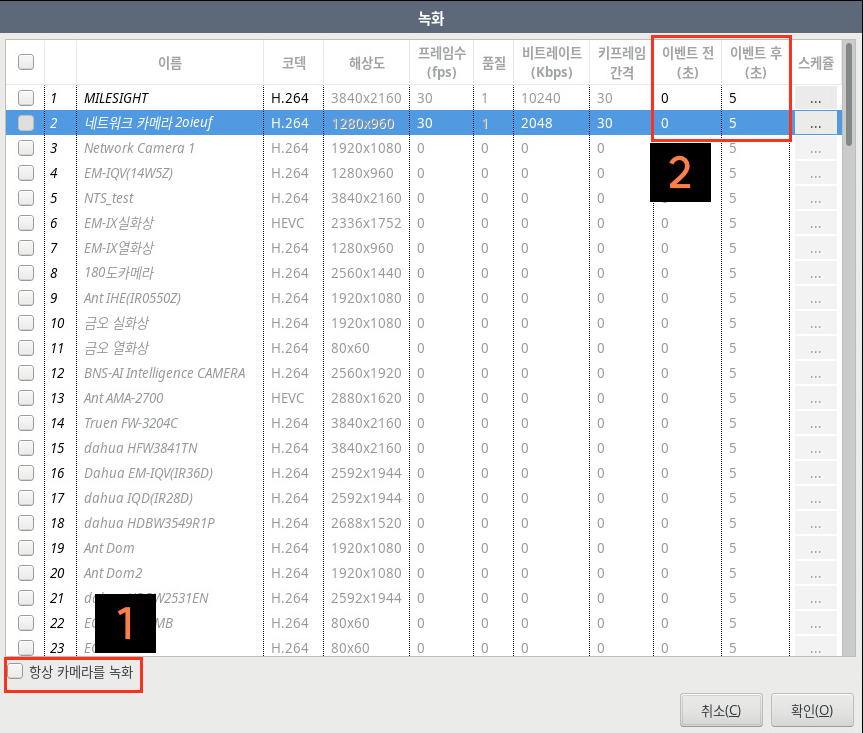
In Settings > Camera Settings > Recording, check the following items.
- Pre-Event: Sets how many seconds before the event to start recording
- Post-Event: Sets how many seconds after the event to continue recording
- Always record cameras: If you want to record only when an event occurs, disable this option or configure it via a schedule.
Note: The schedule applies not only to recording, but also to all devices that use scheduling, such as motion detection and sensors.
5. Verifying operation
- Input a DI signal from the external device.
- Check that the sensor detection / recording status indicators for each camera on the main screen operate normally.
- Use the search function to verify that the sensor event and recording data were recorded.